CHAPTER 3:
AIRDOG ADII DRONE OVERVIEW
15
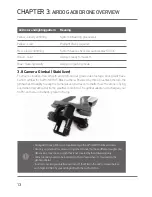
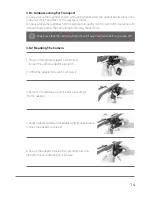
• Always ensure the camera is mounted and connected correctly before each flight.
• Never try to mount or unmount the camera while the propellers are rotating.
• Always turn off the drone before handling the camera.
3.8.3 Gimbal Calibration
1. Turn on Airdog ADII by inserting the battery into the drone and long pressing (3 sec.) the
Power button (located on the battery itself).
2. Turn on AirLeash by long pressing (3 sec.) the Power/OK
button.
3. Short press the Menu
button to enter Menu.
4. Navigate through the Menu with arrow
left
or right
buttons until you see the
Settings
icon on the AirLeash display.
5. Short press the Power/OK
button to enter Settings.
6. Navigate through the Settings with arrow left or right buttons until you see the Calibration
icon on the display.
7. Short press on the Power/OK
button to enter the Calibration menu.
8. Navigate through the Calibration menu with arrow left
or right
buttons until you
see the Gimbal calibration
icon.
9. Short press the Power/OK
button to enter Gimbal Calibration.
10. You can scroll down with arrow down
button to read the calibration tips or press the
Power/OK
button to start the gimbal calibration.
3.8.4 Recommended Camera Settings
Here are our recommended GoPro HERO 5 Black camera settings:
• Wireless Connections (WiFi): OFF
• PROTUNE - OFF
• Video Stabilization - ON
• Resolution: Full HD 1080 or 2.7K
• FOV (field of view): Medium or Linear
• Frame rate: 50 / 60 fps

