15
4. Press the appropriate
Left
or
Right
Selection
button to select the
HIGH
or
LOW
limit.
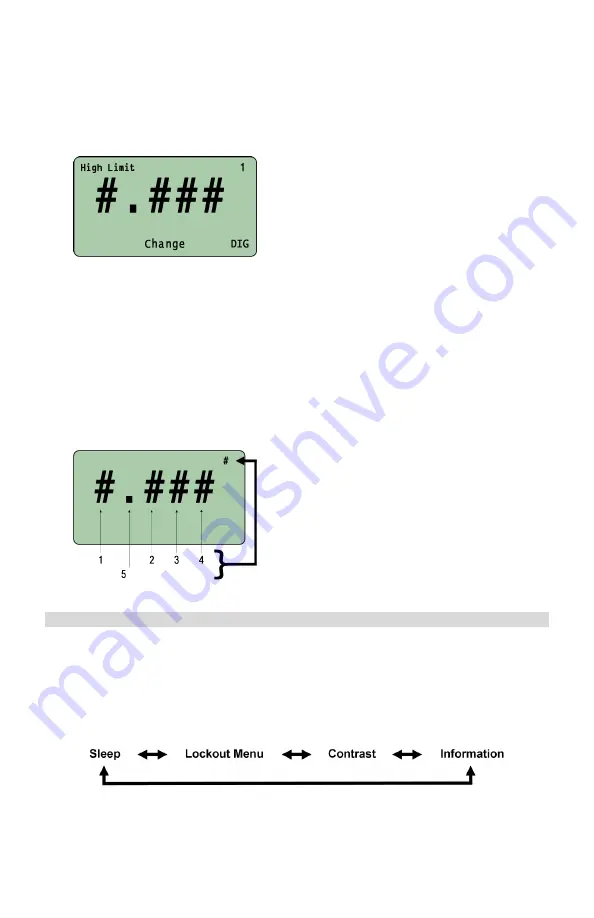
5. If, as an example, the
High
Limit is
being set, the following screen will be
displayed:
6. Press the
Right Selection (DIG)
button to select one of the two
available options.
One of the four numeric position
(
1
– 5
)
OFF
The number in the top-right corner of the
display indicates which option is selected.
The number displayed will correspond to
the following numeric position:
7. If
OFF
is selected with the Right
Selection button, the
corresponding
LIMIT
will be disabled.
If
HIGH
is disabled, then only
readings
below
the
LOW LIMIT
will
generate a
RED
LED signal. Any
reading above the
LOW LIMIT
will
generate a
GREEN
LED signal.
If
LOW
is disabled, only values above
the
HIGH LIMIT
will generate a
RED
LED signal. Any value below the
HIGH LIMIT
will generate a
GREEN
LED signal.
8. Once the selected limit is set, press
ENTER
to return to the
EDIT LIMITS
screen.
9. To select and edit the other limit,
proceed as above.
10. Once either or both limits have been
set, press
ENTER
to return to the
PEAK OPTIONS MENU
screen
At any
Menu
level, pressing
ENT
twice will
return to the Main Display Screen at the
previously set
Operating Mode
III [System Menu]
Accessing the System Menu
1. From the Main Display screen, press
MENU.
2. Use the Selection Arrow buttons to scroll to
System Menu.
3. Press the
Right Selection
button for
SELECT (SEL).
4. The user can then use the
SELECTION ARROW
buttons to scroll through the
following options in the order shown:


