Installation and Commissioning Guide
Package Commercial Unit
25
Installation and Commissioning Guide - Package Commercial Unit
Doc. Part No. 0525-055 Ver. 9 220308
16. EC Indoor Fan Commissioning
CAUTION
• Commissioning of EC fan should be carried out by a qualified / licensed installer or service technician. Make sure that all
instructions are followed accordingly.
• Ensure that connecting duct work and air filters are properly installed.
16.01. PCG153U/V to PCG233U/V
Fan Adjustment Procedure:
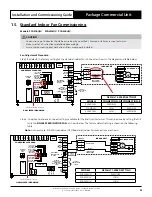
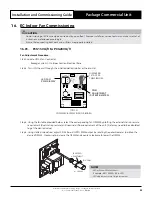
Step 1. Locate CPI3-2 Fan Controller :
Package Systems - Outdoor Section Electrical Pane
Step 2. Turn ON the unit through the installed wall controller or thermostat.
CPI 3
23787-3
C3
DISP2 DISP1
MODEL
A
B
C
D
E
F
ADJUST
V2
C2
P3
C1
+
+
P1
V2.1
U4
U3
R11
R12
R13
R14
R15
C5
D3
R3
R4
C7
R2
R1
RV1
TRA-0100-R
D1
D2
P5
INPUT
R10
C8
P6
GND
0 - 10
V
PWM1 OUT
DAMAGE DUE TO
INCORRECT WIRING
VOIDS WARRANTY
CPI3-2
S/N: XXXXXXXX
IF
ON/OFF
IF
PWR
240VAC IN
ActronAir
LED FAN
PWM DISPLAY
(CPI3-2)
COMMERCIAL PWM INDOOR BOARD
JUMPER PIN
SET AS PER
TABLE BELOW
PWM
ADJUSTMENT
(POTENTIOMETER)
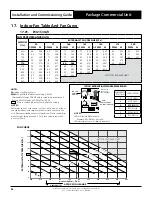
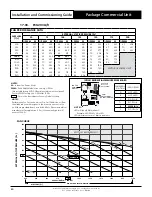
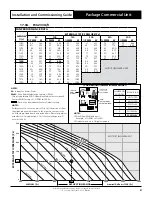
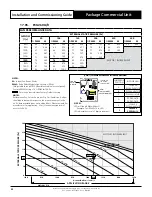
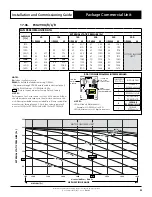
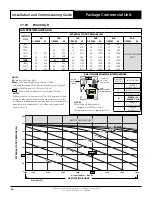
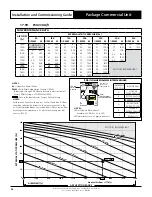
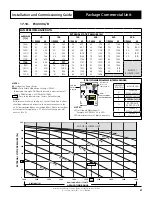
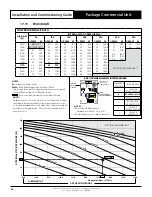
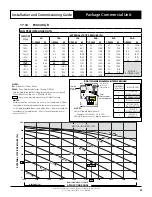
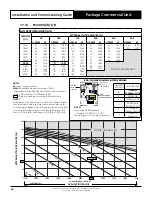
Step 3. Using the fan table provided below, select the corresponding fan %PWM by plotting the external static pressure
requirement (duct static pressure) and nominal airflow requirement of the unit. (Data may need to be calculated
to get the desired value).
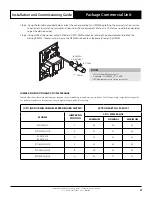
Step 4. Using slotted screwdriver adjust CPI3-2 board 0-99% PWM output by rotating the potentiometer to obtain the
desired %PWM. Clockwise to increase the %PWM and counter-clockwise to lower the %PWM.
+
%PWM
FAN SPEED
ADJUSTMENT
%PWM
_
NOTES
• LED will show PWM without %.
Example: 88% PWM = 88 in LED.
• LED adjustments are in 1 digit increment.

