69
Aspire 1606
Removing the CPU Fan Sink
1.
See “Removing the Battery Pack” on page 56
2.
See “Removing the Middle Cover” on page 61
3.
See “Removing the Keyboard” on page 62
4.
See “Removing the Keyboard Bracket” on page 67
5.
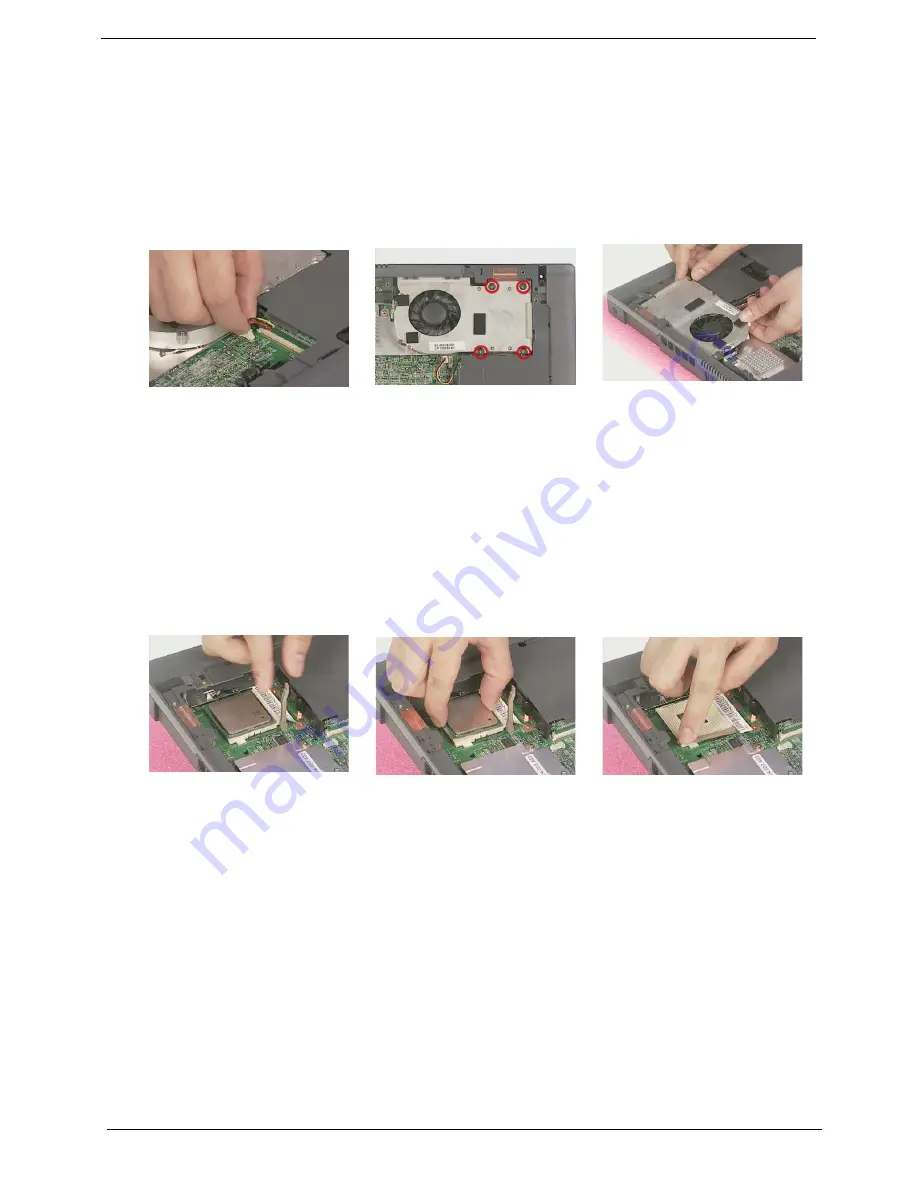
Disconnect the CPU fan cable, remove four screws, and then detach the CPU fan sink from the main unit.
Removing the Processor
1.
See “Removing the Battery Pack” on page 56
2.
See “Removing the Middle Cover” on page 61
3.
See “Removing the Keyboard” on page 62
4.
See “Removing the Keyboard Bracket” on page 67
5.
See “Removing the CPU Fan Sink” on page 69
6.
Lift up the CPU socket lever, remove the CPU from the CPU socket carefully, and then put the CPU
socket lever back to its original position.
Installing the Processor
1.
See “Removing the Battery Pack” on page 56
2.
See “Removing the Middle Cover” on page 61
3.
See “Removing the Keyboard” on page 62
4.
See “Removing the Keyboard Bracket” on page 67
5.
See “Removing the CPU Fan Sink” on page 69
6.
Lift up the CPU socket lever, install the CPU to the CPU socket carefully, and then put the CPU socket
lever back to its original position to secure the CPU well.
Summary of Contents for Aspire 1606
Page 6: ...VI ...
Page 9: ...IX Table of Contents Appendix C Online Support Information 124 ...
Page 42: ...Chapter 1 33 ...
Page 88: ...79 Aspire 1606 16 Detach the I O port bracket from the main board ...
Page 110: ...101 Aspire 1606 ...
Page 116: ...107 Aspire 1606 Exploded Diagram ...
Page 125: ...Chapter 6 116 NS SCREW SCREW TAP FLT M1 7 3 L3 B ZN Picture No Partname Descripton ...
Page 126: ...117 Aspire 1606 ...
Page 128: ...119 Aspire 1600 ...
Page 132: ...123 Aspire 1600 ...
Page 134: ...125 Aspire 1600 ...
Page 137: ...Index 128 ...


