


51
Installing an expansion card
Your server has a preinstalled riser card designed specifically for use in
the 2U rackmount chassis. Depending on the type of riser card
installed, you can install the following expansion cards:
•
Left-side riser for 2U server (default in barebone)
• 8-port 3Gb/s SAS RAID
• Flex I/O Adapter
• Full height 1 x PCI-E x16 connector (w/ Gen2 x8 link)
• 2 x Full height 2 PCI-E x8 connector (w/ Gen2 x4 link)
•
Right-side
r
iser for 2U server (length under 5.6 inches)
• Low profile 3 PCI-E x8 connectors (w/ Gen2 x4 link)
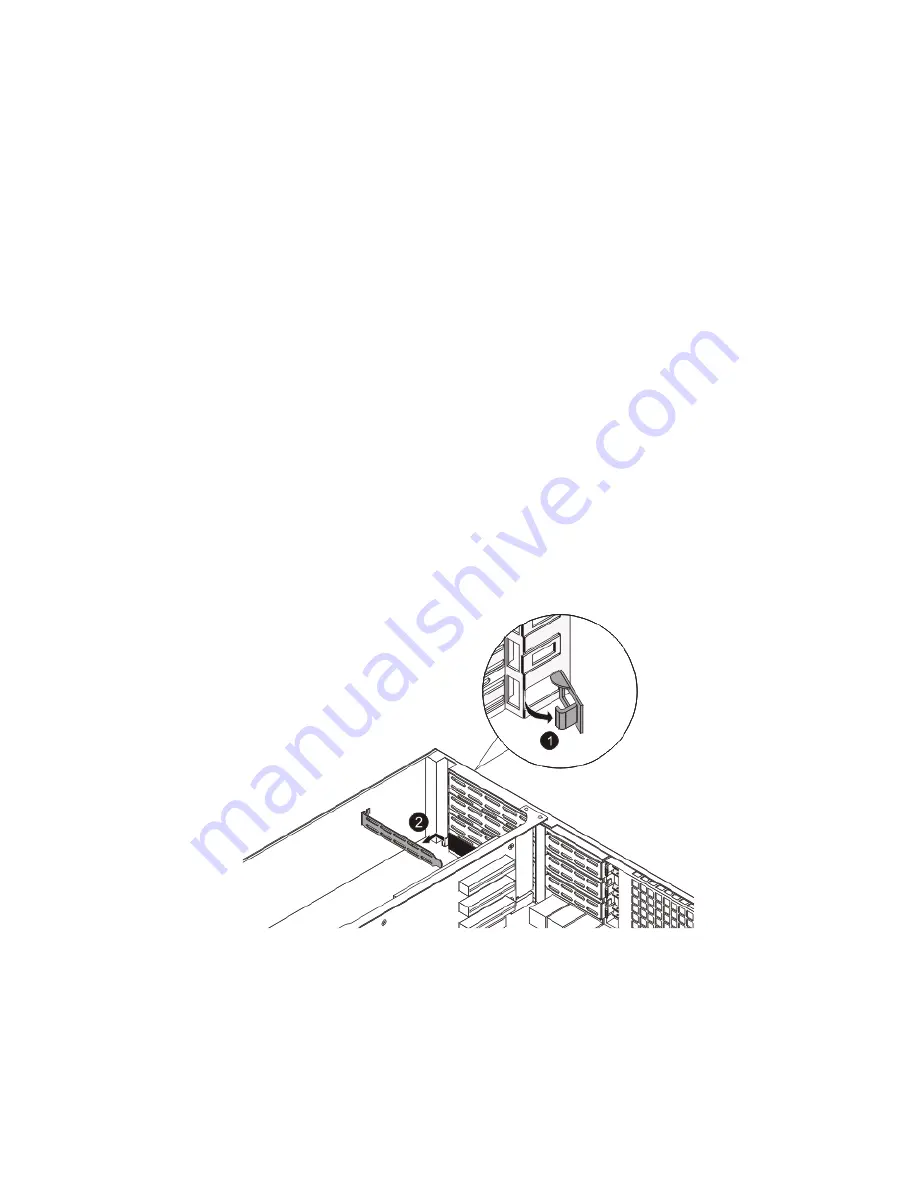
Installing a SAS card
1
Observe the pre-installation instructions on page 24.
2
Unclip the restraining latch and open in the direction shown
below (1).
3
Remove the slot shield (2).
Summary of Contents for AR180 F1 Series
Page 1: ...AR180 F1 Series User Guide ...
Page 6: ...vi manufacturer Dispose of used batteries according to the manufacturer s instructions ...
Page 18: ...xviii ...
Page 19: ...1 System tour ...
Page 33: ...2 System setup ...
Page 40: ...2 System setup 22 ...
Page 41: ...3 System upgrades ...
Page 49: ...31 3 Lock the HDD carrier 4 Observe the post installation instructions described on page 25 ...
Page 74: ...3 System upgrades 56 ...
Page 75: ...4 System BIOS ...
Page 111: ...93 are designed for maximum system stability but not for maximum performance ...
Page 112: ...4 System BIOS 94 ...
Page 113: ...5 System troubleshooting ...
Page 123: ...Appendix A Server management tools ...
Page 135: ...Appendix B Rack mount configuration ...
Page 146: ...Appendix B Rack mount configuration 128 ...
Page 147: ...Appendix C Acer Smart Console ...
Page 176: ...Appendix C Acer Smart Console 158 ...


