


41
4
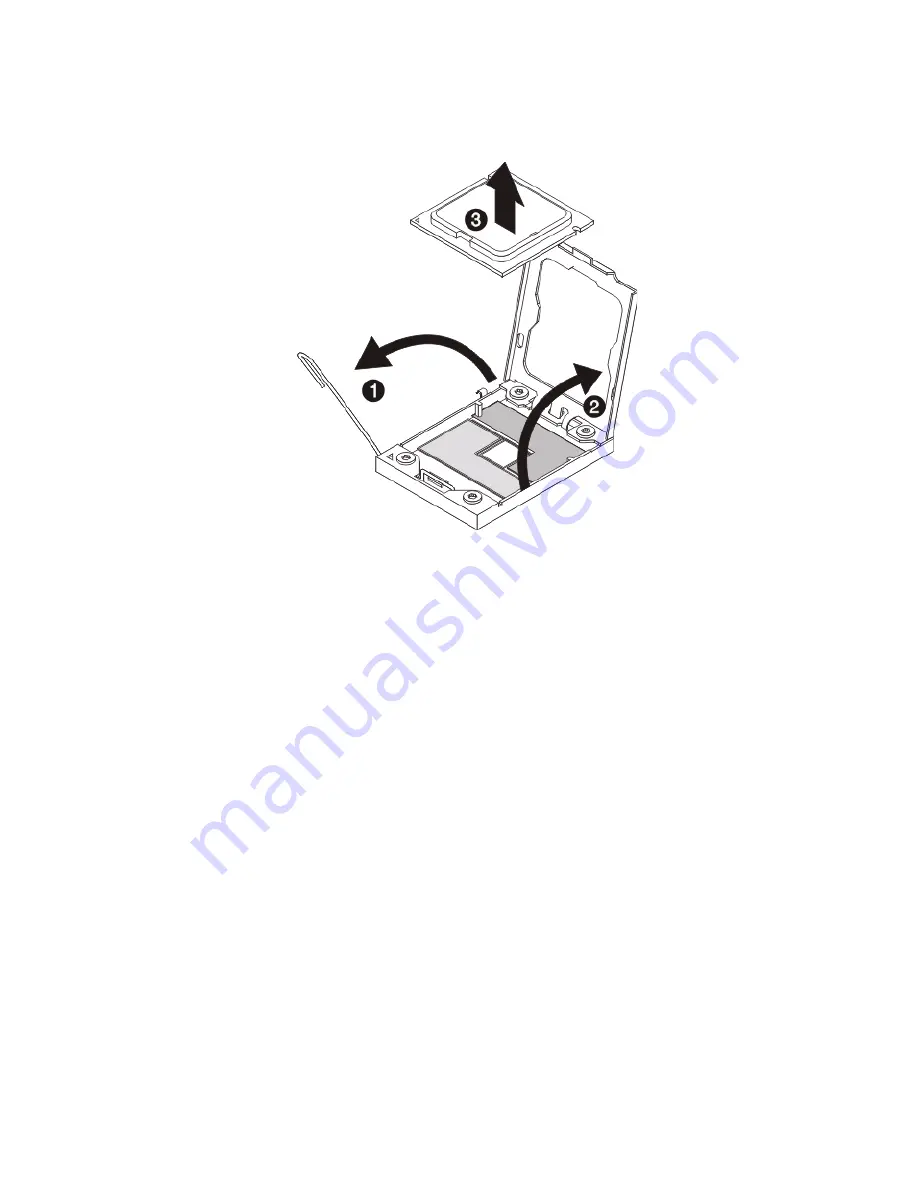
Grasp the installed processor by its edges and lift it out of its
socket.
5
Store the old processor inside an anti-static bag.
6
Remove the new processor from its protective packaging.
7
Install the new processor.
(1) Hold the processor by its edges. Make sure the alignment
tabs on the socket fit the two notch located on the edge
of the processor. The pins are keyed in such a way that
you cannot install the processor in the wrong orientation
without bending the pins.
(2) Insert the new processor in the socket.
(3) Close the retention plate.
Summary of Contents for AR180 F1 Series
Page 1: ...AR180 F1 Series User Guide ...
Page 6: ...vi manufacturer Dispose of used batteries according to the manufacturer s instructions ...
Page 18: ...xviii ...
Page 19: ...1 System tour ...
Page 33: ...2 System setup ...
Page 40: ...2 System setup 22 ...
Page 41: ...3 System upgrades ...
Page 49: ...31 3 Lock the HDD carrier 4 Observe the post installation instructions described on page 25 ...
Page 74: ...3 System upgrades 56 ...
Page 75: ...4 System BIOS ...
Page 111: ...93 are designed for maximum system stability but not for maximum performance ...
Page 112: ...4 System BIOS 94 ...
Page 113: ...5 System troubleshooting ...
Page 123: ...Appendix A Server management tools ...
Page 135: ...Appendix B Rack mount configuration ...
Page 146: ...Appendix B Rack mount configuration 128 ...
Page 147: ...Appendix C Acer Smart Console ...
Page 176: ...Appendix C Acer Smart Console 158 ...


