3 System upgrades
28
Configuring the storage devices
The system supports up to four 3.5-inch hot-plug SAS/SATA hard disk
drives. An optional optical drive can also be added to the server.
Accessing the drive bays
Since SAS/SATA drives have hot-plug capability, you do not need to
access the inside of the chassis or power down the system to install or
replace SAS/SATA drives. Proceed to the next step for instructions.
Note: The operating system you use must have RAID support to
enable the hot-plug capability of the SATA drives.
Caution! When working around the SATA backplane, do not
touch the backplane with any metal objects and make sure no
cables touch the backplane. Also, regardless of how many SATA
drives are installed, all eight drive carriers must remain in the
chassis to maintain proper airflow.
Hard disk drive configuration guidelines
Observe these guidelines when replacing or installing a hard disk drive.
•
Use only qualified SAS or SATA HDDs. To purchase a SAS or SATA
HDD, contact your local representative.
•
Before removing a hard disk drive, make sure to back up all
important system files.
•
Check hard disk drive status by checking the status LED indicators
on the HDD carrier.
•
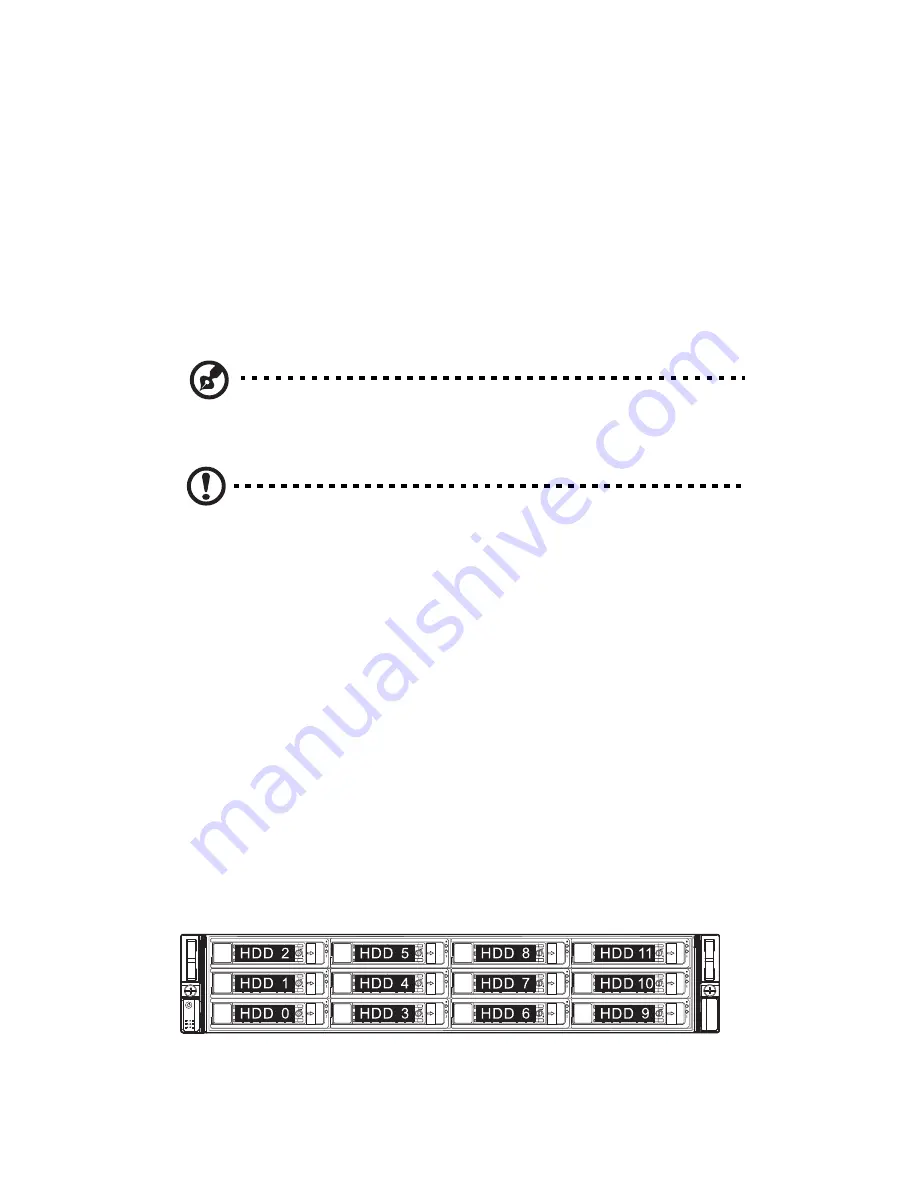
The hard disk drive carriers must be installed in the following
order:
Summary of Contents for AR180 F1 Series
Page 1: ...AR180 F1 Series User Guide ...
Page 6: ...vi manufacturer Dispose of used batteries according to the manufacturer s instructions ...
Page 18: ...xviii ...
Page 19: ...1 System tour ...
Page 33: ...2 System setup ...
Page 40: ...2 System setup 22 ...
Page 41: ...3 System upgrades ...
Page 49: ...31 3 Lock the HDD carrier 4 Observe the post installation instructions described on page 25 ...
Page 74: ...3 System upgrades 56 ...
Page 75: ...4 System BIOS ...
Page 111: ...93 are designed for maximum system stability but not for maximum performance ...
Page 112: ...4 System BIOS 94 ...
Page 113: ...5 System troubleshooting ...
Page 123: ...Appendix A Server management tools ...
Page 135: ...Appendix B Rack mount configuration ...
Page 146: ...Appendix B Rack mount configuration 128 ...
Page 147: ...Appendix C Acer Smart Console ...
Page 176: ...Appendix C Acer Smart Console 158 ...


