


3 System upgrade
64
5.25-inch drive
The 5.25-inch drive bay allows you to install additional drives such as
another backup hard drive, CD-ROM drive, or a tape drive. These
options provide the system with additional storage capacity.
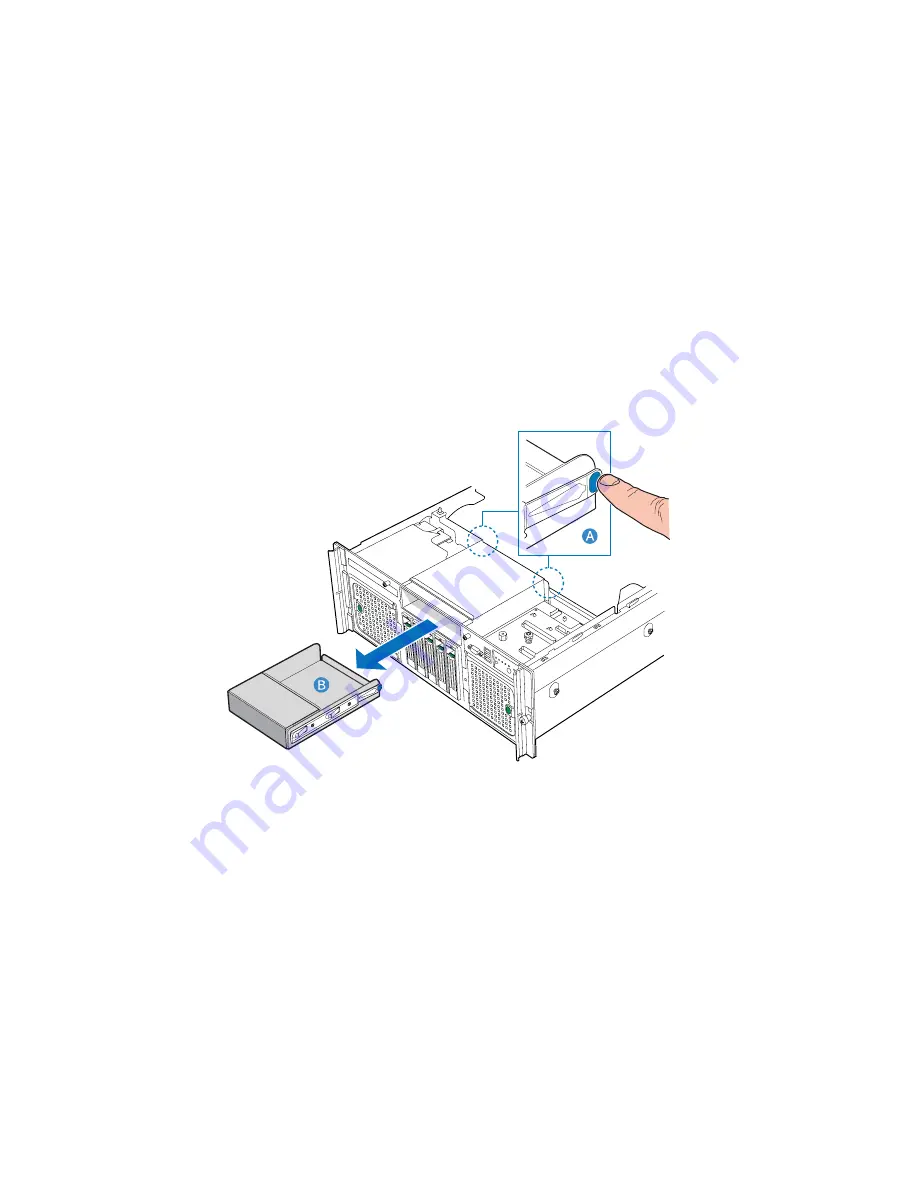
Installing a 5.25-inch drive
1
Observe the ESD precautions and pre-installation instructions
described on page 37.
2
Push the tabs on both sides of the carrier filler panel
(A)
.
3
Hold the tabs in while pulling the carrier filler panel from the bay
(B)
.
4
Remove the screws that attach the slide rails to the filler panel.
5
Attach the slide rails to the device, then secure it with screws you
removed earlier.
6
Attach the Y-power cable to the rear of the device.
Summary of Contents for ALTOS R910 Series
Page 1: ...Acer Altos R910 Series User s Guide ...
Page 10: ...x ...
Page 11: ...1 System tour ...
Page 36: ...1 System tour 26 ...
Page 37: ...2 System setup ...
Page 45: ...3 System upgrade ...
Page 111: ...4 BIOS setup ...
Page 119: ...109 Error Manager Error Manager lets you view POST errors detected by the system ...
Page 137: ...127 Video The Video submenu allows you to enable or disable the onboard video controller ...
Page 150: ...4 BIOS setup 140 ...
Page 151: ...5 Troubleshooting ...
Page 164: ...5 Troubleshooting 154 ...
Page 165: ...Appendix A Acer Altos R910 rack installation guide ...
Page 166: ...This appendix shows you how to set up the Altos R910 server in a rack mount configuration ...
Page 178: ...Appendix A Acer Altos R910 rack installation guide 168 ...
Page 179: ...Appendix B Memory configuration options ...
Page 198: ...Appendix B Memory configuration options 188 ...
Page 199: ...Appendix C RAID configuration utilities ...
Page 206: ...Appendix C RAID configuration utilities 196 ...
Page 210: ...200 U upgrading the BIOS 139 ...


