57
Removing a hot-plug memory board
Note:
If you remove a memory board from the server, you must
either replace it with a new memory board or install a memory
board air baffle.
1
Observe the ESD precautions described on page 37.
2
Press the attention button on the memory board. The power LED
will begin to flash. Refer to “Memory board LED indicators” on
page 24 for the location of the power LED.
3
After the hot-plug attention LED stops flashing, make sure the
power LED for the memory board is also off.
Caution!
Do not attempt to remove any memory board while any
of the LEDs are either on or blinking. If the attention LEDs do not
turn off, your configuration may not support hot-plug memory
board activity. For instructions on non-hot-plug memory board
maintenance, see “Cold removal of memory board” and “Cold
insertion of a memory board”.
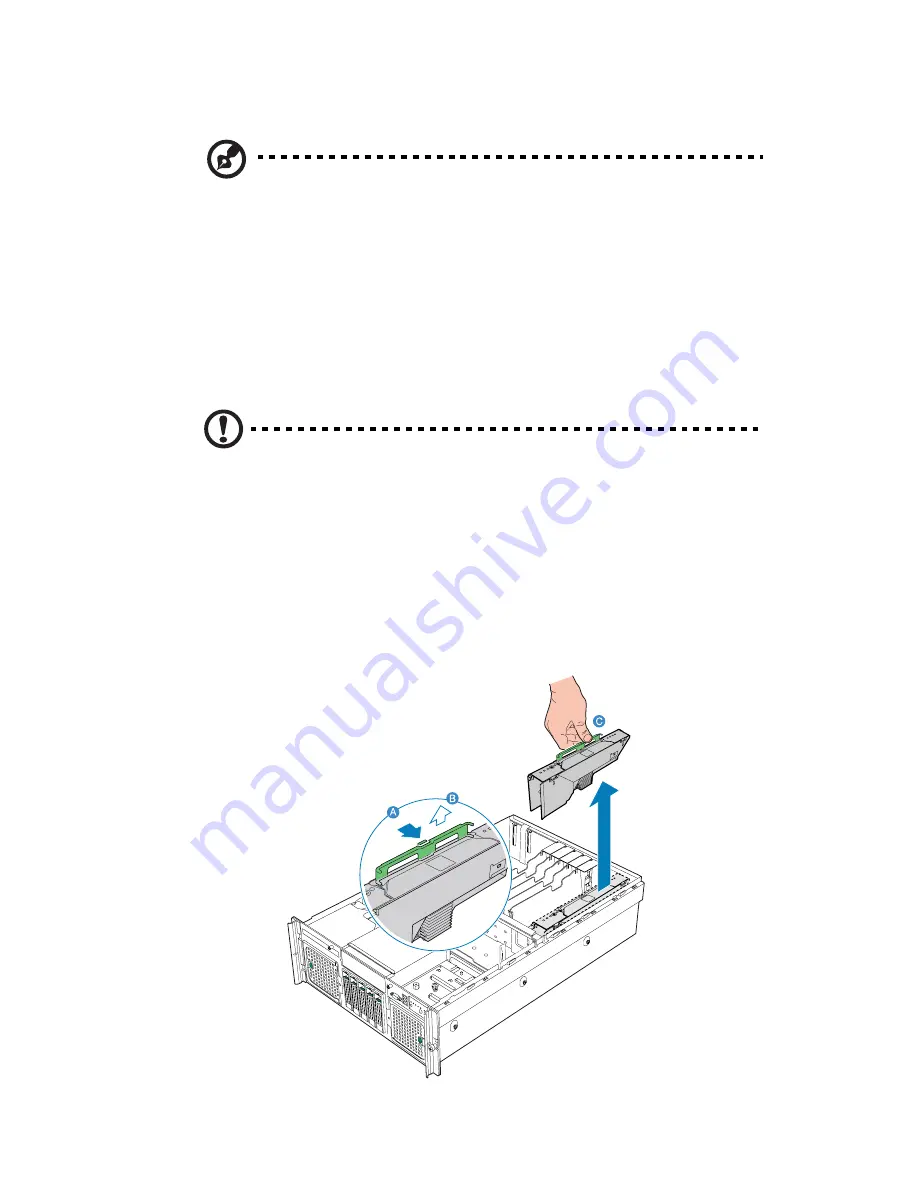
4
Once all the board LEDs are off, press the latch on the memory
board handle to release the handle
(A)
and lift the handle up
(B)
.
5
Lift the memory board from the server
(C)
.
Summary of Contents for ALTOS R910 Series
Page 1: ...Acer Altos R910 Series User s Guide ...
Page 10: ...x ...
Page 11: ...1 System tour ...
Page 36: ...1 System tour 26 ...
Page 37: ...2 System setup ...
Page 45: ...3 System upgrade ...
Page 111: ...4 BIOS setup ...
Page 119: ...109 Error Manager Error Manager lets you view POST errors detected by the system ...
Page 137: ...127 Video The Video submenu allows you to enable or disable the onboard video controller ...
Page 150: ...4 BIOS setup 140 ...
Page 151: ...5 Troubleshooting ...
Page 164: ...5 Troubleshooting 154 ...
Page 165: ...Appendix A Acer Altos R910 rack installation guide ...
Page 166: ...This appendix shows you how to set up the Altos R910 server in a rack mount configuration ...
Page 178: ...Appendix A Acer Altos R910 rack installation guide 168 ...
Page 179: ...Appendix B Memory configuration options ...
Page 198: ...Appendix B Memory configuration options 188 ...
Page 199: ...Appendix C RAID configuration utilities ...
Page 206: ...Appendix C RAID configuration utilities 196 ...
Page 210: ...200 U upgrading the BIOS 139 ...