4 Working Inside Your Server
58
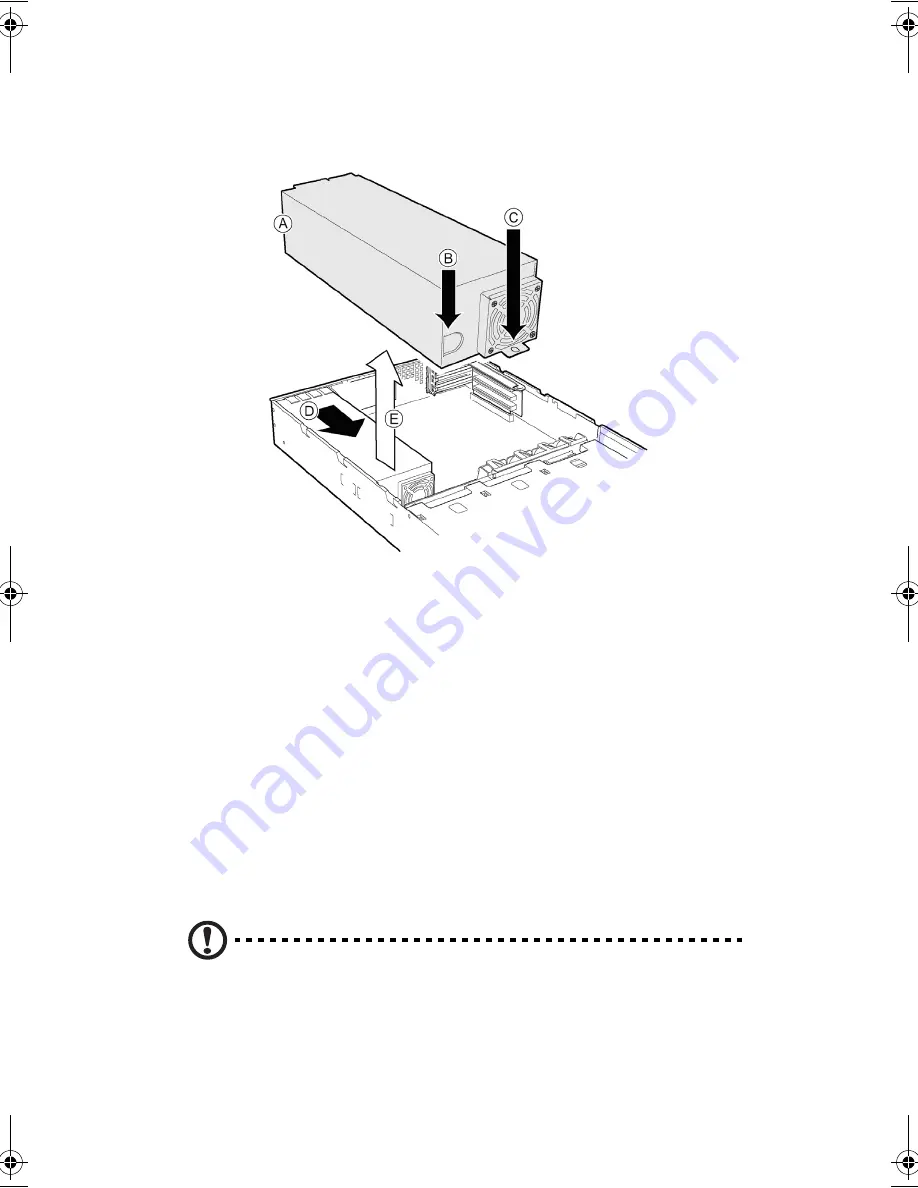
11 At the fan end of the power supply, remove the screw (C) that
attaches the power supply to the standoff in the chassis floor.
12 Lift the fan end of the power supply above the chassis standoff
and slide it toward the front of the server (D). Lift the power
supply out of the chassis (E).
13 Place the new power supply in the chassis and slide it to the rear as
far as it will go.
14 Install the two screws at the rear of the chassis and the one screw
at the fan end of the power supply.
15 Plug the main power connector into the server board.
16 Connect all other power cables to their devices.
17 Install the fan module and connect the fan power cables to the
server board.
18 Install the full-height PCI riser card.
19 Route and connect all cables.
Caution
: Carefully route cables in their original paths to minimize
airflow blockage and cooling problems.
20 Install the chassis cover.
AR700-e.book Page 58 Tuesday, September 10, 2002 2:31 PM
Summary of Contents for Altos R700 Series
Page 1: ...Altos R700 Chassis Subassembly Product guide...
Page 9: ...1 Chassis Description...
Page 22: ...1 Chassis Description 14...
Page 23: ...2 Assembling the System...
Page 51: ...3 Installing the System in a Rack...
Page 54: ...3 Installing the System in a Rack 46...
Page 55: ...4 Working Inside Your Server...
Page 75: ...Appendix A Equipment Log and Worksheets...
Page 77: ...69 DAT TApe Drive Item Manufacturer Name and Model Name Serial Number Date Installed...

