


13
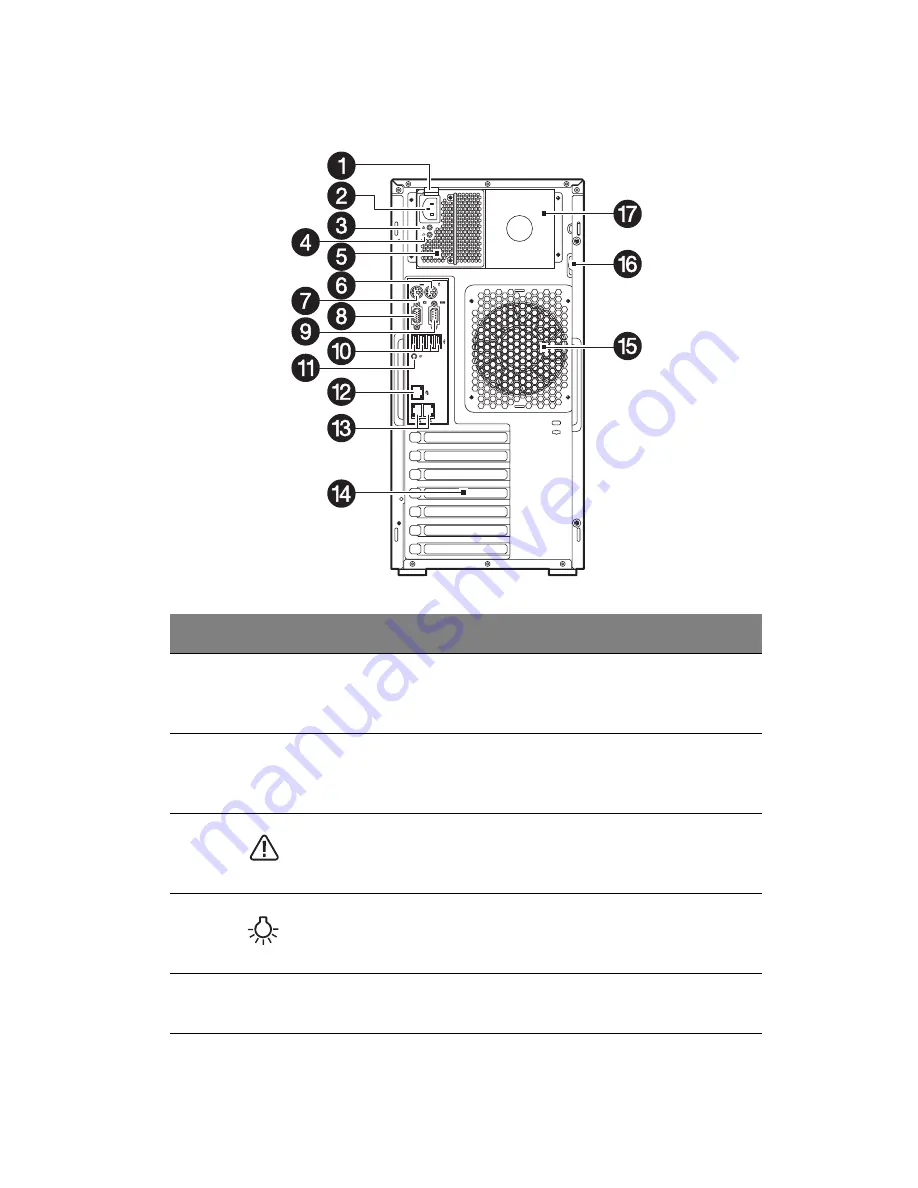
Rear panel
No.
Icon
Component
Description
1
Power supply
module
release latch
Push down the latch to disengage the
module from the chassis.
2
Power supply
module cord
socket
Connect the system power cord here.
3
Power supply
module fault
indicator
Indicates the occurrence of a fault
condition in the power supply
module. (green/amber)
4
Power supply
module status
indicator
Indicates the status of the power
supply module. (green)
5
Main power
supply module
Provides the system’s main power
supply.
Summary of Contents for Altos G540 M2 Series
Page 1: ...Acer Altos G540 M2 Series User s Guide ...
Page 10: ...x ...
Page 11: ...1 System tour ...
Page 30: ...1 System tour 20 60 CPU2 Processor 2 Socket No Code Description ...
Page 38: ...1 System tour 28 ...
Page 39: ...2 System setup ...
Page 49: ...3 System upgrade ...
Page 69: ...59 2 Detach the plastic frame from the HDD carrier ...
Page 77: ...67 2 Connect the power and SATA cables to the new 5 25 inch drive ...
Page 105: ...4 System BIOS ...
Page 112: ...4 System BIOS 104 Processor Configuration ...
Page 122: ...4 System BIOS 114 Intel VT for Directed I O VT d ...
Page 143: ...5 System troubleshooting ...
Page 154: ...5 System troubleshooting 146 ...
Page 155: ...Appendix A Server management tools ...
Page 165: ...Appendix B Rack mount configuration ...
Page 166: ...This appendix shows you how to set up the Altos G540 M2 server in a rack mount configuration ...
Page 174: ...Appendix B Rack mount configuration 166 6 Fully extend the mounting rails on the rack ...
Page 177: ...169 7 Route all cables through the cable clips ...
Page 178: ...Appendix B Rack mount configuration 170 ...
Page 179: ...Appendix C Altos eXpress Console ...
Page 180: ...This appendix familiarize you to a standard web browser with a nice graphical user interface ...


