


29
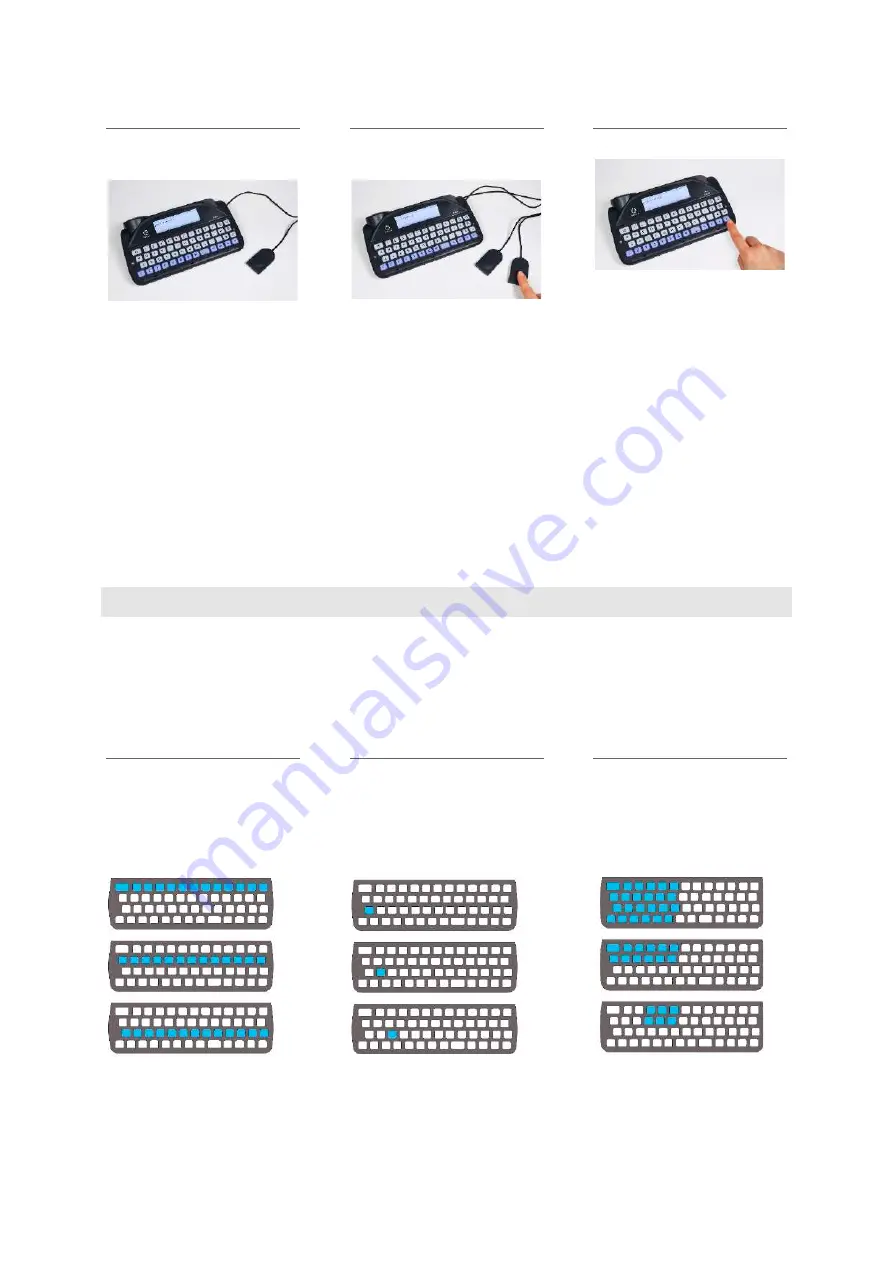
There are 3 access modes available:
ONE SWITCH
SCANNING
Plug one switch into
Port 1
.
Press the
switch
. Scanning
will automatically start to
loop.
Press the
switch
to select
the highlighted key/group
of keys.
Press
any key
to return to
regular keyboard entry.
TWO SWITCH
SCANNING
Plug your two switches into
Ports 1 and 2
.
Press the
switch in
Port 2
to move through the
highlighted rows or keys.
Press the
switch in
Port 1
to select the highlighted
key/group of keys.
Press
any key
to return to
regular keyboard entry.
ANY KEY SCANNING
You will need to activate
Any Key Scanning
(see
Settings
). Once it’s
activated, scanning will start
automatically. Press
any key
to select the highlighted
key/group of keys.
To deactivate Any Key
Scanning,
insert and press
a
switch
, or change the
settings.
CHOOSING A SCAN PATTERN
Scanning works by highlighting different groups of keys on your keyboard in a pattern. When the key
group you want is lit up, then you can press your switch to run a smaller scan within this group of keys.
This continues until eventually you can type your chosen key.
Choosing a suitable scanning pattern will help you to scan your keyboard in the way that suits you:
ROW/COLUMN
Scan one row of the
keyboard at a time,
followed by ‘key by key’ on
the chosen row:
KEY BY KEY
Scan one key at a time,
starting from the top left
and ending at the bottom
right of the keyboard:
HALF AND HALF (SPLIT)
Scan between two halves of
the keyboard, then half of
the selected, until only your
chosen key remains.:
QUICK TIP – you can also change the scanning speed, sounds and loop timeout. See
Settings
.
www.sentient-healthcare.ie


