


10
11
E
N
G
L
IS
H
ENGLISH
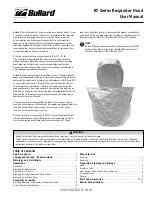
Fig. 11
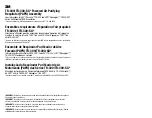
Fig. 12
WARNING
INSPECTION
Always correctly use and maintain the fi lter assembly.
Failure to do so may reduce respirator
performance, overexpose you to contaminants, and may result in sickness or death.
a. Inspect fi lter and fi lter seal before each use and immediately replace if damaged.
b. Always properly install the fi lter into the blower unit.
c. Keep fi lter seal clean.
d. Never attempt to clean fi lters by knocking or blowing out accumulated material.
e. Store the fi lter as described in these
User Instructions
within the recommended storage
temperature conditions.
Failure to follow these
User Instructions
may reduce respirator performance, overexpose
you to contaminants, and
may result in injury, sickness, or death
.
a. Do not use with parts or accessories other than those manufactured by 3M as described
in these
User Instructions
or on the NIOSH approval label for this respirator.
b. The TR-300 PAPR assembly is one component of an approved respiratory protection
system. Always read and follow all
User Instructions
supplied with your 3M™ headgear
and other system components in order to ensure correct system operation.
Before each entry into a contaminated area, the following inspection must be performed to help
ensure proper function of the respirator system. Refer to the specifi c
Assembly
subsection of this
User
Instructions
for proper assembly procedures.
Note:
There are no user serviceable parts inside the TR-300 PAPR Assembly. The motor/
blower unit must not be opened to attempt repairs.
1. PAPR system. Visually inspect the entire PAPR system including the motor blower, cover, fi lter,
breathing tube, battery pack, belt, headgear. If parts are missing or damaged, replace them only
with 3M™ TR-300 replacement parts before proceeding.
2. Battery pack. Confi rm that the battery pack is fully charged and charge is suffi cient for duration of
the work period. The battery pack must be securely latched to the motor/blower.
3. Breathing tube. Examine the entire breathing tube for tears, holes or cracks. Bend the tube to
verify that it is fl exible. Ensure the o-rings located at both ends of the breathing tube (i.e. headgear
and air source connections) are present and there are no gaps or cracks in the rings. The
breathing tube should fi t fi rmly into the air source connection.
Back Pack
(optional)
The BPK-01 back pack may be used in place of the belt (Fig. 9):
1. With either end of the motor/blower towards the top of the back pack (end with the drag handle),
thread the backpack strap through the top retaining slot on the motor/blower and the large
retaining sleeve (Fig. 10-1) on the back pack.
2. Thread the strap through the lower retaining slot on the motor/blower and the small retaining
sleeve (Fig. 10-2) on the back pack.
3. Thread the strap through the buckle (Fig. 10-3) and tighten down.
4. Don the backpack and adjust the shoulder straps for a comfortable fi t.
Fig. 9
Fig. 10
Suspenders
(Optional)
The TR-329 suspenders may be used in conjunction with the TR-300 system belts.
1. Remove the tang end of the belt buckle and all 3 bar sliders on the belt.
2. Slide 2 suspender hangers on to the far end of the belt.
3. Optional - Slide one 3 bar slider (rounded side on the outside of belt) onto the belt about where the
PAPR is expected to sit.
4. Thread the belt through the TR-300 PAPR retaining slots as noted above.
5. Optional - Slide a second 3 bar slider onto the belt.
6. Slide 2 suspender hangers onto the belt.
7. Optional - Slide the third 3 bar slider on to the belt
8. Replace the tang end of the belt buckle on the belt.
9. Twist hangers so plastic “D” rings are above the belt when it is laying fl at. Adjust the hangers, 3
bar sliders, and PAPR assembly to comfortable positions.
10. Clip the left and right front suspender hooks into the left and right front “D” rings respectively. Clip
the left and right rear suspender hooks into the left and right back “D” rings respectively. Adjust
suspenders for a comfortable fi t.
Head gear
Refer to the headgear
User Instructions
for information on attaching and donning the headgear to be
used.
On and Off
To turn on the TR-300 motor/blower, press the power button (Fig. 11) on the top of the motor/blower.
The unit will perform a self diagnostic. The green power on (Fig. 12-1), amber low battery (Fig. 12-2)
and red low fl ow (Fig. 12-3) LEDs will fl ash 2 to 3 times and alarms will sound during this time. To turn
off the motor/blower, press and hold power button for 2 seconds.