To use the 3M Heat Trace Bill of Materials Tool, visit
3M.ca/HeatTrace
28
1.
Select the level of protection required (based on the size of the gutter) from
Table 2.2.3
.
2. Choose the multiplier which corresponds to the application and apply this multiplier to the footage of gutters and
the number and footage of downspouts to be heat traced.
3.
Add sufficient heating cable (including a drip loop) to reach the power connection junction box.
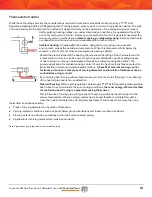
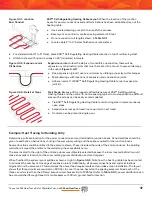
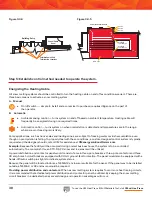
TTS™ Self-Regulating Heating Cable can be utilized in gutters and downspouts
regardless of whether heating cable has been installed on the roof. The amount of
cable required is based on the width of the gutters, the level of protection desired and
the linear footage of gutters and downspouts. A typical layout is shown to the left.
As stated in the IEEE Standard 515.1, it is recommended practice for the testing,
design, installation and maintenance of electrica-resistance heat tracing for
commercial applications that the use of in-line splices and T-splices be avoided.
This will require that heating cable in downspouts be looped (also an IEEE 515.1
recommendation) to eliminate splicing the cable. Additionally, the heating cable end
termination should not be located in the lowest portion of the downspout.
Shingle Roofs
Gutters and Downspouts
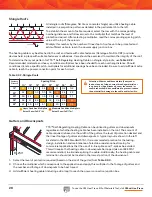
All shingle roofs (fibreglass, flat tile or concrete shingle) can utilize heating cable
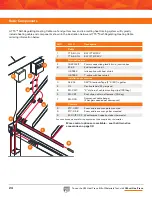
installed in a serpentine pattern as detailed in the partial sketch to the left.
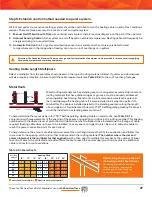
To establish the amount of cable required, select the row with the corresponding
overhang distance and follow across to the multiplier that matches the level of
protection desired. After selecting a multiplier, read the corresponding spacing pitch
value at the top of the column.
Multiply this number by the number of linear feet of roof eave to be protected and
add sufficient cable to reach the power supply junction box.
The heating cable may be attached to the roof and fascia with cable fasteners (Catalogue No. RG-CRF) or similar
devices held in place with suitable fasteners or adhesives. Care should be exercised to maintain the integrity of the roof.
To determine the layout pattern for TTS™ Self-Regulating Heating Cable on shingle-style roofs, use
Table 2.2.2
.
Recommended moderate and heavy conditions multipliers have been shaded for each overhang distance. Should
conditions dictate a specific pitch, multipliers for additional spacings have been included. Be sure to add sufficient extra
cable to reach the power connection point for each circuit.
Spacing pitch
Cable in gutter
Section detail
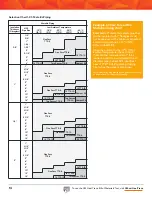
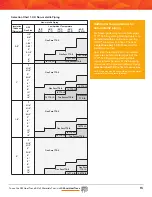
Table 2.2.2: Shingle Roofs
Spacing Pitch
Overhang
Distance
10"
16"
18" 20"
22"
24" 26"
28"
18"
24"
30"
36"
42"
3.3
4.2
5.0
5.8
6.7
3.0
3.7
4.4
5.1
5.9
2.7
3.3
3.9
4.6
5.2
2.4
3.0
3.6
4.1
4.7
2.3
2.8
3.3
3.8
4.3
2.1
2.6
3.0
3.5
4.0
NR
2.4
2.8
3.3
3.7
NR
2.3
2.7
3.1
3.5
Heavy Condition Multipliers
Rate of Snow Fall (2"/hr)
Moderate Condition Multipliers
Rate of Snow Fall (1"/hr)
Attention: Where conditions dictate (heavy snow
loads, steep roof slopes, smooth roofing materials or
long eave-to-ridge distances), snow fences and/or
snow brakes should be considered to prevent/reduce
the potential for damage to the cable and/or facility.
Loop cable in
downspout
!
Summary of Contents for TTS-5-1-OJ
Page 7: ...To use the 3M Heat Trace Bill of Materials Tool visit 3M ca HeatTrace 7 2 2 2 2 2 3 3 3 3...
Page 8: ...To use the 3M Heat Trace Bill of Materials Tool visit 3M ca HeatTrace 8 Pipe Freeze Protection...
Page 11: ...To use the 3M Heat Trace Bill of Materials Tool visit 3M ca HeatTrace 11 4 5 6 7 9 1 8 3 2...

