


www.3DPlatform.com |
23
Original Instructions 2015
Link to Article: The Two Things You
Must Do For Successful 3D Printing
Link to Article: The Five Most Important
3D Printing Tips You Must Know
Printing Tips
The
Z-Offset
in Slic3r
compensates for the
Z-Gap
in the 3DP1000 Printer.
Z-GAP
What is Z-Gap?
The Z-Gap is the distance your
extruder is away from the glass of the print bed when it
begins extruding. Each 3DP1000 printer is equipped with
X, Y, and Z axis position sensors. So, the Z-Gap can be
thought of as the space between the Home Z setting and
the place where the extruder needs to be to lay down
the first layer of filament.
In order to adjust the Z-Gap, you need to
define the Z-Offset in the software
prior to slicing.
• Each 3DP1000 printer is calibrated to a '0' Z-Offset
at the manufacturing facility prior to shipment.
However, if your first layer shows signs of the nozzle
being too far or too close to the print bed—adjust
the Z-Offset in the software prior to slicing.
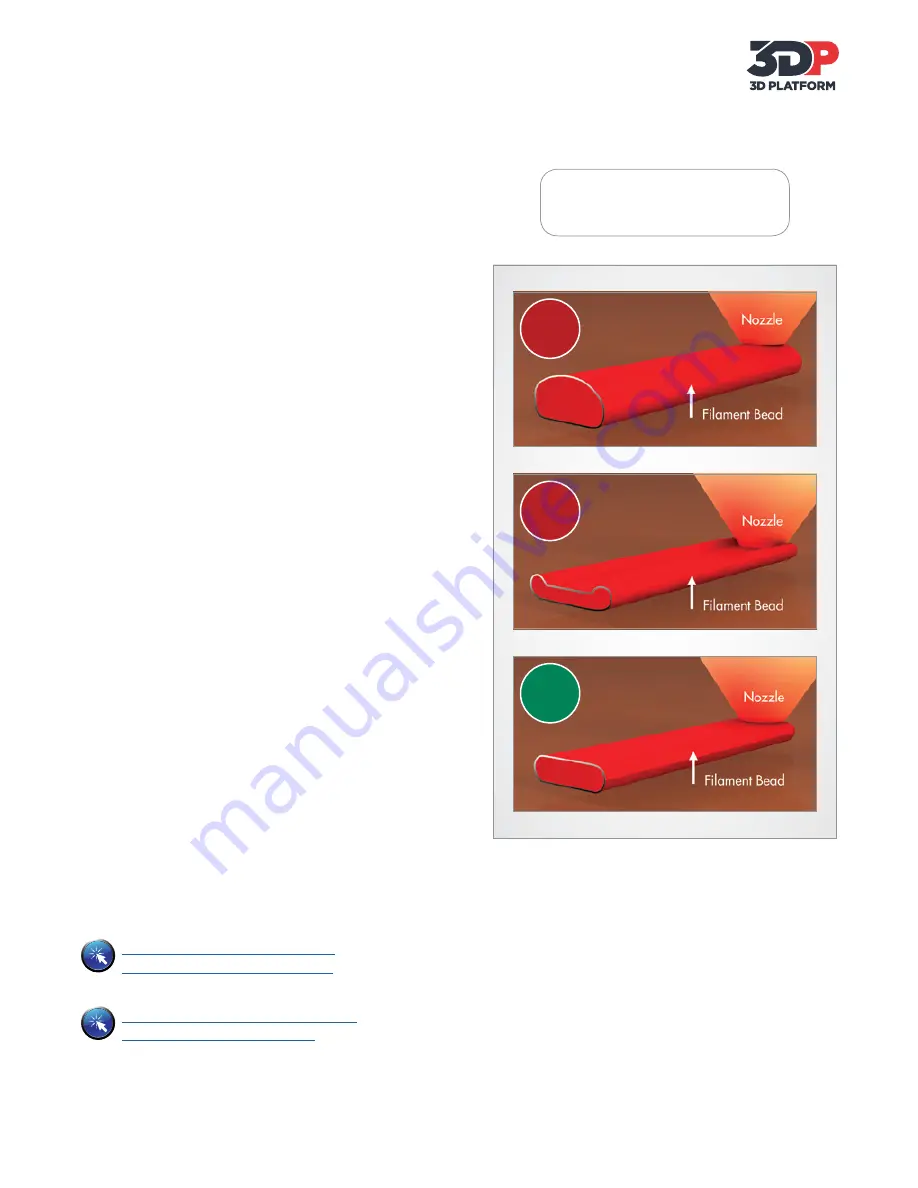
Why are Z-Gap and Z-Offset Important?
• If the Z-Gap is too large, the extruded filament bead
will not contact the glass properly, resulting in a
round bead of filament. This could lead to a first
layer that is not adhered to the print bed and a
failed print. See example A.
• If the Z-Gap is too small, the extruded filament is
pushed down creating a wider bead than intended,
as well as an uneven layer height. Additionally, a
Z-Gap that does not allow sufficient room for the
filament to extrude can cause back pressure and
problems with the extruder. See example B.
How to Enter the Z-Offset
• In Simplify3D, the Z-Offset is located in the G-Code
tab of the Process Settings.
• In Repetier Host, the Z-Offset is located in the Slicer
tab, select Configure, select Printer Settings tab.
Z-Gap Too Large
Stop
Stop
Z-Gap Too Small
Go
Correct Z-Gap
A
B


