14
| www.3DPlatform.com
Original Instructions 2015
Operating the 3DP1000
Tools Required
• Metric Allen Wrench
or Hex Key Set
Socket Head Screw
for raising and lowering
the print bed.
Button Head Screw
for locking the print bed
into a set position.
Link to Article: The Importance of
a Level Print Bed on a 3D Printer
LEVELING THE PRINT BED
Why is Leveling Important?
A level print bed is critical to
overall print quality–especially for consistent first-layer adhesion.
• If one section of the print bed is lower than another,
the first layer might not adhere properly.
• If one section of the print bed is higher than another,
the glass might block the filament from flowing freely
from the nozzle. This may cause damage to the glass
and/or the extruder.
How to Level the Print bed
1. Use the recommended print settings found on
page 21
and the
provided file to process, slice, export gcode, and
print the provided file: Bed-level-test.stl.
Monitor the print. As the filament is printed,
raise or lower each section of the print bed
where the filament bead is not consistent,
until a consistent bead is produced.
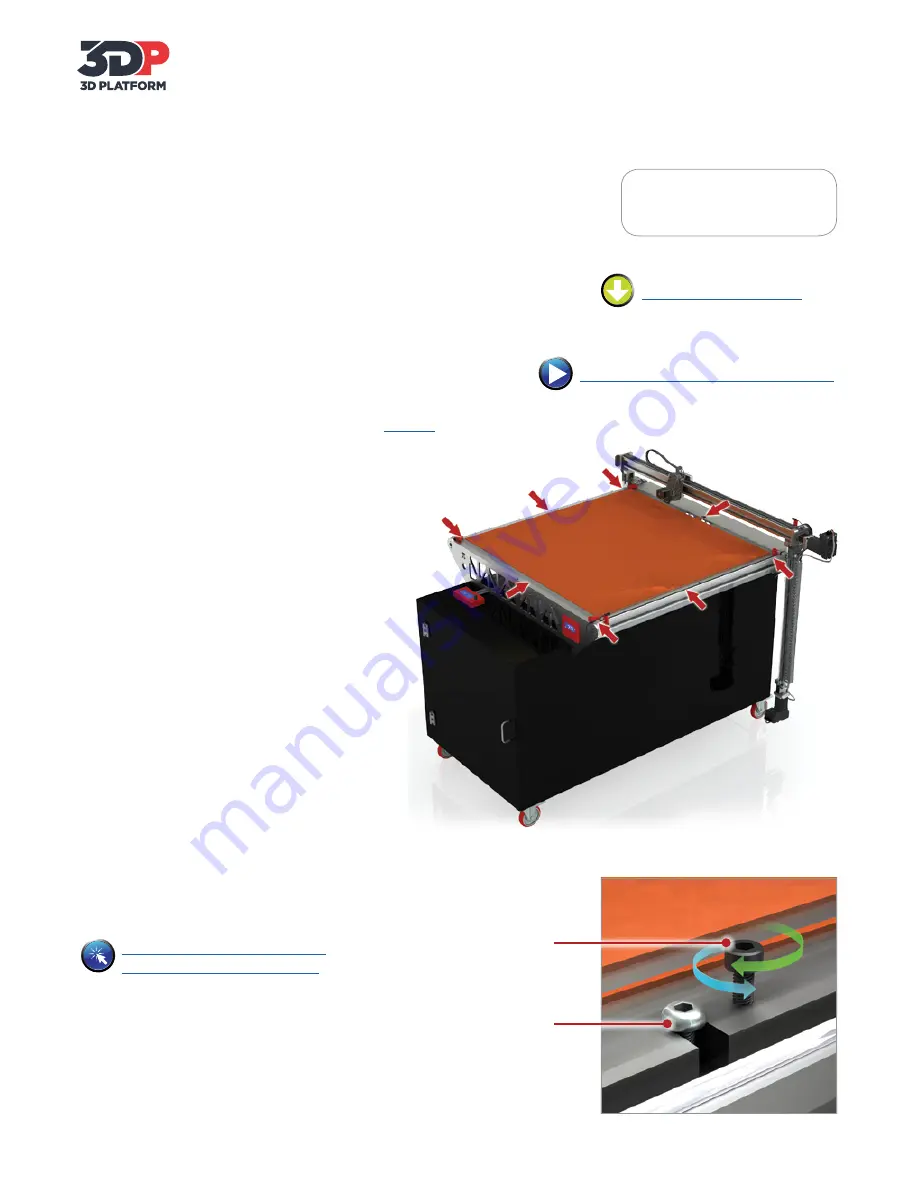
2. There are eight (8) locations for leveling the
bed, each with a Socket Head Screw for
raising and lowing the print bed,
and a Button Head Screw for locking
the position.
a. Loosen the Button Head Screw
(but do not remove).
b. Turn the Socket Head Screw clockwise
to raise the print bed, counter-clockwise
to lower the bed.
c. Tighten the Button Head Screw to lock
the leveled position of the bed.
Download Bed-level-test.stl
Link to Video: How to Level the Build Area


