


3-4
C
hapter
3: C
onfiguring
the
A
dapter
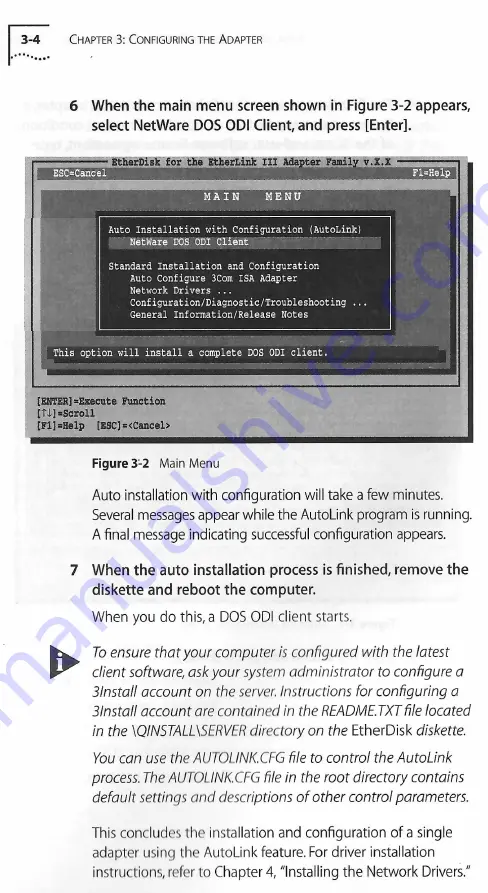
6 When the main menu screen shown in Figure 3-2 appears,
select NetWare DOS ODI Client, and press [Enter].
gtherDisk for the EtherLink III Adapter Family v.X.X ...... -. -i
ESCaCaneei__ ______ '
_ ... _ ...
Fl-Help
....................M jPlN '“ I
h
ENO
* * ... ...
*
Auto Installation with Configuration (AutoLink)
NetWare 90S ODI Client
Standard Installation and Configuration
Auto Configure 3Com ISA Adapter
Network Drivers ...
Configuration/Diagnostic/Troubleshooting ...
General Information/Release Notes
This option will install a complete DOS ODI client.
CENTER]»Execute Function
ETi]"Scroll
[FI]"Help EESC]=<Caneel>
Figure 3-2
Main Menu
Auto installation with configuration will take a few minutes.
Several messages appear while the AutoLink program is running.
A final message indicating successful configuration appears.
7 When the auto installation process is finished, remove the
diskette and reboot the computer.
When you do this, a DOS ODI client starts.
To ensure that your computer is configured with the latest
client software, ask your system administrator to configure a
3lnstall account on the server. Instructions for configuring a
3lnstall account are contained in the README.TXT file located
in the \QINSTALL\SERVER directory on the
EtherDisk
diskette.
You can use the AUTOLINK.CFG file to control the AutoLink
process. The AUTOLINK.CFG file in the root directory contains
default settings and descriptions o f other control parameters.
This concludes the installation and configuration of a single
adapter using the AutoLink feature. For driver installation
instructions, refer to Chapter 4, "Installing the Network Drivers."


