Chapter 34 Static Route
XMG1930 Series User’s Guide
282
34.4 IPv6 Static Route
Click the link next to
IPv6 Static Route
in the
IP Application
>
Static Routing
screen to display the screen
as shown.
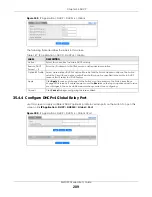
Figure 195
IP Application > Static Routing > IPv6 Static Route
Metric
The metric represents the “cost” of transmission for routing purposes. IP routing uses hop count as
the measurement of cost, with a minimum of 1 for directly connected networks. Enter a number
that approximates the cost for this link. The number need not be precise, but it must be between
1 and 15. In practice, 2 or 3 is usually a good number.
Add
Click
Add
to insert a new static route to the Switch’s run-time memory. The Switch loses these
changes if it is turned off or loses power, so use the
Save
link on the top navigation panel to save
your changes to the non-volatile memory when you are done configuring.
Cancel
Click
Cancel
to reset the above fields to your previous configuration.
Clear
Click
Clear
to set the above fields back to the factory defaults.
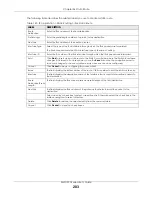
Index
This field displays the index number of the route. Click a number to edit the static route entry.
Active
This field displays
Yes
when the static route is activated and
NO
when it is deactivated.
Name
This field displays the descriptive name for this route. This is for identification purposes only.
Destination
Address
This field displays the IP network address of the final destination.
Subnet Mask
This field displays the subnet mask for this destination.
Gateway
Address
This field displays the IP address of the gateway. The gateway is an immediate neighbor of your
Switch that will forward the packet to the destination.
Metric
This field displays the cost of transmission for routing purposes.
Select an entry’s check box to select a specific entry. Otherwise, select the check box in the
table heading row to select all entries.
Delete
Click
Delete
to remove the selected entry from the summary table.
Cancel
Click
Cancel
to clear the check boxes.
Table 139 IP Application > Static Routing > IPv4 Static Route (continued)
LABEL
DESCRIPTION
Содержание MG1930-30
Страница 19: ...19 PART I User s Guide ...
Страница 46: ...46 PART II Technical Reference ...
Страница 261: ...XMG1930 Series User s Guide 261 Figure 180 Advanced Application LLDP LLDP Local Status LLDP Local Port Status Detail ...
Страница 336: ...XMG1930 Series User s Guide 336 Figure 242 Example Lock Denoting a Secure Connection EXAMPLE ...
Страница 373: ...373 PART III Troubleshooting and Appendices ...


