Chapter 7 Status
XMG1930 Series User’s Guide
85
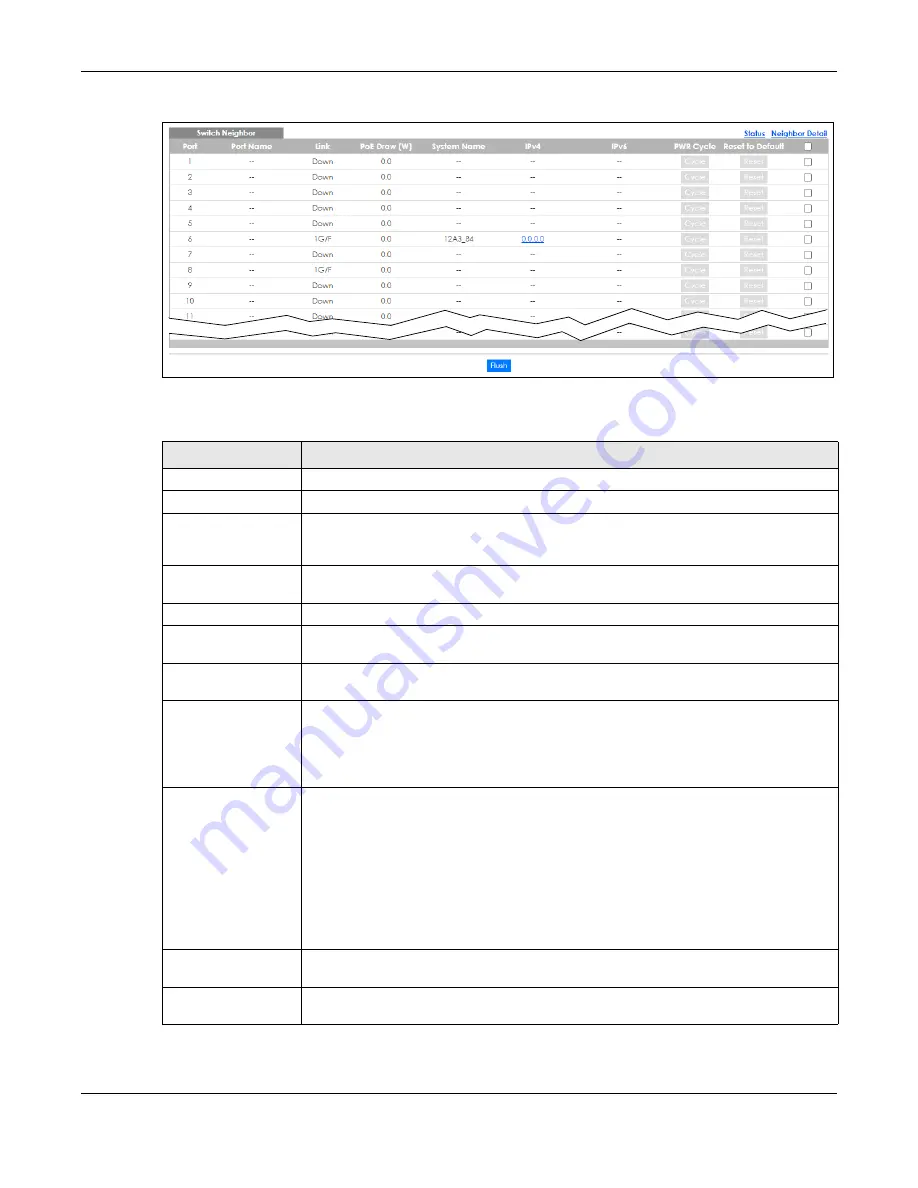
Figure 57
Status > Neighbor
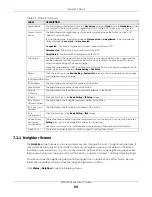
The following table describes the fields in the above screen.
Table 23 Status > Neighbor
LABEL
DESCRIPTION
Port
This shows the port of the Switch, on which the neighboring device is discovered.
Port Name
This shows the port description of the Switch.
Link
This shows the speed (either
100M
for 100 Mbps,
1G
for 1 Gbps,
2.5G
for 2.5 Gbps,
5G
for 5
Gbps, or
10G
for 10 Gbps) and the duplex (
F
for full duplex or
H
for half). This field displays
Down
if the port is not connected to any device.
PoE Draw (W)
This shows the consumption that the neighboring device connected to this port draws from
the Switch. This allows you to plan and use within the power budget of the Switch.
System Name
This shows the system name of the neighbor device.
IPv4
This shows the IPv4 address of the neighbor device. The IPv4 address is a
hyper link
that you
can click to log into and manage the neighbor device through its Web Configurator.
IPv6
This shows the IPv6 address of the neighbor device. The IPv6 address is a
hyper link
that you
can click to log into and manage the neighbor device through its Web Configurator.
PWR Cycle
Click the
Cycle
button to turn OFF the power of the neighbor device and turn it back ON
again. A count down button (from 5 to 0) starts.
Note: The Switch must support power sourcing (PSE) or the network device is a
powered device (PD).
Reset to Default
Click the
Reset
button to reset the neighboring device to its factory default settings. A
warning message “
Are you sure you want to load factory default?
” appears prompting you
to confirm the action. After confirming the action a count down button (from 5 to 0) starts.
Note:
• The Switch must support power sourcing (PSE) or the network device is a powered
device (PD).
• If multiple neighbor devices use the same port, the
Reset
button is not available.
• You can only reset Zyxel powered devices that support the ZON utility.
Select an entry’s check box to select a specific port. Otherwise, select the check box in the
table heading row to select all ports.
Flush
Click the
Flush
button to remove information about neighbors learned on the selected
ports.
Содержание MG1930-30
Страница 19: ...19 PART I User s Guide ...
Страница 46: ...46 PART II Technical Reference ...
Страница 261: ...XMG1930 Series User s Guide 261 Figure 180 Advanced Application LLDP LLDP Local Status LLDP Local Port Status Detail ...
Страница 336: ...XMG1930 Series User s Guide 336 Figure 242 Example Lock Denoting a Secure Connection EXAMPLE ...
Страница 373: ...373 PART III Troubleshooting and Appendices ...


