


Chapter 6 The WIFI Configuration Screen
User’s Guide
75
Depending on the devices you have, you can either press a button (on the device
itself, or in its configuration utility) or enter a PIN (a unique Personal Identification
Number that allows one device to authenticate the other) in each of the two
devices. When WPS is activated on a device, it has two minutes to find another
device that also has WPS activated. Then, the two devices connect and set up a
secure network by themselves.
6.4.5.1 Push Button Configuration
WPS Push Button Configuration (PBC) is initiated by pressing a button on each
WPS-enabled device, and allowing them to connect automatically. You do not need
to enter any information.
Not every WPS-enabled device has a physical WPS button. Some may have a WPS
PBC button in their configuration utilities instead of or in addition to the physical
button.
Take the following steps to set up WPS using the button.
1
Ensure that the two devices you want to set up are within wireless range of one
another.
2
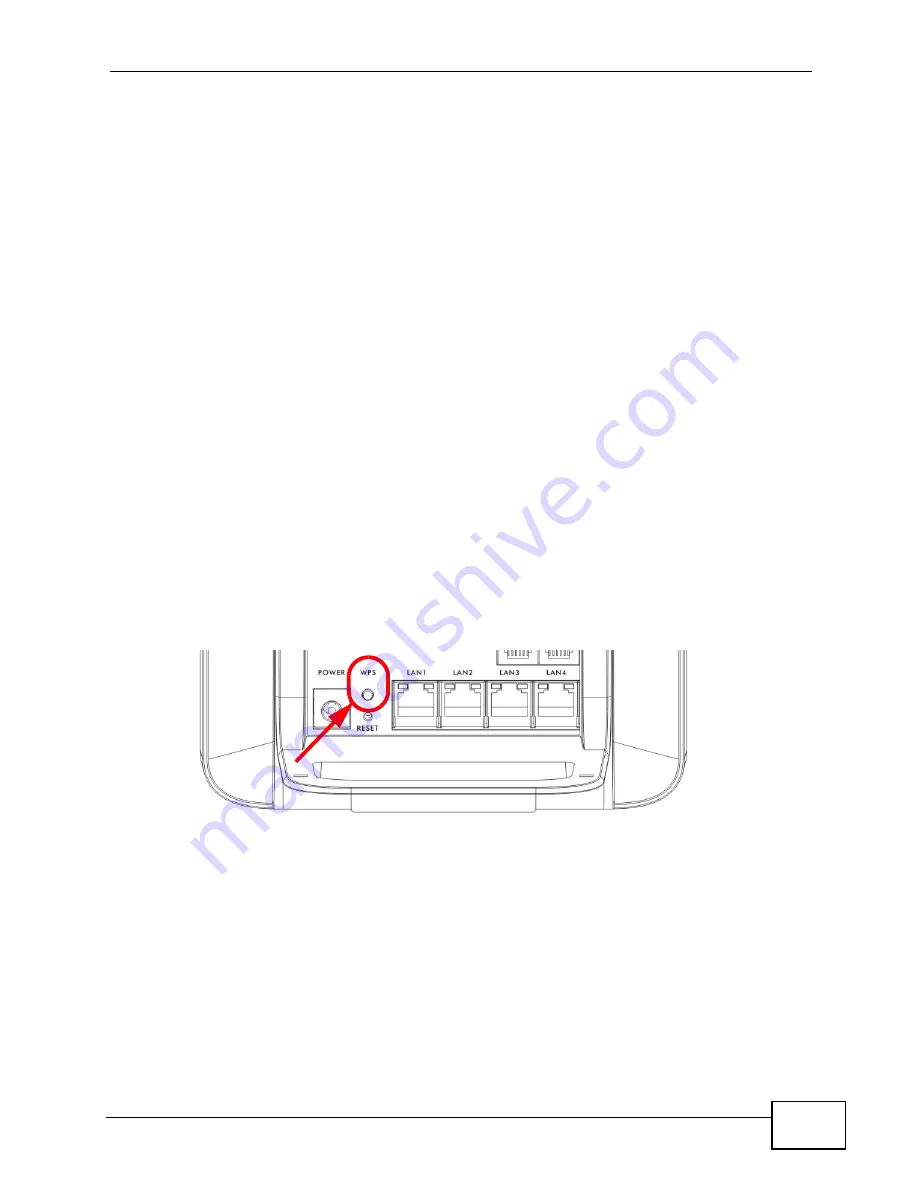
Look for a WPS button on each device. If the device does not have one, log into its
configuration utility and locate the button (see the device’s User’s Guide for how to
do this). The WiMAX Modem’s WPS button is in the rear panel as shown next.
Figure 26
The WPS Button on the WiMAX Modem
3
Press the button on one of the devices (it doesn’t matter which). For the WiMAX
Modem you must press the WPS button for more than three seconds.
4
Within two minutes, press the button on the other device. The registrar sends the
network name (SSID) and security key through an secure connection to the
enrollee.
If you need to make sure that WPS worked, check the list of associated wireless
clients in the AP’s configuration utility. If you see the wireless client in the list,
WPS was successful.
Содержание MAX-207HW2
Страница 7: ...Safety Warnings User s Guide 8...
Страница 9: ...Contents Overview User s Guide 10...
Страница 16: ...17 PART I Introduction and Wizards Getting Started 19 Introducing the Web Configurator 23...
Страница 17: ...18...
Страница 27: ...Chapter 2 Introducing the Web Configurator User s Guide 28...
Страница 28: ...29 PART II Basic Screens The Main Screen 25 The Setup Screens 31...
Страница 29: ...30...
Страница 37: ...Chapter 3 The Setup Screens User s Guide 38...
Страница 39: ...40...
Страница 43: ...Chapter 4 The Status Screen User s Guide 44...
Страница 57: ...Chapter 5 The LAN Configuration Screens User s Guide 58...
Страница 75: ...Chapter 6 The WIFI Configuration Screen User s Guide 76...
Страница 87: ...Chapter 7 The WAN Configuration Screens User s Guide 88...
Страница 97: ...Chapter 8 The NAT Configuration Screens User s Guide 98...
Страница 106: ...107 PART IV Voice Screens The Service Configuration Screens 109 The Phone Screens 127 The Phone Book Screens 137...
Страница 107: ...108...
Страница 125: ...Chapter 10 The Service Configuration Screens User s Guide 126...
Страница 141: ...Chapter 12 The Phone Book Screens User s Guide 142...
Страница 143: ...144...
Страница 147: ...Chapter 13 The Certificates Screens User s Guide 148...
Страница 159: ...Chapter 14 The Remote Management Screens User s Guide 160...
Страница 165: ...Chapter 16 The Status Screen User s Guide 166...
Страница 166: ...167 PART VI Troubleshooting and Specifications Troubleshooting 169 Product Specifications 177...
Страница 167: ...168...
Страница 175: ...Chapter 17 Troubleshooting User s Guide 176...


