background image

22

ZOOM B9.1ut

Using the Tuner (Bypass/Mute Mode) 

)(::Ž/a

¼w:[Y

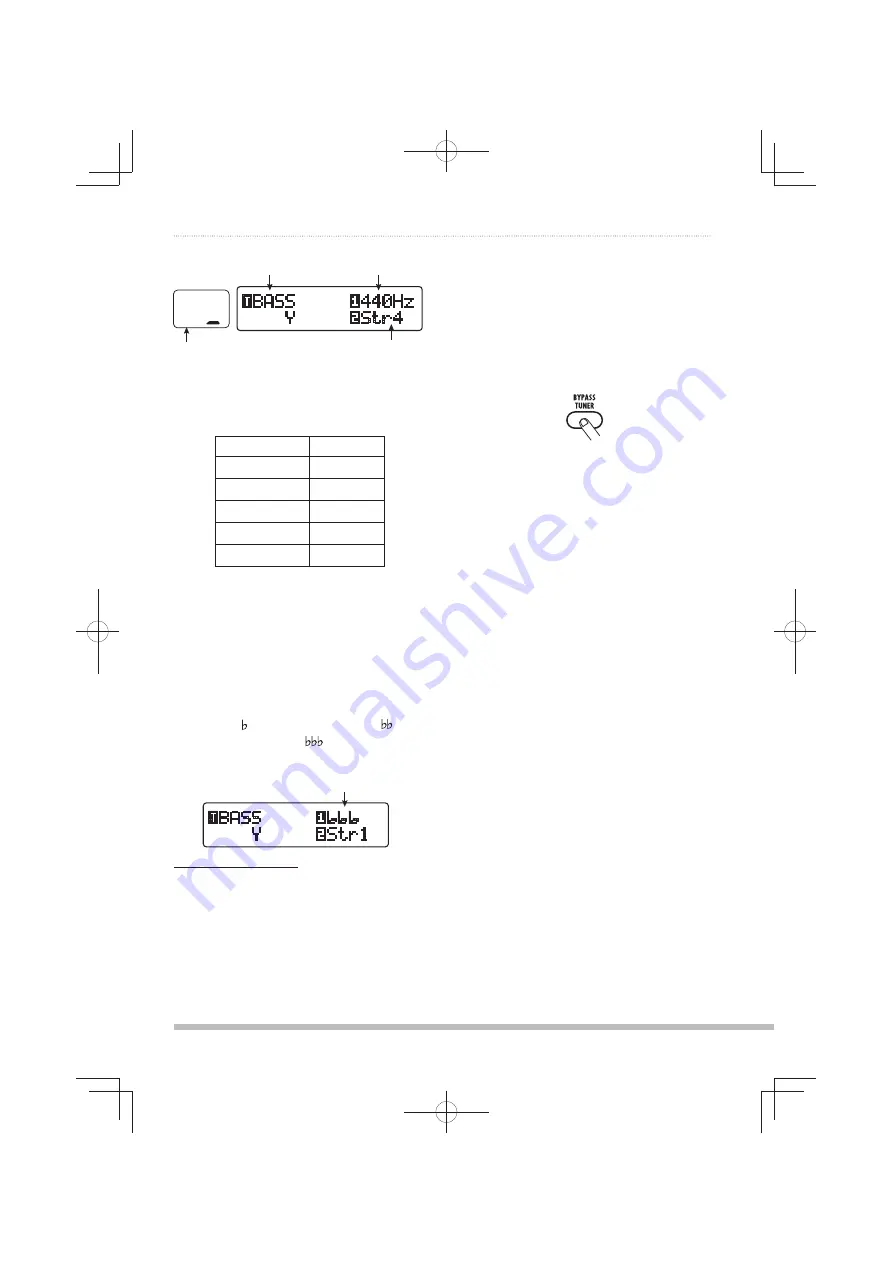
Tuner type

Reference pitch

String number

Correct note for 
selected string 

The note names for each string are shown in the 
table below. 
 

String number Note name

Str1

C

Str2

D

Str3

A

Str4

E

Str5

B

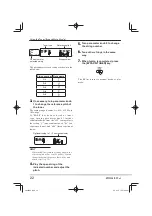
If necessary, turn parameter knob 

3. 

1 to change the reference pitch of 
the tuner. 

The setting range is center A = 435 – 445 Hz, in 
1-Hz steps. 
I f   " BA S S "   h a s   b e e n   s e l e c t e d   a s   t u n e r 
t y p e, t u r n i ng pa r a m et e r k nob 1 f u r t he r 
counterclockwise from the "435" setting selects 
the setting " " (one semitone lower), " " (two 
semitones lower), and "

" (three semitones 

lower). 

)(::Ž

¼w:[Y

Optional tuning to 1 – 3 semitones lower

HINT 

When the B9.1ut is turned off and on again, the 
reference pitch will be reset to 440 Hz. You can 
change the default frequency that will be used 
after a reset (

 p. 59). 

Play the open string of the 

4. 

indicated number and adjust the 
pitch. 

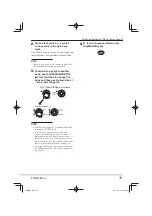
Turn parameter knob 2 to change 

5. 

the string number. 

Tune other strings in the same 

6. 

way. 


When tuning is completed, press 

7. 

the [BYPASS/TUNER] key. 

The B9.1ut returns to manual mode or play 
mode.

0804B9E.indb   22

0804B9E.indb   22

08.4.25   10:57:45 AM

08.4.25   10:57:45 AM

Содержание B9.1ut

Страница 1: ...Operation Manual ZOOM Corporation Reproduction of this manual in whole or in part by any means is prohibited 0804B9E indb 1 0804B9E indb 1 08 4 25 10 57 10 AM 08 4 25 10 57 10 AM ...

Страница 2: ...ked flame sources such as lighted candles on the B9 1ut since this can cause fire The B9 1ut is a precision instrument Do not exert undue pressure on the keys and other controls Also take care not to drop the unit and do not subject it to shock or excessive pressure Take care that no foreign objects coins or pins etc or liquids can enter the unit Connecting cables and input and output jacks You sh...

Страница 3: ...ternal expression pedal 34 Adjusting the expression pedal torque 35 Using the Foot Switches 36 Making settings for function foot switches 36 Assigning modules to foot switches 1 4 38 Specifying the tempo for a patch 38 Using the Effect Loop 40 MIDI Usage Examples 42 What you can do with MIDI 42 Selecting the MIDI channel 42 Sending and receiving patch switching information via MIDI program change ...

Страница 4: ...urn individual effects in patches on and off This makes it easy to simulate playing with an array of compact effects and stomp boxes In play mode the foot switches serve to quickly move between patches XLR connectors for direct output In addition to the OUTPUT jacks a set of XLR connectors lets you send a balanced line level signal directly to a PA mixer or recording console The signal can be bran...

Страница 5: ... 0 PATCH 1 PATCH 2 PATCH 3 PATCH 4 BANK 0 PATCH 1 PATCH 2 PATCH 3 PATCH 4 BANK 1 PATCH 1 PATCH 2 PATCH 3 PATCH 4 BANK 0 PATCH 1 PATCH 2 PATCH 3 PATCH 4 BANK J PATCH 1 PATCH 2 PATCH 3 PATCH 4 BANK 8 PATCH 1 PATCH 2 PATCH 3 PATCH 4 BANK 0 PATCH 1 PATCH 2 PATCH 3 PATCH 4 BANK 0 PATCH 1 PATCH 2 PATCH 3 PATCH 4 BANK 0 PATCH 1 PATCH 2 PATCH 3 PATCH 4 BANK 0 PATCH 1 PATCH 2 PATCH 3 PATCH 4 BANK 0 PATCH 1...

Страница 6: ... MONO connector OUTPUT R jack OUTPUT L MONO jack PHONES jack EXT LOOP SEND jack EXT LOOP RETURN jack MIDI OUT connector MIDI IN connector EXT LOOP GAIN 10dBm 4dBm switch LEVEL knob CONTROL IN jack DC IN jack USB port POWER switch AUX IN jack Control section see next page Accelerator section see next page Pre amp section see next page VOLUME PEDAL LED see page 33 Expression pedal 0804B9E indb 6 080...

Страница 7: ...nob MANUAL key SYSTEM key TUBE control GAIN knob LEVEL knob SUB BASS knob BASS knob LO MID knob TREBLE knob PRESENCE knob HI MID knob Effect module keys SOLID STATE control FOOT SW key PEDAL key Parameter knobs 1 4 BYPASS TUNER key STORE SWAP key EXIT key 0804B9E indb 7 0804B9E indb 7 08 4 25 10 57 18 AM 08 4 25 10 57 18 AM ...

Страница 8: ...al effects but supplied to the outputs as is This signal is also sent to the USB port Rhythm machine or similar Connection example 2 Using the B9 1ut as a DI Mixer If the unit is connected to a mixer or to recording equipment and input signal distortion occurs set this switch to 10dB OUTPUT GAIN switch This switch affects only the signal at the BALANCED OUT R connector In the POST position switch ...

Страница 9: ...peakers Play your bass guitar and adjust the 5 volume control on the bass amplifier on the bass guitar and the LEVEL knob on the rear panel of the B9 1ut to obtain optimum listening volume LEVEL knob Rear panel NOTE The Accelerator setting also has an influence on the volume p 17 HINT The B9 1ut has a so called Pickup Select feature that lets you match the unit to various kinds of bass guitar pick...

Страница 10: ...e PATCH BANK foot switches changes to the next patch Immediately after power on the unit will be in manual mode where you can use foot switches 1 4 to switch modules on and off 1 Use the PATCH BANK foot switches to select a patch 2 Press the foot switch for the module to be switched on and off COMP or WAH EFX1 module PRE AMP or EXT LOOP module LED for controlled module is on or flashing MOD EFX2 o...

Страница 11: ...oot switches 1 4 Pre amp operation The pre amp section allows you to adjust distortion intensity and EQ The B9 1ut goes into edit mode 1 Turn the knobs of the pre amp section to make adjustments 2 To return to manual mode or play mode press the EXIT key Distortion intensity Ultra high range boost cut Pre amp module output level Low range boost cut Hi mid range boost cut Very low range boost cut Lo...

Страница 12: ...e Module name If you press the PRE AMP EQ module key the display will be different For details see page 24 The unit switches to edit mode By repeatedly pressing the effect module key the respective module can be toggled between on and off 1 Press the effect module key for the module to edit 2 Use the TYPE knob and parameter knobs 1 4 to make adjustments TYPE knob Changes the effect type Parameter ...

Страница 13: ...ank patch number 4 Press the STORE SWAP key once more In store mode you can swap patches as well as store or swap entire banks p 27 HINT You can return the user group patches easily to the factory default settings p 29 Only user group patches can be specified as store target When a patch from a user group is selected this patch becomes the default store target When a patch from a preset group is s...

Страница 14: ...de MANUAL key lit YP LK l i WZw4 Lp 74 Bank number 0 9 A J Patch number 1 4 Group name Bank number Patch number E symbol If a setting of the currently selected patch differs from the original setting the indication E for Edited appears Patch name Functions assigned to function foot switches 1 3 Effect module keys Keys for modules that are active in the currently selected patch are lit in red Foot ...

Страница 15: ...he switch The top and bottom LEDs of the foot switch indicate which module is being controlled and its current status as follows LED lit module on LED flashing module off The illustration below shows the foot switches and respective modules HINT You can change the modules assigned to the foot switches 1 4 p 38 The module on off settings are not automatically retained when you change to another pat...

Страница 16: ...he second line of the display the pre amp module or EQ module is set to off Press the respective module key to turn the module on and then change the parameters To adjust the overall volume level 3 patch level turn parameter knob 1 in manual mode Parameter knob 1 The patch level is a parameter that controls the output level of the respective patch The setting range is 2 100 A setting of 80 results...

Страница 17: ...section on the panel The control functions are explained below TUBE control This control adjusts the input signal gain of the tube circuit Turning the control clockwise increases the volume level and the typical tube sound character SOLID STATE control This control adjusts the input signal gain of the solid state circuit Turning the control clockwise increases only the volume At the maximum positi...

Страница 18: ...atch is lit Effect module keys Keys for modules that are active in the currently selected patch are lit in red Bank number 0 9 A J Patch number 1 4 Group name Bank number Patch number E symbol If a setting of the currently selected patch differs from the original setting the indication E for Edited appears Patch name Functions assigned to function foot switches 1 3 Shows the operation that will be...

Страница 19: ...s Foot switches 1 4 HINT You can also switch the group bank patch by turning the TYPE knob In play mode as in manual mode you can use the knobs on the panel to control major parameters of the pre amp section distortion intensity EQ boost cut etc and the Accelerator For information on how to do this see Adjusting the sound on page 16 From play mode you can switch to edit mode for editing patches Fo...

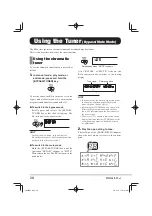
Страница 20: ...e key The B9 1ut is now in the mute mode 4 Release key when MUTE is shown After BYPASS or MUTE is shown the B9 1ut automatically switches to the tuning display 964 a Tuner type Reference pitch HINT In bypass mode the built in expression pedal functions as a volume pedal In the mute mode the pedal has no effect By turning the TYPE knob you can switch between the chromatic tuner and the bass tuner F...

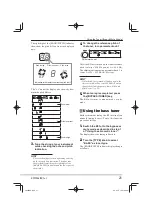
Страница 21: ...on the tuner reference pitch is always 440 Hz center A 440 Hz The adjustment range using parameter knob 1 is center A 435 445 Hz in 1 Hz steps HINT When the B9 1ut is turned off and on again the reference pitch will be reset to 440 Hz You can change the default frequency that will be used after a reset p 59 When tuning is completed press 5 the BYPASS TUNER key The B9 1ut returns to manual mode or ...

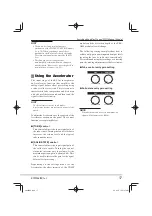
Страница 22: ...unterclockwise from the 435 setting selects the setting one semitone lower two semitones lower and three semitones lower w Y Optional tuning to 1 3 semitones lower HINT When the B9 1ut is turned off and on again the reference pitch will be reset to 440 Hz You can change the default frequency that will be used after a reset p 59 Play the open string of the 4 indicated number and adjust the pitch Tu...

Страница 23: ...basic steps that are normally taken in edit mode are described here For details on effect types and parameters for each module see the section Effect Types and Parameters on pages 64 79 Select the patch to edit 1 The patch can be from a preset group P or user group U However if you have edited a patch from a preset group it can only be stored in a user group p 27 In play mode or manual mode 2 pres...

Страница 24: ...he display Pressing the same key once more in this condition switches the module on HINT If any module on off status effect type selection or a parameter setting value has been changed at least once the STORE SWAP key lights up and the indication E appears to the right of the item The E indication disappears when the item is returned to the original value However if any other item has been changed...

Страница 25: ...OTE If HPF high pass filter is selected for the Sub Bass band of the EQ module or if LPF low pass filter is selected for the Presence band the boost cut setting for that band cannot be adjusted The indication will be fixed to 12 dB Repeat steps 2 4 to edit other 5 modules in the same way When editing is finished press the 6 EXIT key The B9 1ut returns to the previous mode NOTE The changes that you...

Страница 26: ...acter can be changed Patch name TYPE knob Turn parameter knob 4 to move the 3 character input position and use parameter knobs 1 3 to select the new character Parameter knobs 1 3 select characters as follows Parameter knob 1 numerals 0 9 Parameter knob 2 letters A Z a z Parameter knob 3 symbols space _ Repeat step 3 until the patch 4 name is as desired Then press the EXIT key NOTE The changes that...

Страница 27: ...e top right of the display YP L w 7 69 j Parameter knob 2 HINT When BANK is shown the subsequent operation will be carried out for the entire bank Make sure that the correct indication is shown Turn parameter knob 1 to bring 3 up the indication STORE or SWAP on the display YP L w 7 69 j Parameter knob 1 When STORE is selected the current patch can be stored as any user patch When SWAP is selected ...

Страница 28: ...lains how to store and swap entire banks In manual mode play mode or edit 1 mode press the STORE SWAP key The B9 1ut switches to the store standby condition and the currently selected bank becomes the store swap source To store swap entire banks turn 2 parameter knob 2 to bring up the indication BANK in the top right of the display 52 w 52 69 j Store swap source group name bank number Store swap t...

Страница 29: ...ny time To do this proceed as follows NOTE When you perform the All Initialize function all patches stored in the user area will be overwritten Proceed with care Turn power to the B9 1ut on while 1 holding down the STORE SWAP key The indication All Initialize appears on the display SS 0UP PHSPaL 69 5 0 Press the STORE SWAP key once 2 more All patches are returned to the factory default condition T...

Страница 30: ...hown in the following illustration the pedal adjusts the Gain parameter of the PRE AMP module when moved in the vertical direction and the Rate parameter of the MOD EFX2 module when moved in the horizontal direction Gain Rate Control target parameters PRE AMP module PV1 MOD EFX2 module PH1 HINT The parameter adjustment range can be set for each control target separately In bypass mode the expressi...

Страница 31: ...etting the vertical direction control targets PV1 to PV4 are the same TYPE knob Turn parameter knob 1 to select 4 the parameter that is to be controlled Parameter knob 1 As you turn parameter knob 1 the effect parameter effect type and effect module settings change HINT For information on which parameters can be selected as control targets see Effect Types and Parameters on pages 64 79 When Volume...

Страница 32: ...pedal fully down To achieve this set the volume pedal on off status and the control target module on off status to the opposite condition p 33 Repeat steps 3 6 to set the other 7 control targets for the vertical direction in the same way To assign control targets for the 8 horizontal direction turn the TYPE knob to select one of the four horizontal direction control targets PH1 to PH4 The display ...

Страница 33: ...ameter of the WAH EFX1 module as control target PV2 7 LUZL V HO 2 Perform step 6 of Assigning control targets to the expression pedal to set all control targets to Enable When the setting is completed press the EXIT key to return to the previous mode 3 Verify that the volume pedal function is on and set the control target selected in step 1 WAH EFX1 module in this example to off In this condition ...

Страница 34: ... and press the STORE SWAP key 2 Turn pedal fully to the right 1 Disable stopper The adjustment is completed and the unit returns to the play mode HINT If the indication ERROR appears return to step 2 and repeat the procedure Using an external expression pedal If you connect an optional expression pedal FP01 FP02 to the CONTROL IN jack of the B9 1ut you can use it as a separate volume pedal freeing...

Страница 35: ... Adjusting horizontal torque for expression pedal B9 1ut bottom view 3 mm size hex wrench 40 mm or longer Loosen Tighten The expression pedal of the B9 1ut is designed for operation with one foot When the pedal is fully turned to the right pushing it strongly down hitting it or otherwise exerting strong force on it will damage the pedal Be sure to operate the pedal only within its designated range...

Страница 36: ... The following functions can be assigned to function foot switches 1 3 BypasOnOff Mute OnOff The function foot switch toggles the bypass mode and mute mode between on and off In either mode the tuning display appears ManualMode The function foot switch toggles between play mode and manual mode BPM TAP The function foot switch can be used to specify the individual tempo for a patch p 38 When the sw...

Страница 37: ... the function foot switch once more releases the hold condition and the bass sound stops HINT To use the Hold Synth function MonoSyn or 4VoiceSyn must be selected as effect type in the PRE AMP module of the patch COMP OnOff WAH OnOff ExLopOnOff ZNR OnOff AMP OnOff EQ OnOff CAB OnOff MOD OnOff DELAYOnOff REV OnOff The function foot switch toggles the respective module between on and off TunerDsply ...

Страница 38: ...he respective foot switches Foot switch 1 COMP module CMP or WAH EFX1 module WAH Foot switch 2 PRE AMP module AMP or EXT LOOP module ExL Foot switch 3 MOD EFX2 module MOD or EQ module EQ Foot switch 4 DELAY module DLY or REVERB module REV HINT The names of the two modules that can be assigned to each foot switch are printed on the panel to the right of the switch The currently selected module is i...

Страница 39: ...tempo synchronization are available Thirty second note ƒ Sixteenth note 3 Quarter triplet note ƒ Dotted sixteenth note π Eighth note Ø 3 Half triplet note π Dotted eighth note Quarter note Dotted quarter note x2 Quarter note x 2 x20 Quarter note x 20 NOTE The actual available setting range depends on the parameter For example when you have selected the eighth note setting the Time parameter will b...

Страница 40: ...y changes as follows 3667 LUK3L LS NOTE When EXT LOOP Module Off is shown the EXT LOOP module is currently turned off Press the EXT LOOP key once more to turn the module on Use parameter knob 1 to adjust 4 the level of the signal sent from the B9 1ut to the external effect send level 3667 LUK3L LS l Parameter knob 1 HINT If the input level at the external effect is not sufficient even with the sen...

Страница 41: ...sses the input signal for output such as a compressor or EQ unit the dry level should normally be set to 0 and the signal level should be adjusted with the return level parameter When the effect loop settings have 7 been made press the EXIT key The unit returns to manual mode or play mode Store the patch as necessary 8 When you next call up the stored patch the external effect settings will also b...

Страница 42: ...ing parameter This makes it possible to use the B9 1ut as a real time controller for other MIDI enabled devices or alter effect parameters and module on off status under control of a MIDI sequencer synthesizer or other MIDI enabled device Exchange patch data between two B9 1ut units via MIDI The patch data of the B9 1ut can be output as MIDI messages system exclusive for copying to another B9 1ut ...

Страница 43: ...am change or bank select program change messages There are two ways program change modes for doing this as described below Direct mode With this method you use a combination of MIDI bank select and program change messages to specify the patch HINT Bank select is a MIDI message type for specifying the sound category of a synthesizer or similar It is used in combination with program change messages ...

Страница 44: ...mode without saving Using direct mode By using a combination of MIDI bank select and program change messages you can specify a patch directly NOTE Before carrying out the following steps verify that the send receive MIDI channel setting of the B9 1ut is as required p 42 and that send receive of program change messages is enabled p 43 In play mode press the SYSTEM 1 key 70 2 7 LS 0 Turn the TYPE kn...

Страница 45: ...ime the B9 1ut receives a program change the most recent bank select instruction will be used Using mapping mode In this mode a program change map is used to assign patches allowing patches to be specified by using program change messages only NOTE Before carrying out the following steps verify that the send receive MIDI channel setting of the B9 1ut is as required p 42 and that send receive of pr...

Страница 46: ...anges The setting is accepted and the unit returns to manual mode or play mode By pressing the EXIT key you can abort the changes and return to play mode without saving To send and receive program 8 change messages proceed as described in step 6 of Using direct mode p 44 The program change bank select messages sent by the unit are the same in direct mode and mapping mode For information on which b...

Страница 47: ...g the EXIT key you can abort the changes and return to play mode without saving Assigning control change numbers You can assign control change numbers to the expression pedal and keys of the B9 1ut as follows NOTE Before carrying out the following steps verify that the send receive MIDI channel setting of the B9 1ut is as required p 42 and that send receive of control change messages is enabled p ...

Страница 48: ...n the built in external expression pedal is operated The value of the assigned control change number is varied continuously over the range of 0 127 For the built in expression pedal two control change messages can be sent simultaneously for vertical direction and horizontal direction movement Display Control target Default cc cc setting range CTRL IN Expression pedal operation 7 OFF 1 5 7 31 64 95...

Страница 49: ...ue is between 0 and 63 the module is switched off If control change value is between 64 and 127 the module is switched on When control change for bypass mute on off is received If control change value is between 0 and 63 bypass mute is switched off If control change value is between 64 and 127 bypass mute is switched on Sending pedal synth playing information via MIDI note on note off When the ped...

Страница 50: ...When two B9 1ut units are connected via a MIDI cable this allows copying of patch data from the sending unit to the receiving unit NOTE When patch data are received all existing patch data in the B9 1ut will be overwritten Perform the following steps with care to avoid accidentally overwriting important data Connect the MIDI OUT connector 1 on the source B9 1ut to the MIDI IN connector on the targ...

Страница 51: ...process is completed the source B9 1ut return to the SYSTEM menu and the target B9 1ut returns to the previous mode HINT The web site of ZOOM Corporation http www zoom co jp has editor librarian software available for download Using this software you can store patch data of the B9 1ut on a computer 0804B9E indb 51 0804B9E indb 51 08 4 25 10 58 49 AM 08 4 25 10 58 49 AM ...

Страница 52: ...eter knob 1 to select 3 the control target parameter Parameter knob 1 As you turn parameter knob 1 the effect parameter effect type and effect module changes HINT The parameters that can be selected as control targets are the same as can be selected for operation by the expression pedal See the section Effect Types and Parameters p 64 79 When NOT Assign is displayed no parameter is assigned as con...

Страница 53: ...iangle Square triangle Square Tri Sine wave Sine Square wave Square 6 5 7 8 Turn parameter knob 2 to select 7 the control waveform cycle The display changes as follows 994 9H L UJ _ Parameter knob 2 The control waveform cycle uses the patch specific tempo p 38 as reference and is displayed as eighth note quarter note or quarter note x numeral see table on page 39 The numeral after x 2 20 indicates...

Страница 54: ...foot switch twice in the desired interval max 5 4 seconds Note symbol Use the patch specific tempo p 38 as reference and set recording duration in note units HINT When nothing is recorded LED of function foot switch 2 is out you can use function foot switch 2 to set the tempo of the patch When the switch is pressed repeatedly the interval between the last four presses is detected and averaged auto...

Страница 55: ...en to the loop playback and record a new bass phrase When you press function foot switch 3 once more recording stops and the unit returns to loop playback only Loop playback Loop playback Sound on sound recording Effect sound Original sound Function foot switch 3 To stop loop playback press 8 function foot switch 2 HINT To start loop playback again press function foot switch 3 To clear the recorde...

Страница 56: ...l synth sound Turn parameter knob 3 to select 3 the pedal synth scale and the sound generation method The display changes as follows JHSL 4VKL 4 l Parameter knob 1 Scale Sound generation method Three types of pedal synth scales are available M Major m Minor C Chromatic The sound arrangement with each scale is shown in the illustration below The pedal synth function has two operation modes for prod...

Страница 57: ...e EXIT key The unit returns to manual mode or play mode Store the patch as necessary When the pedal synth function was enabled the indication in manual mode and play mode changes as follows 96 2 l 2 3 4 Keynote Scale and Sound generation method To play the pedal synth sounds 7 press the foot switches except for function foot switch 2 HINT The pedal synth sound is processed by the effects after the...

Страница 58: ...playback see Figure 3 below For details see the next section For details on recording and playback refer to the documentation of the DAW application NOTE If the DAW application has an echo back function input signal during recording is supplied directly to an output this must be disabled If recording is carried out with the echo back function on the output signal may sound as if processed by a fla...

Страница 59: ...YPE knob to bring up 2 the indication shown below ULY HSPI a TYPE knob Turn parameter knob 1 to change 3 the reference pitch When the setting is complete 4 press the EXIT key If the setting was changed the indication Store appears on the display to allow you to store the changes If the setting was not changed the unit returns to the previous mode Press the STORE SWAP key to 5 store the new setting...

Страница 60: ...anual mode or play mode 1 press the SYSTEM key The SYSTEM menu for parameters that apply to all patches appears 70 2 7 LS 0 Turn the TYPE knob to bring up 2 the System Version indication The current system version is shown on the second line of the display Z LT LYZPVU TYPE knob Current version HINT The system version is also briefly shown during power up of the B9 1ut After checking the system ver...

Страница 61: ...n integrated active pickup When the setting is complete 3 press the EXIT key If the setting was changed the indication Store appears on the display to allow you to store the changes If the setting was not changed the unit returns to the previous mode Press the STORE SWAP key to 4 store the new setting If you press the EXIT key the change will be discarded and the unit returns to the previous mode ...

Страница 62: ...g the insert position of the pre amp section To change the insert position of the pre amp section call up the Chain parameter and set it to Pre before MOD EFX2 module or Post after DELAY module The Chain parameter can be used with all effect types except for bass synth effects In manual mode play mode or edit 1 mode press the PRE AMP key The display changes as follows 79 47 TWLN Turn the TYPE knob...

Страница 63: ...B EQ PRE AMP ZNR COMP WAH EFX1 MOD EFX2 CABINET DELAY REVERB EQ PRE AMP EXT LOOP EXT LOOP EXT LOOP ZNR COMP WAH EFX1 MOD EFX2 CABINET DELAY REVERB EQ PRE AMP EXT LOOP ZNR COMP WAH EFX1 MOD EFX2 CABINET DELAY REVERB Pre amp section PRE WAH EFX1 Befr Pre amp section PRE WAH EFX1 Aftr Pre amp section POST WAH EFX1 Befr Pre amp section POST WAH EFX1 Aftr WAH EFX1 Befr When synthesizer effect type is s...

Страница 64: ... a value for the parameter when making the setting at the B9 1ut the parameter value will be synchronized to the patch specific tempo in note units p 38 Expression pedal The pedal symbol in the table indicates that the parameter can be controlled with the built in expression pedal If you select the parameter as control target when making the setting at the B9 1ut p 31 the expression pedal will adj...

Страница 65: ...the compressor Adjusts the compressor attack rate Adjusts the signal level after passing the module Limiter This is a limiter that suppresses signal peaks above a certain reference level PARM1 PARM2 PARM3 PARM4 Threshold 0 50 Ratio 1 10 Release 1 10 Level 2 100 Adjusts the reference signal level for the limiter action Adjusts the compression ratio of the limiter Adjusts the delay between the point...

Страница 66: ...the signal level after passing the module FixedPhaser This is a fixed phaser effect that has an equalizer like sound PARM1 PARM2 PARM3 PARM4 Position Befr Aftr Frequency 1 50 Color 1 4 Level 2 100 See A Resonance Auto Resonance p 65 Adjusts the frequency to be emphasized Adjusts the sound color Adjusts the signal level after passing the module RingModulate This effect produces a metallic ringing s...

Страница 67: ...of the Z pedal PV1 PV4 to the Frequency parameter and the horizontal direction PH1 PH4 to the X Fade parameter PARM1 PARM2 PARM3 PARM4 Position Befr Aftr Frequency 1 50 X Fade 0 100 Level 2 100 See A Resonance Auto Resonance p 65 Adjusts the modulation frequency Adjusts the balance between original sound and effect sound Adjusts the signal level after passing the module X Phaser This effect allows...

Страница 68: ...RATION AmpegSVT SuperBass Simulation of the ultimate rock bass amp the Ampeg SVT Simulation of the Marshall Super Bass that made rock history SWR AmpegB15 Simulation of the SWR SM 900 famous for its hi fi sound Simulation of the Ampeg B 15 made famous by the Motown sound of the 1960s Acoustic Aguilar Simulation of the Acoustic 360 well known for its gutsy midrange Simulation of the Aguilar DB750 f...

Страница 69: ... Adjusts the rate of sound change Adjusts the signal level after passing the module PARM1 PARM2 PARM3 Variation iA UE UA oA Tone 0 10 MixBal 0 100 Selects a vowel variation Adjusts the tonal quality of the sound Adjusts the balance between original sound and effect sound V Syn Vintage Synthesizer This effect produces a vintage bass synthesizer sound GAIN LEVEL Decay 0 100 Level 1 100 Adjusts the r...

Страница 70: ... the foot switches operate differently from normal mode For details see page 56 GAIN LEVEL Decay Atk 1 100 Level 1 100 Adjusts the rate of sound change The target parameter is Decay in trigger mode and Attack in hold mode Adjusts the signal level after passing the module PARM1 PARM2 PARM3 PARM4 Scale Mode M TG m TG C TG M HD m HD C HD Key C1 B3 Variation Saw0 9 Pulse0 9 PWM0 9 MixBal 0 100 Selects...

Страница 71: ...s 4x12 BM 4x12 Bassman Simulates the Marshall 1935A Simulates the Fender Bassman combo amp cabinet 4x10 1x15 TE 4x10 1x15 Trace Elliot 4x10 HA 4x10 Hartke Simulates the Trace Elliot 1048H 1518 Simulates the Hartke 4 5XL 4x10 SWR 4x10 SWR 4x10 AL 4x10 Aguilar Simulates the SWR Goliath Simulates the Aguilar GS410 4x10 GK 4x10 Gallien Krueger 2x15 EV 2x15 Electro Voice Simulates the Gallien Krueger 4...

Страница 72: ...RM3 PARM4 Shift 12 1 0 1 12 24 Tone 0 10 Fine 25 25 Balance 0 100 Sets the pitch shift amount in semitones Adjusts the tonal quality of the sound Allows fine adjustment of pitch shift amount in Cent 1 100 semitone steps Adjusts the balance between original sound and effect sound PedalPitch This effect allows using the expression pedal to shift the pitch in real time PARM1 PARM2 PARM3 PARM4 Color 1...

Страница 73: ... according to the input signal level PARM1 PARM2 PARM3 PARM4 Depth 0 100 Rate 0 50 Resonance 10 10 Sense 10 10 Adjusts the modulation depth Adjusts the modulation rate Adjusts the resonance intensity Adjusts the effect sensitivity With positive setting values the effect sound level increases at higher input signal levels With negative setting values the effect sound level decreases at higher input...

Страница 74: ... 0 100 Adjusts the effect depth Positive values cause upward bending and negative values cause downward bending Adjusts the attack time for the bending effect Higher setting values result in slower attack Adjusts the release time for the bending effect Higher setting values result in slower release Adjusts the balance between original sound and effect sound CombFilter This effect uses the comb fil...

Страница 75: ...PARM3 PARM4 Depth 0 100 Rate 0 50 X Fade 0 100 Shape 0 10 Adjusts the modulation depth Adjusts the modulation rate Adjusts the level balance between original sound and effect sound Adjusts the envelope of the effect sound Z Step This is a step effect which allows shifting the emphasized frequency up or down using the pedal or another control source If you assign the Frequency parameter to the peda...

Страница 76: ...shows an example for Z pedal operation when vertical direction is assigned to Formant V and horizontal direction to Formant H max min max min max min 1 2 3 i a u i e u u e e o o a Variation max min max min 4 5 o e a o a i i u Vertical direction Horizontal direction Variation max min Vertical direction Horizontal direction max min DELAY module This is a delay module that allows use of the hold func...

Страница 77: ...combination of current BPM setting and note symbol determines the recording time Adjusts the effect sound mixing ratio REVERB module This module comprises various kinds of reverb early reflections and multi tap delay Hall This reverb effect simulates the acoustics of a concert hall Room This reverb effect simulates the acoustics of a room Spring This effect simulates a spring type reverb Arena Thi...

Страница 78: ...ation depth Selects a waveform for modulation Higher setting values result in stronger clipping of the waveform tips giving a stronger auto panning effect Z Delay This is a delay effect which allows adjustment of panning and mix level using the pedal or another control source Try assigning the vertical direction of the Z pedal PV1 PV4 to the Pan parameter and the horizontal direction PH1 PH4 to th...

Страница 79: ...targets 1 4 for horizontal direction movement of the expression pedal The above eight effect types have the same parameters However for PH1 to PH4 expression pedal horizontal direction setting PARM4 module on off is not available PARM1 PARM2 PARM3 PARM4 Expression pedal control target min minimum value Max maximum value Module on off function Specifies the expression pedal control target Specifies...

Страница 80: ...ssion pedal p 31 Depending on the parameter assigned to the expression pedal a pedal action causing a drastic parameter change may result in noise Hum noise is heard when using BALANCED OUT connectors A ground loop involving connected equipment may have formed Try setting the GROUND switch to LIFT and check whether this improves the condition Effects do not work When using the BALANCED OUT R conne...

Страница 81: ...tput Standard monaural phone jack x 2 Maximum output level 11 dBm into load impedance of 10 kilohms or more Output impedance 1 kilohm or less Headphone output Standard stereo phone jack Rated output 60 mW into 32 ohm load 20 mW into 300 ohm load Output impedance 47 ohms External send Standard monaural phone jack Rated output level 10 dBm 4 dBm switch selectable Balanced output XLR connector x 2 Ou...

Страница 82: ... x x Pitch Bend x x o o 0 32 0 Bank select Control 1 5 7 31 64 95 1 5 7 31 64 95 Expression Pedal CONTROL IN 64 95 64 95 Effect module on off Signal mute Change Bypass See Note 1 Prog o 0 79 o 0 127 Change True System Exclusive o o System Song Pos x x Song Sel x x Common Tune x x System Clock x x Real Time Commands x x Aux Local ON OFF x x All Notes OFF x x Mes Active Sense x x sages Reset x x Not...

Страница 83: ...E 0 0 56 0 0 57 0 0 58 0 0 59 F 0 0 60 0 0 61 0 0 62 0 0 63 G 0 0 64 0 0 65 0 0 66 0 0 67 H 0 0 68 0 0 69 0 0 70 0 0 71 i 0 0 72 0 0 73 0 0 74 0 0 75 J 0 0 76 0 0 77 0 0 78 0 0 79 P 0 1 0 0 1 0 1 1 0 2 1 0 3 1 1 0 4 1 0 5 1 0 6 1 0 7 2 1 0 8 1 0 9 1 0 10 1 0 11 3 1 0 12 1 0 13 1 0 14 1 0 15 4 1 0 16 1 0 17 1 0 18 1 0 19 5 1 0 20 1 0 21 1 0 22 1 0 23 6 1 0 24 1 0 25 1 0 26 1 0 27 7 1 0 28 1 0 29 1 ...

Страница 84: ... the instructions may cause harmful interference to radio communications However there is no guarantee that interference will not occur in a particular installation If this equipment does cause harmful interference to radio or television reception which can be determined by turning the equipment off and on the user is encouraged to try to correct the interference by one or more of the following me...

Страница 85: ... New Orleans Funk sound with a clear wide tone range Good for fingering or slap play MOD Chorus Rate 4 4 60 sROCK CMP Compressor AMP AmpegSVT MOD Chorus DLY Delay Volume A patch that simulates the bass sound of 1960s Rock AMP AmpegSVT Gain Modeling 51 Q TRON CMP M Comp AMP Trace MOD Chorus DLY Delay Volume Patch modeled on the Electro Harmonix Q Tron Suitably light mix of original sound makes the ...

Страница 86: ...This patch is suitable for line output REV AutoPan Rate SpecialFx F1 AmVocode WAH AutoWah AMP TubePre MOD H P S REV Room Volume Patch with Vocoder type sound H P S for the patch is set to match a key of C or Am REV Room Decay F2 ChainSaw WAH Tremolo AMP FuzzFace MOD Flanger DLY Delay Volume Wild distortion based on the image of a chain saw Pressing foot switch 1 in manual mode enables Tremolo for ...

Страница 87: ...p After startup select ZOOM ASIO Driver as the ASIO driver in the right section of the Device Setup window When you change the ASIO driver selection a confirmation message appears Click the Switch button The device indication in the left section of the window now shows ZOOM ASIO Driver as the ASIO driver Click on this indication to select it and then click the Control Panel button in the right sec...

Страница 88: ...ad change the recording level and gain settings at this unit NOTE While the monitoring button is enabled the direct signal input to this unit and the signal routed to the computer and then returned to this unit will be output simultaneously from this unit causing a flanger like effect in the sound To accurately monitor the sound also while adjusting the recording level temporarily set the output d...

Отзывы: