8
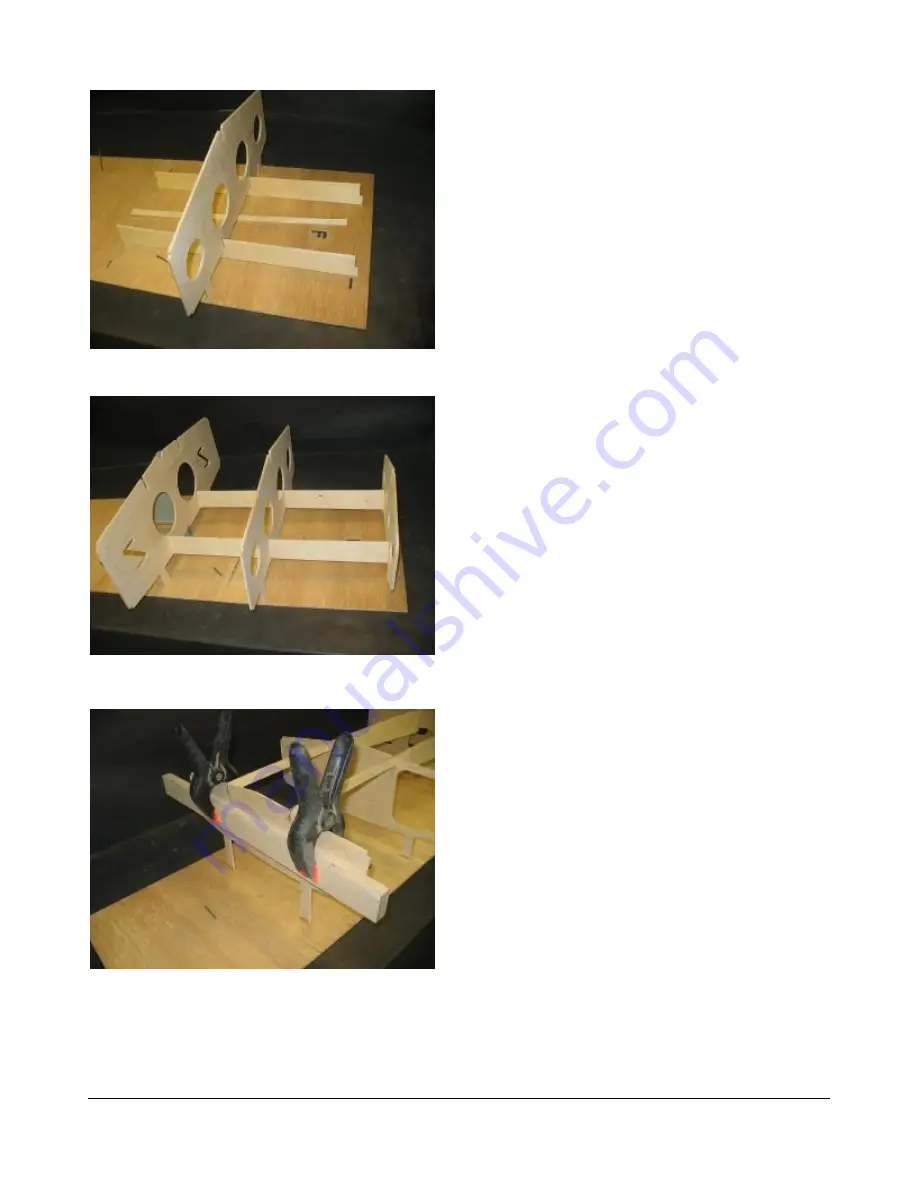
Bulkhead 2 and spines
Bulkheads 1, 2 and three in place with the spines.
Note that the holes in the spines face forward.
Block clamped to bulkhead 5, keeping it flat.
Let’s get started.
Attach the jig board to your FLAT bench (or 12x48
ply) with screws, nails, clamps or whatever you
need, to make sure it’s attached to the surface.
Make sure the “F” is so that you can read it.
Remove bulkheads 1, 2, 3 and the (2) spines.
Sand the edges with 80 grit to remove the fuzz, as
well as the little tabs that held them in the sheet.
Grab bulkhead 2 and the two spines. Push the
center slot of the spines into bulkhead 2. Check the
fit; it should be flush with the top of the bulkhead.
Put bulkhead 2 into the jig. The hole in the spines
should face forward.
Put bulkheads 1 and 3 into the jig, engaging the
spines in the slots.
Starting from the front of the jig, glue the tabs of
bulkhead 1 to the jig.
Use a square to ensure that it’s 90 degrees to the
jig. Also make sure that the tabs don’t protrude
under the jig.
Use CA and accelerator.
Don’t glue the spines at this time. We will glue them
after we flip the hull over.
When dry and square, glue bulkheads 2 and 3 the
same way. Use the square.
Make sure the “Z” on bulkhead 3 is readable from
the back.
Remove both keels.
Sand as before.
Using CA, glue both keels together. Be sure that
the keels are aligned with each other.
Clamp while drying.
Remove, sand and glue bulkheads 4 and 5 to the
jig as before.
Make sure the cutout in bulkhead 4 is to YOUR
RIGHT, when looking at the back of the boat (it will
be on the left, for exhaust, when upright).
Find the two ¼ ply engine rails. Sand them smooth
with 80.
Now look at bulkhead 5. Is it twisted or warped? If
so, clamp a piece of wood to the back of it for the
next few steps.
Check the fit of the engine rails into bulkheads 3, 4
and 5.
If ok, glue them in (the big end goes forward).
The keel should be dry by now.
Check the fit of the keel into bulkheads 1, 2 and 3.
If ok, glue it in, making sure the keel is centered on
bulkhead 1.
This kind of looks like a boat, doesn’t it?
Take a break, and give the glue a little while to
completely cure.
Содержание I-BOX
Страница 8: ...I B O X N B O X 6...


