


3-8
<Toc> <Ind>
TI 05C01E02-01E
1st Edition : Oct. 31, 2001-00
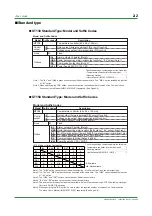
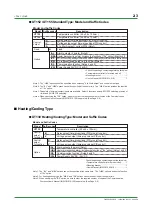
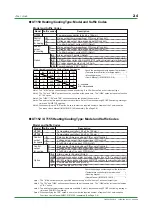
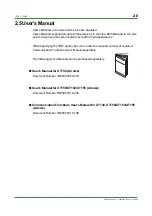
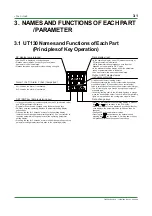
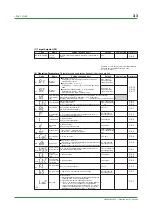
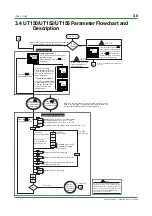
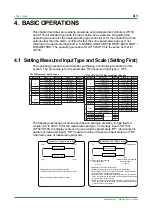
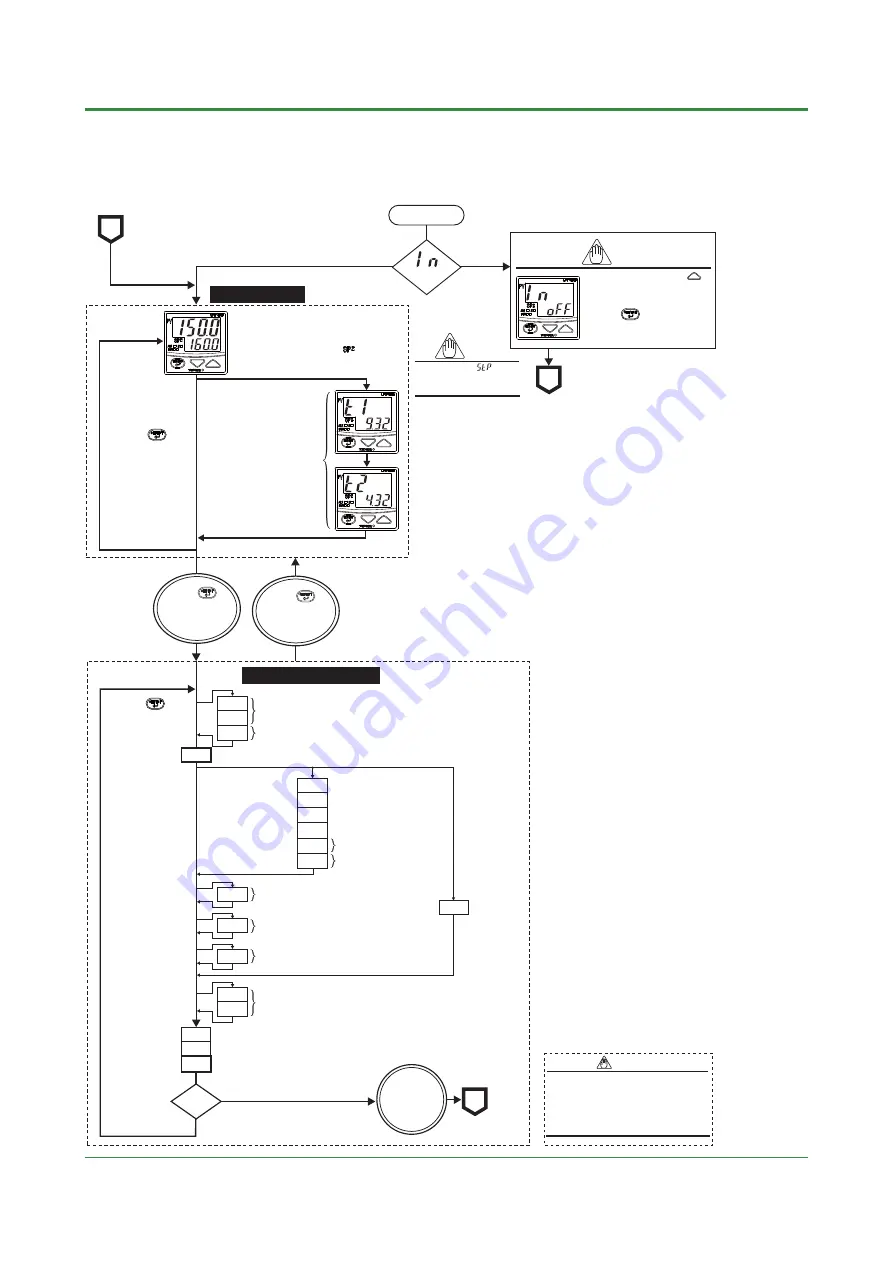
3.4 UT150/UT152/UT155 Parameter Flowchart and
Description
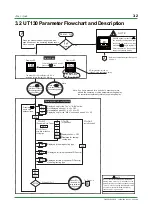
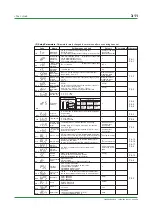
SP1
SP2
CT
CTC
DB
HYS
A1
A2
HC
FL
BS
LOC
AT
P
I
D
MR
COL
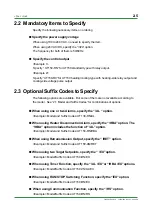
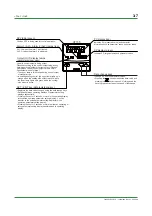
When measured input range code has been already set,
the operating display 1 shown below appears.
P o w e r O N
is displayed
?
Yes
No
Operating display 1
Operating display 2
CTL=SLF
CTL
Operating parameter setting display
CTL=PID
Displayed when I = OFF
Displayed for heating/
cooling type
Displayed for heating/cooling type
Displayed for time-proportional PID control
Displayed for time-proportional PID control
of heating/cooling type
Displayed for the "/EX" option.
CTL=ONF
(on/off control)
Displayed only for the "/HBA" option and when "AL1" = 25
LOC=
When LOC = -1
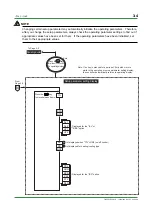
N O T E
Note: If no key is pressed for a period of two minutes or more
while in the operating or setup parameter setting display, the
controller automatically returns to operating display 1.
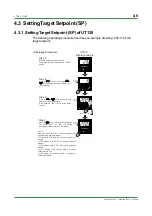
Press the key to
move between items.
NOTE: CTL = SLF
is not permitted for
heating/cooling type.
(Dynamic Auto Tune)
(PID control)
In STOP mode, or PV
value is displayed on PV
display alternately.
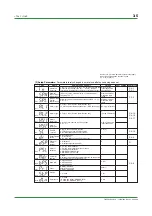
N O T E
When LOC= -1,
transfers to the
setup parameter
setting display
To Page 3-10
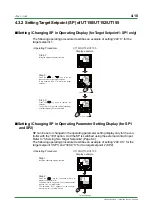
SP1 or SP2 value can be changed at
operating display1.
SP2 is displayed when the lamp
is flashing.
Timer 1 (T1) operating
display is shown when "AL1"
= 23 or 24 with the "/AL" and
"/EX" options. The value is
the remaining time.
Timer 2 (T2) operating display
is shown when "AL2" = 23 or
24 with the "/AL" and "/EX"
options. The value is the
remaining time.
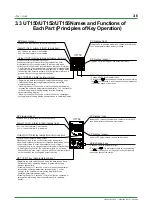
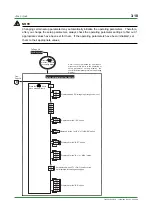
Operating display
A
A
B
* Refer to the Measured Input Ranges on
Page 4-1.
Displayed only for the /AL" or "/HBA" options
Not displayed when "AL1", "AL2" = OFF.
Not displayed when "AL1", "AL2" = 21 or 22
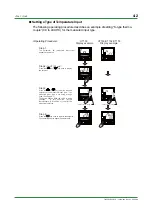
Press the key
for at least 3 seconds.
(To operating parameter
setting display)
Press the key
for at least 3 seconds.
(To operating display)
Note
Press the key to
move between items.
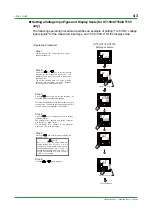
When IN appears, press the
key to display the measured input
range code you want to use, then
press the key to register it.
After this operation, the controller
shows the operating display.
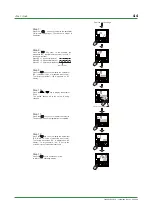
Set "-1" to enter the setup parameter setting
display. But if "LOC=1 or 2" is already set, the
parameter value can not be changed by setting
"LOC=-1" only. To change the parameter value,
set "LOC=0" at first (for disabling keylock),
then set "LOC=-1" once again.
NOTE
Содержание UT130
Страница 2: ...Blank Page ...
Страница 4: ...Blank Page ...
Страница 8: ...Blank Page ...
Страница 30: ...Blank Page ...
Страница 48: ...Blank Page ...
Страница 60: ...Blank Page ...
Страница 72: ...Blank Page ...


