4-26
CYLINDER AND PISTON
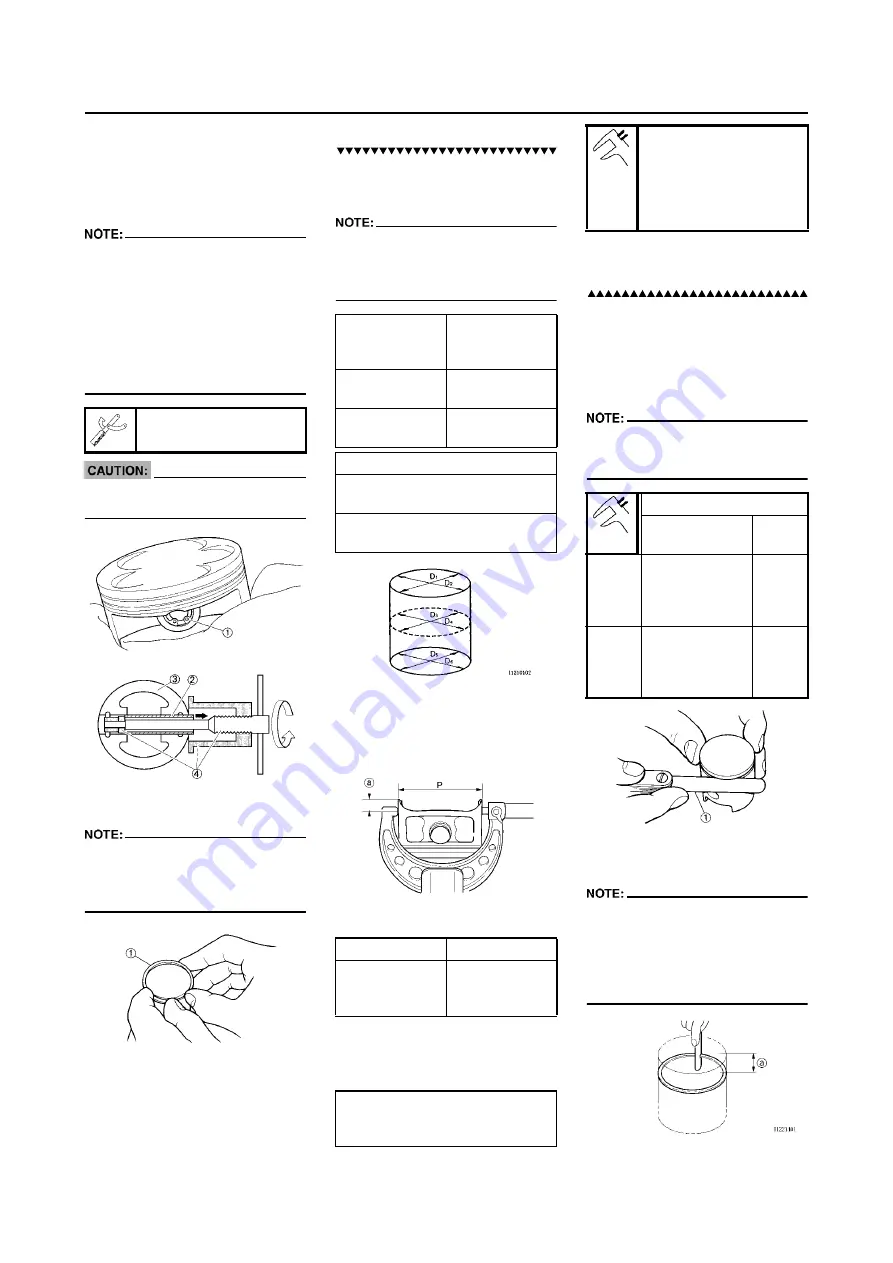
REMOVING THE PISTON AND
PISTON RING
1. Remove:
• Piston pin clip "1"
• Piston pin "2"
• Piston "3"
• Put identification marks on each
piston head for reference during re-
installation.
• Before removing each piston pin,
deburr the clip groove and pin hole
area. If the piston pin groove is de-
burred and the piston pin is still dif-
ficult to remove, use the piston pin
puller set "4".
Do not use a hammer to drive the
piston pin out.
2. Remove:
• Piston ring "1"
Spread the end gaps apart while at
the same time lifting the piston ring
over the top of the piston crown, as
shown in the illustration.
CHECKING THE CYLINDER AND
PISTON
1. Inspect:
• Cylinder and piston walls
Vertical scratches
→
Replace cyl-
inder and piston.
2. Measure:
• Piston-to-cylinder clearance
Measurement steps:
a. Measure the cylinder bore "C"
with a cylinder bore gauge.
Measure the cylinder bore "C" in par-
allel to and at right angles to the
crankshaft. Then, find the average of
the measurements.
b. If out of specification, replace the
cylinder, and replace the piston
and piston rings as set.
c. Measure the piston skirt diameter
"P" with a micrometer.
a.
8 mm (0.31 in) from the piston
bottom edge
d. If out of specification, replace the
piston and piston rings as a set.
e. Calculate the piston-to-cylinder
clearance with following formula:
f.
If out of specification, replace the
cylinder, and replace the piston
and piston rings as set.
CHECKING THE PISTON RING
1. Measure:
• Ring side clearance
Use a feeler gauge "1".
Out of specification
→
Replace
the piston and rings as a set.
Clean carbon from the piston ring
grooves and rings before measuring
the side clearance.
2. Position:
• Piston ring
(in cylinder)
Insert a ring into the cylinder and
push it approximately 10 mm (0.39 in)
into the cylinder. Push the ring with
the piston crown so that the ring will
be at a right angle to the cylinder
bore.
a.
10 mm (0.39 in)
Piston pin puller set:
YU-1304/90890-01304
Cylinder bore
"C"
77.00–77.01
mm (3.0315–
3.0319 in)
Taper limit "T"
0.05 mm (0.002
in)
Out of round
"R"
0.05 mm (0.002
in)
"C" = Maximum D
"T" = (Maximum D
1
or D
2
) - (Max-
imum D
5
or D
6
)
"R" = (Maximum D
1
, D
3
or D
5
) -
(Minimum D
2
, D
4
or D
6
)
Piston size "P"
Standard
76.955–76.970
mm (3.0297–
3.0303 in)
Piston-to-cylinder clearance =
Cylinder bore "C" - Piston skirt
diameter "P"
Piston-to-cylinder clear-
ance:
0.030–0.055 mm
(0.0012–0.0022 in)
<Limit>:0.1 mm (0.004
in)
Side clearance:
Standard
<Lim-
it>
Top
ring
0.030–0.065
mm (0.0012–
0.0026 in)
0.12
mm
(0.005
in)
2nd
ring
0.020–0.055
mm (0.0008–
0.0022 in)
0.12
mm
(0.005
in)
Содержание YZ250F X 2008
Страница 2: ......
Страница 3: ...YZ250F X 5XC 28199 34 E0 2008 OWNER S SERVICE MANUAL ...
Страница 4: ......
Страница 39: ...2 17 LUBRICATION DIAGRAMS 1 Crankshaft 2 Oil filter element 3 Oil tank 4 Oil hose A From oil pump ...
Страница 59: ...3 13 ENGINE INTAKE EXHAUST ...
Страница 110: ...4 41 OIL PUMP 15 Rotor housing 1 Order Part name Q ty Remarks ...
Страница 161: ...5 29 STEERING 9 Bearing race 2 Refer to removal section Order Part name Q ty Remarks ...
Страница 170: ...5 38 REAR SHOCK ABSORBER 12 Bearing 2 Refer to removal section Order Part name Q ty Remarks ...
Страница 191: ......
Страница 192: ...PRINTED IN JAPAN E PRINTED ON RECYCLED PAPER YAMAHA MOTOR CO LTD 2500 SHINGAI IWATA SHIZUOKA JAPAN ...


