PM5D / PM5D-RH Quick Start Guide Part 3
25
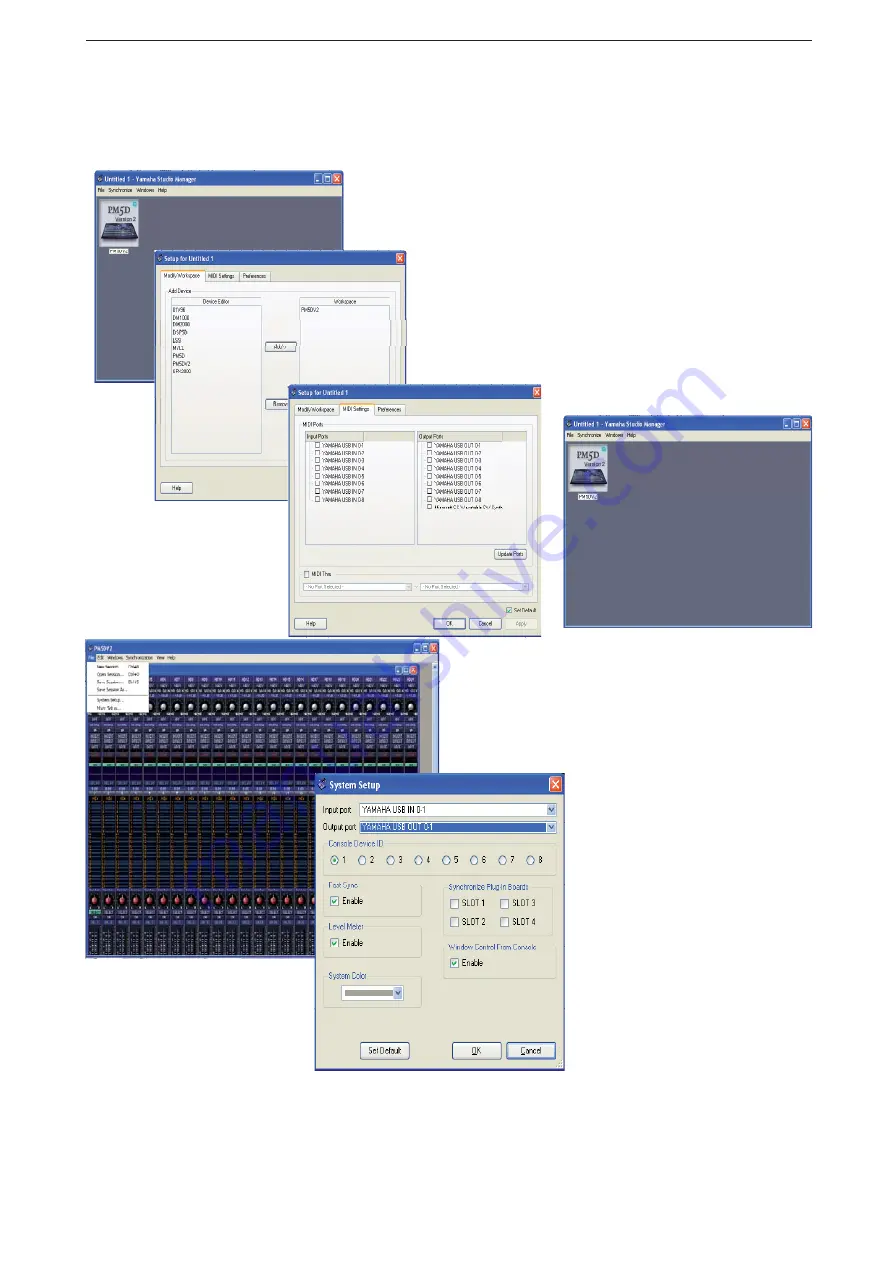
Setting up MIDI ports the fi rst time you go on-line.
There are several stages to set up communication, but at each stage if you set “default” you will not have to set these
again next time you connect. Open Studio Manager from the PC Start Menu or Mac Task bar. Do not open the editor
just yet.
When you open Studio Manager the Editor Icon
screen will show. Instead of double clicking the icon
to enter the editor, click FILE>>>SETUP on a PC or
SM2>>>Preferences on a Mac..
Choose the MIDI Settings tab. If the MIDI driver is
installed correctly there should be a choice of 8 ports, mul-
tiple ports allow for more complex setups. Choose port
0-1 for both Input and Output ports. Check that the Set
default option is checked and click OK. DSP5D has only
one port, labelled either Unit 1 or something you named it
in the DME-N network driver.
Now you can double click to open the Editor window. The
next step is to assign the Editor to those MIDI ports. Click
FILE>>SYSTEM SETUP and choose the ports from the
drop down boxes. Remember to check Set Default and
confi rm with OK.
Now your computer should be on-line with the PM5D. There is no obvious indication of this on the Editor screen. To
check you are on-line it is simplest to drag a screen fader and see if the PM5D fader moves! But if someone is using the
desk you
can
check by opening the Sync window. Click on Windows and Sync or use the short-cut Ctrl+1. At this stage
it is important to understand the connection states that can exist in the system. On-line, off-line, and synchronized.
So it should be understood that there
are two stages in assigning the MIDI-
ports. Firstly all the ports are assigned
in Studio Manager and secondly each
Editor being used is assigned to one of
those chosen ports. It seems compli-
cated if you only have one mixer, but it
is necessary for larger setups.


