background image

9-43

PTT cylinder

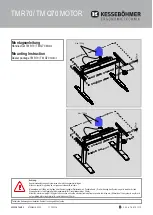
Removing the tilt ram and trim ram

Before removing the tilt cylinder end
screw, make sure that the PTT rams are
fully extended. Otherwise, fluid could be
expelled forcefully from the PTT unit due
to internal pressure.

1.

Connect the battery jumper leads to the
PTT motor lead “1” to fully extend the
PTT rams.

2.

Open the manual valve “1”.

3.

Loosen the tilt cylinder end screw “1”,
and then remove the tilt ram assembly.

4.

Tighten the manual valve “1” to the spec-
ified torque.

5.

Connect the battery jumper leads to the
PTT motor lead “1”, and then remove the
free piston “2”.

When removing the free piston, never
look into the tilt cylinder opening. Other-
wise, fluid could be expelled forcefully
from the PTT unit due to internal pres-
sure.

6.

Loosen the trim cylinder end screws “1”,
and then remove the trim ram assem-
blies.

Ram

PTT motor lead

Battery

Extend

Blue (L)

(+)

Green (G)

(–)

L

G

1

1

1

2

Cylinder end screw wrench “2”: 

90890-06591

Manual valve “1”: 

3 N·m (0.3 kgf·m, 2.2 ft·lb)

PTT motor lead

Battery

Blue (L)

(+)

Green (G)

(–)

1

L

G

2

1

Содержание F150A

Страница 1: ...SERVICE MANUAL 63P 28197 3P 12 F150A FL150A F150B FL150B ...

Страница 2: ...ons and significant changes in specifications and procedures and these are incorporated in successive editions of this manual Also up to date parts information is available on YPEC web Additional information and up to date information on Yamaha products and services are available on Yamaha Service Portal Important information Particularly important information is distinguished in this manual by th...

Страница 3: ...al information 0 Specification 1 Technical feature and description 2 Rigging information 3 Troubleshooting 4 Electrical system 5 Fuel system 6 Power unit 7 Lower unit 8 Bracket unit 9 Maintenance 10 Index Appendix A ...

Страница 4: ......

Страница 5: ...n 0 1 Self protection 0 2 Working with crane 0 2 Handling of gas torch 0 2 Part lubricant and sealant 0 2 Handling of sealant 0 3 Special service tool 0 3 Tightening torque 0 3 Non reusable part 0 3 Disassembly and assembly 0 3 How to use this manual 0 4 Manual format 0 4 Abbreviation 0 5 Lubricant sealant and thread locking agent 0 6 Symbol 0 6 Special service tool 0 8 ...

Страница 6: ...shock Do not touch any electrical parts while start ing or operating the engine Otherwise shock or electrocution could result Propeller Do not hold the propeller with your hands when loosening or tightening the propeller nut Handling of gasoline Gasoline is highly flammable Keep gaso line and all flammable products away from heat sparks and open flames Gasoline is poisonous and can cause injury or...

Страница 7: ...ion If the outboard motor does not have three or more points to be suspended support it using additional ropes or the like so that the outboard motor can be lifted and carried in a stable manner Handling of gas torch Improper handling of a gas torch may result in burns For information on the proper han dling of the gas torch see the operation manual issued by the manufacturer When using a gas torc...

Страница 8: ... large sizes first and then tighten the small sizes starting from the center and moving outward Non reusable part Always use new gaskets seals O rings cot ter pins and so on when installing or assem bling parts Disassembly and assembly Use compressed air to remove dust and dirt during disassembly Apply engine oil to the contact surfaces of moving parts before assembly Install bearings so that the ...

Страница 9: ...o i s n e t x E 6 4 l e w o D 7 2 r e v o C 8 2 l a e S 9 1 e p i p r e t a W 0 1 1 e p i p r e t a W 1 1 1 t e m m o r G 2 1 0 1 M 1 t l o B 3 1 45 mm 1 t i n u r e w o L 4 1 1 r e c a p S 5 1 1 r e l l e p o r P 6 1 r e l l e p o r p S D S t p e c x E 1 r e c a p S 7 1 23 15 14 18 17 19 20 16 7 7 3 4 5 5 13 12 7 10 11 8 9 9 8 5 5 7 25 4 24 6 1 2 2 1 21 22 43 N m 4 3 kgf m 31 7 ft lb 48 N m 4 8 k...

Страница 10: ...pean Norm European standard EX Exhaust F Forward ID Identification IEC International Electrotechnical Commission IN Intake ISO International Organization for Standardization ISC Idle Speed Control N Neutral PCV Pressure Control Valve PORT Port side PTT Power Trim and Tilt R Reverse RON Research Octane Number SAE Society of Automotive Engineers SDS Shift Dampener System STBD Starboard side TCI Tran...

Страница 11: ...he application points Symbol Name Application Yamaha 4 stroke motor oil Lubricant Hypoid gear oil Lubricant Water resistant grease Yamaha grease A Lubricant Low temperature resistant grease Yamaha grease C Lubricant Corrosion resistant grease Yamaha grease D Lubricant Molybdenum disulfide grease Lubricant WR No 2 grease Lubricant Symbol Name Application Gasket Maker Sealant ThreeBond 1280B Sealant...

Страница 12: ...hread locking agent ThreeBond 1401 Thread locking agent ThreeBond 1530D Sealant LOCTITE 271 red Thread locking agent LOCTITE 242 blue Thread locking agent LOCTITE 572 white Sealant Silicone sealant Sealant Symbol Name Application ...

Страница 13: ...Marine Service Division Special service tools with part numbers other than 90890 06883 and FIM20000ME are distributed by the Parts Division Drilling plate 90890 06783 YDIS 2 starter kit 90890 06883 Diagnostic flash 90890 06873 Digital circuit tester 90890 03189 Peak voltage adapter B 90890 03172 Test harness 3 pins 90890 06869 Vacuum pressure pump gauge set 90890 06945 Test harness 3 pins 90890 06...

Страница 14: ...rk gap tester 90890 06754 Test harness 2 pins 90890 06792 Test harness 3 pins 90890 06791 Test harness 2 pins 90890 06867 Fuel pressure gauge 90890 06753 Leakage tester 90890 06840 Small end bearing installer 90890 06528 Vacuum gauge 90890 03159 Fuel injection meter FIM20000ME ...

Страница 15: ...ge extension 90890 06563 Flywheel holder 90890 06522 Flywheel stopper 90890 06598 Flywheel puller 90890 06521 Hydro puller kit 90890 06593 Valve spring compressor 90890 04019 Valve spring compressor attachment 90890 06320 Valve guide remover installer 90890 06801 Valve guide installer 90890 06810 ...

Страница 16: ...0890 04101 Valve seat cutter holder 90890 06316 Valve seat cutter 30 90890 06327 Valve seat cutter 45 90890 06325 Valve seat cutter 60 90890 06324 Valve seat cutter 30 90890 06326 Oil filter wrench 90890 06830 Driver rod L3 90890 06652 Needle bearing attachment 90890 06611 ...

Страница 17: ... puller 90890 06540 Piston ring compressor 90890 05158 Needle bearing attachment 90890 06653 Shift rod socket 90890 06681 Ring nut wrench extension 90890 06513 Ring nut wrench 4 90890 06512 Bearing housing puller claw L 90890 06502 Stopper guide plate 90890 06501 Center bolt 90890 06504 ...

Страница 18: ...890 06535 Driver rod SS 90890 06604 Needle bearing attachment 90890 06610 Bearing depth plate 90890 06603 Bearing inner race attachment 90890 06640 Needle bearing attachment 90890 06654 Drive shaft holder 6 90890 06520 Pinion nut holder 90890 06715 Needle bearing attachment 90890 06608 ...

Страница 19: ...90890 06605 Needle bearing attachment 90890 06612 Bearing outer race attachment 90890 06628 Driver rod LS 90890 06606 Bearing outer race attachment 90890 06619 Ball bearing attachment 90890 06633 Bearing outer race puller assembly 90890 06523 Backlash indicator 90890 06706 Magnet base plate 90890 07003 ...

Страница 20: ...6844 Pinion height gauge 90890 06671 Slide hammer handle 90890 06531 Puller head 90890 06514 Needle bearing attachment 90890 06607 Ring nut wrench 90890 06578 Bearing inner race attachment 90890 06660 Ball bearing attachment 90890 06629 PTT hydraulic gauge adapter 90890 06863 ...

Страница 21: ...ervice tool 0 1 2 3 4 5 6 7 8 9 10 A Hydraulic pressure gauge 90890 06776 06800 Cylinder end screw wrench 90890 06591 Trim tilt wrench 90890 06587 Power tilt wrench 90890 06560 PTT piston vice attachment 90890 06572 ...

Страница 22: ...em 1 7 Fuel injection control system 1 8 Engine speed control system 1 8 PTT system 1 8 Charging system 1 9 Starting system 1 9 Y COP standard for European market and optional for Oceanian market 1 9 Gauge sensor 1 10 Fuel system technical data 1 11 Fuel system 1 11 Power unit technical data 1 12 Power unit 1 12 Cylinder head assembly 1 12 Crankcase assembly 1 13 Lower unit technical data 1 15 Low...

Страница 23: ...ed tightening torque 1 17 Rigging information 1 17 Electrical system 1 17 Fuel system 1 17 Power unit 1 18 Lower unit regular rotation model 1 19 Lower unit counter rotation model 1 19 Bracket unit 1 19 PTT unit 1 20 General tightening torque 1 20 ...

Страница 24: ... Blowby gas reburning system Fuel cooler Vapor gas treatment Freshwater flushing device Speed sensor and water pressure sensor optional b Electrical Electronic fuel injection control Digital ignition control Vaper shut off valve control ISC Idle Speed Control Over rev control Self diagnosis system with flash indicator and YDIS New YDIS version 2 00 or later Conventional or LAN gauges acceptable Fa...

Страница 25: ...A 4 Model variation Level 1 Starting method M Manual start E Electric start W Electric start with manual start Level 2 Control method None Remote control without tiller handle H Tiller handle C Remote control with tiller handle Level 3 Trim and tilt method None Manual tilt D Hydraulic tilt P PT Power tilt T PT T Power trim and tilt Level 4 Lubrication system 2 stroke model None Premixed fuel with ...

Страница 26: ...fixed to the port clamp bracket 1 Model name 2 Approved model code 3 Transom height 4 Serial number Model name Approved model code Starting serial No F150AET 63P 1106291 FL150AET 64P 1013389 F150BET 6BM 1001267 FL150BET 6BN 1000213 YAMAHA MOTOR CO LTD MADE IN JAPAN PAYS D ORIGINE JAPON 1 3 2 4 ...

Страница 27: ...150 HP at 5500 r min FL150AET 110 3 kW at 5500 r min 150 HP at 5500 r min F150BET 110 3 kW at 5000 r min 150 HP at 5000 r min FL150BET 110 3 kW at 5000 r min 150 HP at 5000 r min Full throttle operating range F150AET 5000 6000 r min FL150AET 5000 6000 r min F150BET 4500 5500 r min FL150BET 4500 5500 r min Maximum fuel consumption F150AET 58 4 L h at 5500 r min 15 4 US gal h at 5500 r min 12 8 Imp ...

Страница 28: ...FR5A 11 Firing order 1 3 4 2 Cooling system Water Exhaust system Propeller boss Lubrication system Wet sump Lower unit Gear positions F N R Gear ratio 2 00 28 14 Gear type Spiral bevel gear Clutch type Dog clutch Propeller drive system Spline Propeller direction F150AET Clockwise FL150AET Counter clockwise F150BET Clockwise FL150BET Counter clockwise Propeller mark F150AET M T FL150AET ML TL F150B...

Страница 29: ... F150AET 0 980 L 1 036 US qt 0 862 Imp qt FL150AET 0 870 L 0 920 US qt 0 766 Imp qt F150BET 0 980 L 1 036 US qt 0 862 Imp qt FL150BET 0 870 L 0 920 US qt 0 766 Imp qt 1 If the recommended engine oil grades are not available use engine oil with an API classification of SH SJ or SL and an SAE classification of 15W 40 20W 40 or 20W 50 2 Meeting both API and SAE requirements 3 For engine oil level whe...

Страница 30: ... at cranking unloaded 3 0 V at cranking loaded 21 0 V at 1500 r min loaded 39 0 V at 3500 r min loaded Resistance 459 0 561 0 Ω at 20 C 68 F Air temperature sensor Input voltage 4 75 5 25 V Resistance reference data 2 2 2 7 kΩ at 20 C 68 F 0 32 kΩ at 80 C 176 F Air pressure sensor Input voltage 4 75 5 25 V Output voltage 3 21 V at 20 0 kPa 0 20 kgf cm2 2 9 psi 2 16 V at 46 7 kPa 0 467 kgf cm2 6 8 ...

Страница 31: ...0 0 34 0 Ω at 20 C 68 F Engine speed control system TPS Output voltage reference data 0 703 V with throttle valve fully closed 4 033 V with throttle valve fully open Throttle valve opening angle reference data 0 1 degrees with throttle valve fully closed 83 2 degrees with throttle valve fully open Input voltage 4 75 5 25 V ISC valve Input voltage 12 V Oil pressure sensor Input voltage 4 75 5 25 V ...

Страница 32: ...aded 13 V at 3500 r min loaded Starting system Starter motor Type Sliding gear Output 1 40 kW Cranking time limit 30 seconds Commutator Standard diameter 29 0 mm 1 14 in Wear limit 28 0 mm 1 10 in Standard undercut 0 8 mm 0 03 in Wear limit 0 2 mm 0 01 in Brush Standard length 15 5 mm 0 61 in Wear limit 9 5 mm 0 37 in Y COP standard for European market and optional for Oceanian market Receiver Inp...

Страница 33: ... Input voltage 4 75 5 25 V Output voltage reference data 2 5 V at 392 0 kPa 3 92 kgf cm2 56 8 psi 4 5 V at 784 0 kPa 7 84 kgf cm2 113 7 psi Speed sensor Input voltage 4 75 5 25 V Output voltage reference data 2 5 V at 392 0 kPa 3 92 kgf cm2 56 8 psi 4 5 V at 784 0 kPa 7 84 kgf cm2 113 7 psi ...

Страница 34: ...d Fuel filter assembly Fuel inlet holding pressure positive pressure 200 kPa 2 0 kgf cm2 29 0 psi Fuel outlet holding pressure negative pressure 80 kPa 0 8 kgf cm2 11 6 psi Primer pump Fuel inlet holding pressure positive pressure 166 7 kPa 1 67 kgf cm2 24 2 psi Throttle link Roller clearance 0 50 mm 0 02 in Vapor separator tank Float height 55 0 61 0 mm 2 2 2 4 in Canister Holding pressure positi...

Страница 35: ...nt temperature 20 C 68 F fully open throttle with spark plugs removed from all cylinders 2 For the checking method see Checking the oil pressure 7 1 The figures are for reference only Cylinder head assembly Valve Clearance Intake 0 17 0 24 mm 0 0067 0 0094 in Clearance Exhaust 0 31 0 38 mm 0 0122 0 0150 in Margin thickness Intake 0 40 0 80 mm 0 0157 0 0315 in Margin thickness Exhaust 0 80 1 20 mm ...

Страница 36: ...r 93 921 93 941 mm 3 6977 3 6985 in Measuring point 13 5 mm 0 53 in Piston clearance 0 030 0 048 mm 0 0012 0 0019 in Ring groove Top 1 23 1 25 mm 0 0484 0 0492 in Ring groove 2nd 1 22 1 24 mm 0 0480 0 0488 in Ring groove Oil 2 51 2 53 mm 0 0988 0 0996 in Pin boss inside diameter 21 021 21 031 mm 0 8276 0 8280 in Pin outside diameter 21 008 21 017 mm 0 8271 0 8274 in Cylinder Bore 94 000 94 017 mm ...

Страница 37: ...necting rod Small end inside diameter 21 022 21 037 mm 0 8276 0 8282 in Big end inside diameter 53 025 53 045 mm 2 0876 2 0884 in Big end side clearance 0 14 0 31 mm 0 006 0 012 in Big end oil clearance 0 030 0 057 mm 0 0012 0 0022 in Crankshaft Journal diameter 51 980 52 000 mm 2 0465 2 0472 in Crankpin diameter 49 980 50 000 mm 1 9677 1 9685 in Runout 0 03 mm 0 0012 in Crankpin width 22 000 22 1...

Страница 38: ...aft Runout 1 0 mm 0 04 in 1 Figures obtained using the special service tools Lower unit assembly counter rotation model Lower unit Holding pressure 69 0 kPa 0 69 kgf cm2 10 0 psi Gear backlash Forward gear backlash 1 FL150AET 0 15 0 42 mm 0 0059 0 0165 in FL150BET 0 15 0 49 mm 0 0059 0 0193 in Reverse gear backlash 1 FL150AET 0 24 0 58 mm 0 0094 0 0228 in FL150BET 0 24 0 65 mm 0 0094 0 0256 in Ava...

Страница 39: ... Down 5 85 8 85 MPa 58 5 88 5 kgf cm2 848 3 1283 3 psi Up 11 2 13 2 MPa 112 0 132 0 kgf cm2 1624 0 1914 0 psi Motor commutator Standard diameter 22 00 mm 0 8661 in Limit 21 00 mm 0 8268 in Standard undercut 1 50 mm 0 0591 in Limit 1 00 mm 0 0394 in Motor brush Standard length 10 00 mm 0 3937 in Limit 3 5 mm 0 14 in ...

Страница 40: ...y cable nut 9 0 9 6 6 Clamp screw M5 2 0 2 1 5 Receiver screw M4 4 0 4 3 0 Part to be tightened Screw size Tightening torques N m kgf m ft lb Control unit screw M6 4 0 4 3 0 Buzzer screw ø6 2 0 2 1 5 Transmitter screw ø2 0 1 0 01 0 1 Part to be tightened Screw size Tightening torques N m kgf m ft lb Fuel cup assembly 5 0 5 3 7 Fuel pump screw M6 4 0 4 3 0 Fuel pump bolt M6 10 1 0 7 4 Intake silenc...

Страница 41: ...lt 1st M7 9 0 9 6 6 2nd 17 1 7 12 5 Driven sprocket bolt M10 60 6 0 44 3 Cylinder head cover plate screw M4 2 0 2 1 5 Cylinder head bolt 1st M8 14 1 4 10 3 2nd 28 2 8 20 7 1st M10 28 2 8 20 7 2nd 56 5 6 41 3 3rd 90 Exhaust cover bolt 1st M6 6 0 6 4 4 2nd 12 1 2 8 9 Thermostat cover bolt 1st M6 6 0 6 4 4 2nd 12 1 2 8 9 Exhaust cover plug M14 23 2 3 17 0 M18 56 5 6 41 3 Oil pump cover screw M6 4 0 4...

Страница 42: ...M5 1 0 1 0 7 Part to be tightened Screw size Tightening torques N m kgf m ft lb Drain screw 9 0 9 6 6 Check screw 9 0 9 6 6 Propeller nut 55 5 5 40 6 Trim tab bolt M10 43 4 3 31 7 Lower case mounting bolt M10 48 4 8 35 4 Ring nut 145 14 5 106 9 Pinion nut 95 9 5 70 1 Water inlet cover screw M5 1 0 1 0 7 Part to be tightened Screw size Tightening torques N m kgf m ft lb Shift position switch screw ...

Страница 43: ... to be tightened Screw size Tightening torques N m kgf m ft lb Lower mounting shaft bolt M10 39 3 9 28 8 Reservoir cap 7 0 7 5 2 Main valve 11 1 1 8 1 Manual valve 3 0 3 2 2 Tilt ram 65 6 5 47 9 Tilt piston screw M6 7 0 7 5 2 Trim cylinder end screw 160 16 0 118 0 Tilt cylinder end screw 150 15 0 110 6 PTT motor mounting bolt M6 7 0 7 5 2 Reservoir mounting bolt M6 7 0 7 5 2 Pump bracket bolt M4 4...

Страница 44: ...ts 2 8 YDIS 2 9 Overview 2 9 New functions 2 10 Logging 2 11 Power unit system 2 12 Shimless valve lifter 2 12 Fuel system 2 13 Fuel diagram 2 13 Vapor gas diagram 2 14 Lubrication system 2 15 Lubrication diagram 2 15 Cooling system 2 16 Cooling diagram 2 16 Intake and exhaust system 2 17 Intake and exhaust diagram 2 17 Lower unit 2 18 Propeller SDS 2 18 PTT unit 2 19 Trim up and tilt up function ...

Страница 45: ...0 1 2 3 4 5 6 7 8 9 10 A Technical feature and description Trim ram retraction when there is no load on the tilt ram and trim ram 2 21 Stationary condition 2 22 Shock absorbing function 2 22 ...

Страница 46: ... on the YDIS and flash indicator It is also equipped with Y COP as an anti theft measure standard for European market and optional for Oceanian market 1 Pulser coil 2 TPS 4 Oil pressure sensor 3 Air pressure sensor 5 Engine temperature sensor 6 Air temperature sensor 7 Thermoswitch 8 Shift cut off switch 9 Shift position switch 10 Water detection switch 11 Water pressure sensor optional 12 Speed s...

Страница 47: ...hift cut off switch 9 Shift position switch 10 Water detection switch 11 Water pressure sensor optional 12 Speed sensor optional 13 Vapor shut off valve 14 Ignition coil 15 High pressure fuel pump 16 ISC valve 17 Fuel injector 18 Idle speed control 19 Vapor shut off valve control 20 Fuel control 21 Ignition control 22 Engine ECM 23 6Y8 Multifunction Meter 24 Y COP 25 Hub 26 Battery 27 YDIS ...

Страница 48: ...2 3 Electronic control system Engine ECM component 2 3 4 6 5 1 8 7 10 9 11 12 14 15 16 13 17 ...

Страница 49: ... 6 Oil pressure sensor Detects the engine oil pressure 7 Water detection switch Detects water intrusion in fuel filter 8 Air temperature sensor Detects the intake air temperature 9 Air pressure sensor Detects the intake air pressure 10 ISC valve Adjusts the flow of air to the engine when idling 11 Engine temperature sensor Detects the engine temperature 12 TPS Detects the throttle valve opening 13...

Страница 50: ...ontrol is activated then these are to be activated in the same way for the other outboard motor that is operating normally Fuel injection will be skipped in stages to limit engine speed to approximately 2000 3500 r min Shift cut off control Shift cut off switch is ON engine speed is 400 2000 r min This allows smooth engagement and disengagement of the dog clutch 400 729 r min Retards ignition timi...

Страница 51: ...s more than 2000 r min 23 Air temperature sensor Open or short circuit in the air temperature sensor circuit Output voltage is less than 0 1 V or more than 4 61 V Set to 40 C 104 F 1 28 Shift position switch Cranking while in gear Cranking while the shift position circuit is open circuited 29 Air pressure sensor Open or short circuit in the air pressure sensor circuit Output voltage is less than 0...

Страница 52: ...ch is turned to OFF TIP The receiver can register up to 5 transmitters Additional transmitters cannot be registered if none of the transmitters is functioning properly The transmitter and receiver function within a distance of approximately 3 m 10 ft Installation location requires special attention to avoid electrical interference obstructions or water exposure 1 Y COP 2 Transmitter 3 Receiver 4 H...

Страница 53: ...or well when tilted up This tilt limiter consists of a magnet affixed to a through tube and a sensor on a swivel bracket The movement of the swivel bracket when tilting the outboard motor up will move the sensor position When the mark a on the magnet is aligned with the mark b on the sensor power to the PTT for tilting the outboard motor up will be cut off 1 PTT switch UP 2 Tilt limiter unit 3 PTT...

Страница 54: ...IP There is no compatibility between the YDIS version 2 00 and version 1 series Use of the Windows function 1 to change the screen size and to end programs is now possible Displays the current level 2 Displays the communications status Communicating 3 Communications error 4 For connection methods see Connecting the communication cable 4 5 For menu levels see Function 4 2 For details of operation m...

Страница 55: ... commercially available external instruments the external input function enables display of this information on the engine monitor The new adapter has 1 6 MB of memory meaning that logging of engine monitor information is possible while the computer is not connected The adapter has an internal battery which is recharged by being connected to the computer or to the outboard motor while the engine s...

Страница 56: ...ting and disconnecting the USB cable between the computer and adapter The adapter has a built in battery Therefore during operation this is recharged using electricity from the engine When the engine stops backup uses the internal battery Guaranteed for 48 hours continuous operation with the battery charged for one hour If the internal battery becomes depleted recorded data will be deleted Recordi...

Страница 57: ...ers 1 have been adopted in place of the valve shims previously used 2 The valve lifters are available in different thicknesses a Therefore the valve clearance b can be adjusted by replacing the current valve lifter with a new valve lifter of the appropriate thickness A Previous L4 model B New L4 model b a A B 2 1 ...

Страница 58: ... Combustion chamber 15 Fuel cooler A Fuel flow 4 Low pressure fuel pump 10 Pressure regulator 2 Primer pump 1 Fuel tank 3 Fuel filter 8 Filter 5 Filter 7 Float chamber 9 High pressure fuel pump 11 Fuel rail 12 Fuel injector 1 14 Combustion chamber 1 14 Combustion chamber 2 14 Combustion chamber 3 14 Combustion chamber 4 13 Intake manifold 6 Vapor separator 2 11 15 Fuel cooler 12 Fuel injector 2 12...

Страница 59: ...hambers 1 Vapor separator 2 Filter 3 Canister 4 Vapor shut off valve 5 Intake manifold 6 Combustion chamber 7 Filter 8 Atmosphere cowl outside A Vapor gas flow B Air flow D Purified gas B A D 6 Combustion chamber 1 6 Combustion chamber 2 6 Combustion chamber 3 6 Combustion chamber 4 5 Intake manifold 1 Vapor separator 8 Atmosphere cowl outside 4 Vapor shut off valve 2 Filter 2 7 Filter 7 3 Caniste...

Страница 60: ... FL150A 12 Crankcase 13 Camshaft journal 14 Camshaft 15 Intake and exhaust valves 16 Cylinder head 17 Relief valve A Engine oil flow 16 Cylinder head 6 Oil pressure sensor 8 Crank pin 9 Piston 10 Sleeve 4 Oil filter 17 Relief valve 3 Oil pump 2 Oil strainer 1 Oil pan 7 Crankshaft main journal 14 Camshaft 15 Intake and exhaust valves 13 Camshaft journal 5 Main gallery A 12 Crankcase 11 Balancer F15...

Страница 61: ...ase 13 Propeller boss 14 Trim tab water inlet 15 Fuel cooler 16 Cooling water pilot hole 17 Flushing device A Cooling water flow 1 Water 2 Water inlet 3 Water pump 4 Oil pan 5 Exhaust guide 6 Exhaust cover 7 Cylinder block 8 Cylinder head 7 Cylinder block 13 Propeller boss 12 Lower case 11 Upper case muffler 10 PCV 14 Trim tab water inlet 16 Cooling water pilot hole 15 Fuel cooler 9 Thermostat 2 3...

Страница 62: ...e silencer 2 Throttle body 3 Intake manifold 4 Exhaust cover 5 Exhaust guide 6 Exhaust manifold 7 Muffler 8 Propeller boss A Intake air flow B Exhaust gas flow 4 Exhaust cover 5 Exhaust guide 6 Exhaust manifold 7 Muffler 8 Propeller boss 1 Intake silencer 2 Throttle body 3 Intake manifold A B ...

Страница 63: ...es a damper 1 to reduce the shock when the out board motor is shifted into gear and eliminates the clunk that is sometimes heard When shifting gears the protrusions a on the dedicated spacer 2 transmit the rotational force of the propeller shaft directly to the propeller 3 A Neutral B Shift in 1 2 3 a a A B ...

Страница 64: ...p the trim rams 8 and the PTT fluid in the upper chambers of the trim cylinders 6 returns to the reservoir 9 The PTT fluid pressure pushes up the tilt ram 10 and the PTT fluid in the upper chamber of the tilt cylinder 7 passes through the down passage returning to the gear pump When tilt up operation is complete the PTT fluid pressure increases When this exceeds 12 2 MPa 122 0 kgf cm2 1769 0 psi t...

Страница 65: ... PTT fluid in the lower chamber of the tilt cylinder 6 returns to the gear pump 2 When the tilt ram 7 drops the trim rams 8 are pushed down due to the weight of the outboard motor and the PTT fluid is sucked up from the reservoir 9 to the upper chamber of the trim cylin ders 10 When tilt down operation is complete the PTT fluid pressure increases When this exceeds 7 35 MPa 73 5 kgf cm2 1065 8 psi ...

Страница 66: ...rom the trim cylinder 5 lower chambers which have little resistance to suction This allows the trim rams 6 to be retracted Trim ram retraction when there is no load on the tilt ram and trim ram When the PTT unit has been removed from the outboard motor operating the PTT motor towards the DN side will cause the tilt ram 2 to operate in the same way as when tilting the outboard motor down If the til...

Страница 67: ... upper chamber a to increase the tilt piston absorber valves 2 will open so that PTT fluid enters the space between the tilt piston 3 and the free piston 4 to decrease the PTT fluid pres sure As a result the damping effect of the tilt piston absorber valves 2 protects the PTT unit from damage before the tilt piston 3 strikes the top of the tilt cylinder After the collision a force is gener ated as...

Страница 68: ...hrottle cable 3 11 Installing the 6Y8 Multifunction Meter harness 3 12 Installing the conventional gauge harness 3 12 Installing the main wiring harness 3 13 Installing the rigging grommet 3 13 Optional equipment 3 14 Installing the isolator lead 3 14 Installing the water pressure sensor 3 14 Installing the speed sensor 3 15 Installing the tilt limiter 3 16 Setting the tilt limiter 3 18 Deactivati...

Страница 69: ...n 6Y8 Multifunction Meter 3 29 Single outboard motor application conventional gauge 3 31 Twin outboard motor application 6Y8 Multifunction Meter 3 33 Twin outboard motor application conventional gauge 3 35 Rigging recommendation 3 37 Extension length recommendation for battery cable 3 37 Propeller selection 3 38 Propeller size 3 38 Selection 3 38 ...

Страница 70: ...the transom can change the center of gravity buoyancy operating bal ance or performance of the boat which could cause loss of control or swamping Consult the boat manufacturer for the maximum engine weight allowable on the transom which is different from the overall boat capacity Overloading the transom with an outboard motor that is too heavy could also damage the hull transom deck or helm area a...

Страница 71: ...units at handling 3 IMPORTANT This unit delivered to carrier in a good condition For protection against loss due to dam age inspect thoroughly If damage is noted make note on freight bill Shipper assumes no further liability to the transportation company Your claim should be filed against carrier for damage of any nature 4 Lifting fork insert position 5 Product barycentric position 6 Stack limit M...

Страница 72: ...pping and then check the outboard motor for concealed dam age 5 Remove the top cowling and then remove the flywheel magnet cover 1 6 Install the lifting harnesses 1 to the engine hangers 2 7 Tension the lifting harnesses TIP Place a rag 1 between the flywheel magnet and the lifting harness 8 Remove the skeg holder 1 9 Lift up the outboard motor carefully along with the bottom frame 1 Make sure tha...

Страница 73: ...3 4 Uncrating 0 1 2 3 4 5 6 7 8 9 10 A 11 Remove the steering retainer and then install a hydraulic steering cylinder or steering cable following the recommen dation of the manufacturer 1 ...

Страница 74: ...he outboard motors in twin or triple installation 2 Transom height 660 26 0 T1 256 10 1 433 17 0 629 24 8 L 1032 40 6 X 1148 45 2 164 6 5 698 27 5 75 3 0 210 8 3 27 1 1 915 36 0 769 30 3 455 17 9 45 1 8 16 0 6 162 6 4 12 7 0 4 3 5 646 25 4 1 H 2 L 946 37 2 X 1073 42 2 L 35 1 4 X 43 1 7 L 516 20 3 X 643 25 3 L 787 31 0 X 864 34 0 L 60 2 4 X 80 3 1 mm in ...

Страница 75: ... 5 6 7 8 9 10 A Clamp bracket TIP The dimension values may include reference values 82 3 2 13 0 5 180 7 1 163 5 6 4 254 10 0 55 5 2 2 367 14 4 52 2 0 163 5 6 4 125 4 4 9 125 4 4 9 102 4 9 102 4 9 180 7 1 13 0 5 50 8 2 0 18 5 0 7 mm in ...

Страница 76: ...oth sides of hull and have another measurement points TIP Make sure that distance a is equal to dis tance b and distance c is equal to dis tance d A Hull without strakes B Hull with strakes C L Centerline of the transom For twin outboard motor installation place the outboard motors so that the distance from the C L of each outboard motor to the C L of the boat transom are equal on both sides TIP M...

Страница 77: ...the surface of the boat transom using a 13 0 mm 0 5 in a drill bit C L Centerline of the transom 6 Apply sealant to the mounting holes and then secure the outboard motor using the included mounting bolts 1 small wash ers 2 large washers 3 and nuts 4 Make sure that there is no clearance between the surfaces of the boat transom and the clamp brackets Otherwise the clamp brackets or boat transom may ...

Страница 78: ...Y8 Multifunction Meter harness 7 Fuel hose 8 Speedometer hose 9 Shift cable 10 Throttle cable Installing the shift cable Always perform the cable adjustment in advance following the procedures in the remote control operation manual 1 Remove the rubber seal 1 from the retaining plate 2 and then remove the retaining plate 2 2 Fully screw in the shift cable joint 1 to the shift cable 2 3 Move the rem...

Страница 79: ...he shift cable joint must be screwed in 8 0 mm 0 31 in or more a TIP When it is not possible to ensure cable screw in length of 8 0 mm 0 31 in or more remove the shift cable holder 3 and then reinstall it to the hole b or c to adjust the length 8 Install the clip 1 and then tighten the shift cable locknut 2 to the specified torque 9 Check the shift cable for proper opera tion 2 1 1 1 2 3 2 b 1 2 a...

Страница 80: ...tle lever 2 1 so that it con tacts the stopper 2 on the cylinder block 5 Adjust the throttle cable joint 1 and then install the throttle cable joint 1 to the pin 2 of the throttle lever 2 The throttle cable joint must be screwed in 8 0 mm 0 31 in or more a TIP Pull the inner cable 3 to remove any free play in the cable When it is not possible to ensure cable screw in length of 8 0 mm 0 31 in or mo...

Страница 81: ...e 6Y8 Multifunction Meter harness 1 Remove the cap 1 2 Connect the 6Y8 Multifunction Meter har ness coupler a 3 Remove the yellow tape 1 and caps 2 4 Connect the trim sensor coupler a Installing the conventional gauge harness 1 Remove the gauge harness coupler a from the bracket 1 2 Remove the cap 1 3 Connect the gauge harness coupler a Throttle cable locknut 2 5 N m 0 5 kgf m 3 7 ft lb 1 2 1 a 2 ...

Страница 82: ...sing the holder 1 Installing the rigging grommet 1 Route each harness through the proper hole in the rigging grommet See Rig ging grommet description 3 9 2 Align the white tape a on the battery cable 1 with the inner end of the rigging grommet 3 Align the white mark a on the fuel hose 1 with the outer end of the rigging grom met 4 Install the retaining plate 1 5 Install the rubber seal 2 TIP Make ...

Страница 83: ... Meter set up manual for details of the components 1 Install the water pressure sensor 1 to the water pressure sensor adapter 2 and then tighten the water pressure sen sor 1 to the specified torque 2 Remove the plug 1 3 Install a new gasket 1 and the water pressure sensor adapter 2 and then tighten the water pressure sensor adapter 2 to the specified torque 4 Remove the water pressure sensor cou p...

Страница 84: ... ple 2 and then fasten it using the plas tic tie 3 4 Cut the corrugated tube 1 to 300 0 mm 11 8 in 5 Cut the corrugated tube 2 to 270 0 mm 10 6 in 6 Install the corrugated tubes 1 and 2 7 Install the speed sensor 1 to the speed sensor adapter 2 and then tighten the speed sensor 1 to the specified torque 8 Remove the bracket 1 9 Connect the extension hose 1 to the speed sensor adapter 2 and then in...

Страница 85: ...s any grease clean the surface of through tube 1 to which the holder is to be installed 3 Install the holder 2 so that the protru sion a on the magnet lever is aligned with the groove b in the through tube 1 and the protrusion c on the holder is aligned with the hole d in the through tube 1 4 Install the collar 3 and tighten the clamp screw 4 temporarily TIP Tighten the clamp screw 4 to the extent...

Страница 86: ...tic tie 1 and then pull the PTT motor lead 2 out of the bottom cowling 11 Route the tilt limiter leads 1 through the hole in the grommet 2 and into the bot tom cowling TIP Pass the tilt limiter leads one by one through the hole in the grommet 12 Route the PTT motor leads 1 through the hole in the grommet 2 and into the bottom cowling TIP Pass the PTT motor leads one by one through the hole in the ...

Страница 87: ...er couplers of the main harness side with the tilt limiter cou plers a of the tilt limiter side of the same wire colors 19 Connect the PTT motor leads 1 and then tighten the PTT motor lead bolt 2 to the specified torque 20 Connect the battery cables 3 and then tighten the battery cable nut 4 to the specified torque 21 Install the rubber cap 5 22 Install the junction box cover Setting the tilt limi...

Страница 88: ... TIP The scales on the sensor indicate the approximate angles from the full trim down position Example If the desired tilt up angle is 35 align the mark a on the magnet with the scale mark b on the sensor 5 Operate the PTT switch on the bottom cowling to tilt the outboard motor up 6 Check that the outboard motor stops at set position 7 Tilt the outboard motor down to adjust the position of the mag...

Страница 89: ...l the receiver in a location where it will be exposed to water Do not cover the receiver with metal objects Otherwise signals may not be received 1 Install the receiver 1 and then tighten the receiver screws 2 to the specified torque TIP Mount the receiver within 3 m 10 ft from the steering position 2 Connect the Y COP wires See System diagram 3 29 Registering the receiver ID to the ECM 1 Check th...

Страница 90: ...the engine start switch to ON TIP If the outboard motor is equipped with the 6Y8 Multifunction Meter is displayed on the tachometer when the engine start switch is turned to ON 7 Push the unlock button 1 of the trans mitter Check that the buzzer of the receiver will sound 2 short beeps TIP If the outboard motor is equipped with the 6Y8 Multifunction Meter 0 is displayed on the tachometer when the ...

Страница 91: ...ory battery When only one battery is used for one engine connect the positive battery cable and isola tor lead to the positive battery terminal If the isolator lead is left unconnected accidental contact of the isolator lead with the negative terminal of the battery can cause a short cir cuit which may result in a fire When using a dual battery installation a negative battery cable must be install...

Страница 92: ...or lead 3 Red 4 Black 1 Outboard motor 2 Isolator lead 3 Battery switch 4 Red 5 Black 3 Red 4 Black 2 Isolator lead STBD PORT 1 Outboard motor 1 Outboard motor 3 Red 4 Black 4 Black ON OFF 3 Battery switch 4 Red 5 Black 2 Isolator lead 1 Outboard motor ...

Страница 93: ...oat system 5 Black 6 Red ON OFF ON OFF STBD PORT 3 Battery switch 5 Black 2 Isolator lead 2 Isolator lead 1 Outboard motor 1 Outboard motor 4 Red 5 Black 4 Red 5 Black 3 Battery switch ON OFF 5 Black 6 Red 5 Black 3 Navigation system STBD PORT ON OFF 4 Boat system 2 Battery switch 2 Battery switch 1 Outboard motor 1 Outboard motor 6 Red 6 Red 6 Red 5 Black 5 Black 5 Black ...

Страница 94: ...t in a fire When using a house battery a negative battery cable must be installed between the house battery and the engine battery This cable must be sized equivalent to the engine battery cables or larger AWG cable size in accordance with ABYC specifications Battery switches must be capable of meeting intermittent and continuous current ratings for engines and accessories 1 Outboard motor 2 Isola...

Страница 95: ...ead 3 Red 4 Black 5 House battery 1 Outboard motor 2 Isolator lead 3 Black 4 Red 5 Battery switch 6 House battery 1 Outboard motor 2 Isolator lead 5 House battery 4 Black 3 Red 4 Black 1 2 2 Isolator lead 6 House battery 4 Red 5 Battery switch 1 Outboard motor 3 Black 4 Red 3 Black ...

Страница 96: ...STBD PORT 5 Red 4 Battery switch 1 Outboard motor 1 Outboard motor 2 Isolator lead 2 Isolator lead 3 Black 3 Black 3 Black 4 Battery switch 5 Red 4 Battery switch 5 Red 6 House battery 3 Black ON OFF 1 2 1 2 STBD PORT 2 Isolator lead 1 Outboard motor 1 Outboard motor 2 Isolator lead 3 Black 3 Black 3 Black 3 Black 4 Battery switch 4 Battery switch 4 Battery switch 6 House battery 5 Red 5 Red 5 Red...

Страница 97: ... STBD PORT 2 Isolator lead 6 House battery 5 Red 4 Battery switch 1 Outboard motor 3 Black 1 Outboard motor 2 Isolator lead 4 Battery switch 5 Red 3 Black 3 Black 3 Black 5 Red 5 Red STBD PORT ON OFF ON OFF ON OFF 2 Isolator lead 2 Isolator lead 6 House battery 6 House battery 4 Red 3 Battery switch 1 Outboard motor 5 Black 5 Black 5 Black 1 Outboard motor 3 Battery switch 5 Black 5 Black 4 Red 4 ...

Страница 98: ...3 29 System diagram System diagram Single outboard motor application 6Y8 Multifunction Meter G B Y Y Y R 1 2 B P P 1 2 3 5 6 7 8 8 8 8 9 10 11 12 13 14 15 a b c c c b 4 ...

Страница 99: ...Power wire 8 Pigtail bus wire 9 Single hub 10 Main bus wire 11 Hub 12 Terminal resistor 13 Tachometer unit 14 Speedometer unit 15 Receiver a Power port b Bus port c Device port 1 Install the waterproof cap to the open ter minal 2 Y COP standard for European market and optional for Oceanian market Color code B Black G Green P Pink R Red Y Yellow ...

Страница 100: ...motor application conventional gauge IN UP OUT W 1 Gy P B P B Pu Gy P W G R Gy Pu W Pu W G W O B Pu Pu W R W R G R G W G R G Y R R R B B W W W R P P O O B W G P P W R B B O O O B B R Y L B G 1 Y 1 2 3 4 5 6 7 8 9 10 11 R B G Y L Y L Y 12 ...

Страница 101: ... flow sensor 7 GPS 8 Speedometer hose 9 Gauge harness 10 Main wiring harness 11 Fuel hose 12 Lamp switch 1 When a GPS NMEA0183 is used a speedometer hose is not required Color code B Black G Green Gy Gray L Blue O Orange P Pink Pu Purple R Red W White Y Yellow G R Green Red G W Green White O B Orange Black P B Pink Black P W Pink White Pu W Purple White W R White Red ...

Страница 102: ...rd motor application 6Y8 Multifunction Meter B P B P B W L Y Y Y B B R R R R 1 P P 4 4 3 P P 3 2 1 1 6 7 8 9 9 10 11 12 12 12 12 12 12 12 12 9 11 13 13 14 14 15 16 16 17 18 19 19 20 21 22 23 a b c c c b a b c c c b a b c c c b A B 5 ...

Страница 103: ...esistor 12 Pigtail bus wire 13 Main bus wire 14 Cap red 15 Cap white 16 Tachometer unit 17 Fuel meter unit 18 Speedometer unit 19 Fuel tank fuel level sensor 20 GPS 21 Multisensor speed water temperature and water depth 22 Receiver 23 Power distribution wire a Power port b Bus port c Device port A PORT B STBD 1 Y COP standard for European market and optional for Oceanian market Color code B Black ...

Страница 104: ...de h Pu Pu B B Br Br B B O O O Y Y Y Y Y Y Y Y Y Y L L L R R R R R G G G G G R R G B B B B B B B B L G G P Gy Gy G W G W G W W R Pu W O B W R Pu W Pu W G R G R O B G R G R Gy Gy P P P P P W W B R R B W Pu Pu Pu O O O B B B P W P B P B Gy G P P P W G R G R P B P B Gy G P P W W W W B B Br Br Br Br R Br Br B Y L Lg G R L W R R G P Y P Sb R Lg Sb B Br Br Br B Br Lg R Sb R Lg Sb B B R W 1 1 IN UP OUT I...

Страница 105: ...r 8 GPS 9 Speedometer hose 10 Gauge harness 11 Main wiring harness 12 Fuel hose 13 Lamp switch 1 When a GPS NMEA0183 is used a speedometer hose is not required Color code B Black Br Brown G Green Gy Gray L Blue Lg Light green O Orange P Pink Pu Purple R Red Sb Sky blue W White Y Yellow G R Green Red G W Green White O B Orange Black P B Pink Black P W Pink White Pu W Purple White W R White Red ...

Страница 106: ...n length is the total combined length of the positive and negative battery cables Select an extension battery cable and terminal that meet ABYC requirements or the equivalent Select the battery stud that is best suited to the terminal size Solder the cable and terminal connections to prevent them from corroding Ambient temperature above 0 C 32 F Battery requirements Cable specifications Unit Minim...

Страница 107: ...nches c Propeller type propeller mark Selection With the engine speed at full throttle operating range and under a maximum boat load the engine speed should be within the upper half of the full throttle operating speed range Regular rotation model a b c a b c Full throttle operating range F150A FL150A 5000 6000 r min Full throttle operating range F150B FL150B 4500 5500 r min Blade Dia in Pitch in ...

Страница 108: ...T Stainless steel 6D0 45974 00 3 15 1 2 17 T Stainless steel 6CE 45978 00 SDS 1 3 15 1 4 19 T Stainless steel 6CE 45970 00 SDS 1 3 15 21 T Stainless steel 6CE 45972 00 SDS 1 3 14 3 4 23 T Stainless steel 6CE 45974 00 SDS 1 4 15 21 T Stainless steel 6BR 45B70 00 00 4 15 22 T Stainless steel 6BR 45B72 00 00 4 15 23 T Stainless steel 6BR 45B74 00 00 4 15 21 T Stainless steel 6CE 45B70 00 00 SDS 1 4 1...

Страница 109: ...ess steel 6R1 45974 A0 3 15 1 2 17 TL Stainless steel 6D1 45978 00 3 15 1 4 19 TL Stainless steel 6D1 45970 00 3 15 21 TL Stainless steel 6D1 45972 00 3 14 3 4 23 TL Stainless steel 6D1 45974 00 3 15 1 2 17 TL Stainless steel 6CF 45978 00 SDS 1 3 15 1 4 19 TL Stainless steel 6CF 45970 00 SDS 1 3 15 21 TL Stainless steel 6CF 45972 00 SDS 1 3 14 3 4 23 TL Stainless steel 6CF 45974 00 SDS 1 4 15 21 T...

Страница 110: ...3 41 Propeller selection MEMO ...

Страница 111: ... troubleshooting 4 6 Troubleshooting procedure 4 6 Troubleshooting the power unit using the YDIS 4 6 Trouble code and checking step 4 8 Troubleshooting the power unit using the diagnostic flash indicator 4 10 Troubleshooting the power unit trouble code not detected 4 11 Troubleshooting the PTT unit 4 16 Troubleshooting the lower unit 4 17 ...

Страница 112: ... tool functions that allow it to respond to new models and technologies maintaining compatibility with regulations This manual contains the model specific information See YDIS Ver 2 00 or later instruction manual for detailed information Basic components No Part name Q ty Remarks 1 YDIS 2 starter kit 1 90890 06883 2 CD ROM 1 Software and instruction manual 3 Adapter 1 4 USB cable 1 5 m 16 4 ft 5 A...

Страница 113: ...Engine operating hours by RPM 8 Engine Monitor 12 Component Test 15 Data Logger 19 Record Set 20 Show Data 21 Clear Data 18 Logging 14 Active Test 13 Stationary Test 1 Start 22 Boat System 23 Tilt Limiter 24 R C System Reset 25 Maintenance 26 Engine oil change record 27 Update 28 Setting 29 Off Line 31 Communication List 32 Bus Statistics 30 CAN Information 16 Logger Graph 17 ECM Rec Graph 5 Diagn...

Страница 114: ...uble codes displayed are the same as those described in this chapter See Trouble code and checking step 4 8 7 Engine operating hours by RPM Displays both operating hours and total operating hours for different engine speeds 8 Engine Monitor Displays engine ECM conditions sensor information in real time 9 Digital Display displays these in digital form and 10 Graph Display displays these in graph fo...

Страница 115: ...o update the database when update information is provided 28 Setting Switches the language to use in the YDIS English French Spanish Japanese 29 Off Line Displays graph data saved in the Engine Monitor Graph Display and Logging even when the computer is not connected to the outboard motor 31 Communication List By connecting the YDIS to a hub via a CAN Line displays the name of Yamaha genuine parts...

Страница 116: ...e 1 CAN Line harness 2 Adapter cap 3 Adapter 4 USB cable 5 Hub K Line 1 Adapter 2 Adapter cap 3 USB cable 4 K Line harness a YDIS coupler gray 3 Adapter 4 USB cable 5 Hub 5 Hub 2 Adapter cap 1 CAN Line harness 4 K Line harness 1 Adapter 3 USB cable 2 Adapter cap a YDIS coupler ...

Страница 117: ... input voltage of a part the coupler or connector must be disconnected As a result the engine ECM determines that the part is disconnected and a trouble code is detected Therefore make sure to delete the diagnosis record after checking the input voltage Since the main relay comes on for approximately 10 seconds after the engine start switch is turned to OFF the power of the engine ECM cannot be tu...

Страница 118: ...IS diagnosis YDIS diagno sis record 1 No trouble functioning properly U 13 Pulser coil U U U 15 Engine temperature sensor U U U 18 TPS U U U 19 Battery voltage U U U 23 Air temperature sensor U U U 28 Shift position switch U U U 29 Air pressure sensor U U U 37 Intake air passage U U U 39 Oil pressure sensor U U U 44 Engine shut off switch U U 45 Shift cut off switch U U U 46 Thermoswitch U U U 86 ...

Страница 119: ...ry voltage Below specified volt age Battery voltage and battery alert are displayed Engine does not restart Depends on battery condi tion Engine operates normally Check the lighting coil output peak voltage 5 19 Measure the lighting coil resistance 5 19 Measure the Rectifier Regulator out put voltage 5 19 Check the Rectifier Regulator for con tinuity 5 19 23 Air temperature sen sor Out of specific...

Страница 120: ... 16 Check for wiring continuity between the oil pressure sensor and the engine ECM A 2 45 Shift cut off switch Irregular signal Check Engine is displayed Higher idle speed Measure the shift cut off switch input voltage 5 26 Measure the shift cut off switch resis tance 5 26 Check for wiring continuity between the shift cut off switch and the engine ECM A 4 46 Thermoswitch Irregular signal Check Eng...

Страница 121: ... one trouble code is detected the indicator of special service tool flashes in the pattern of the lowest trouble code After that trouble code is corrected the indicator flashes in the pattern of the next lowest the trouble code This continues until all the trouble codes are detected and cor rected Example The illustration indicates code number 23 a Light on 0 33 seconds b Light off 4 95 seconds c ...

Страница 122: ...age 5 27 Check the wiring harness for continuity A 6 A 8 Starter motor malfunction Disassemble and check the starter motor 5 35 Starter motor operates but the engine does not crank Stuck piston or crankshaft Disassemble and check the power unit 7 61 Stuck drive shaft Check the drive shaft bushing 9 18 Disassemble and check the lower unit 8 19 8 60 Symptom 2 Cause Checking steps See page Engine ECM...

Страница 123: ...e high pressure fuel pump and engine ECM A 2 Fuel pump malfunction Check the fuel pump for leakage 6 13 Check the diaphragm for tears 6 14 Check the camshaft 7 35 Y COP is locked Unlock Y COP 3 20 Compression pressure is low Improper valve timing Check the timing belt 7 17 Compression leakage Measure the compression pressure 7 1 Check the valve for bends or sticking 7 41 Check the piston and pisto...

Страница 124: ...ator 6 5 Check the fuel filter for dirt and obstruc tions 6 43 Check the high pressure fuel pump 5 18 Fuel not supplied some cylinders Fuel injector malfunction Check the fuel injector operation using the YDIS 5 17 Measure the fuel injector resistance 5 17 Measure the fuel injection volume 6 32 Short open or loose connec tion in fuel injector circuit Measure the fuel injector input voltage 5 17 Ch...

Страница 125: ... cooling water inlet 10 8 Water pump impeller malfunc tion Check the impeller 8 11 Check the Woodruff key 8 11 Check the insert cartridge 8 11 Water leakage from water pump housing Check the water pump housing 8 11 Check the outer plate cartridge 8 11 Clogged cooling water pas sages Check the cooling water passages 2 16 PCV is open Check the PCV 7 50 Thermostat malfunction Check the thermostat 7 5...

Страница 126: ...8 Lighting coil malfunction Measure the lighting coil output peak voltage 5 19 Measure the lighting coil resistance 5 19 Rectifier Regulator malfunction Measure the Rectifier Regulator output voltage 5 19 Check the Rectifier Regulator for conti nuity 5 19 Symptom 2 Cause Checking steps See page There is an answer back beep Y COP transmitter malfunction Check the button cell battery voltage 5 31 Re...

Страница 127: ...arness continuity between the PTT switch and the fuse A 6 A 8 PTT motor does not operate PTT motor malfunction Check the PTT motor 9 35 Short open or loose connec tion in PTT motor circuit Check for continuity between the PTT motor and the PTT relay terminal A 6 A 8 Bent tilt ram or trim ram Check the tilt ram and trim ram 9 41 Stuck tilt ram or trim ram Disassemble and check the PTT unit 9 41 PTT...

Страница 128: ... the manual valve 9 60 Insufficient PTT fluid Add sufficient PTT fluid 10 14 Check the hydraulic pressure 9 35 PTT fluid leakage Check the PTT fluid leakage 10 14 Clogged fluid passages Disassemble and check the PTT unit 9 41 9 48 9 54 Check the valves for damage 9 41 9 54 Check the fluid passages for obstruc tions 2 19 Symptom 2 Cause Checking steps See page Shift cable is not adjusted properly A...

Страница 129: ...4 18 Outboard motor troubleshooting MEMO ...

Страница 130: ...king the ISC valve 5 15 Checking the oil pressure sensor 5 16 Fuel control unit and component 5 16 Checking the water detection switch 5 16 Checking the fuel injector 5 17 Checking the high pressure fuel pump 5 18 Checking the vapor shut off valve 5 18 Charging unit and component 5 19 Checking the lighting coil stator assembly 5 19 Checking the Rectifier Regulator 5 19 Ignition unit and component ...

Страница 131: ...the Y COP main wiring harness 5 30 Checking the button cell battery 5 31 Starter motor 5 33 Removing the starter motor 5 35 Checking the starter motor pinion 5 35 Disassembling the starter motor 5 35 Checking the armature starter motor 5 37 Checking the brush holder 5 37 Assembling the starter motor 5 38 Installing the starter motor 5 39 6Y8 Multifunction Meter sensor 5 40 Checking the water press...

Страница 132: ...ermoswitch 4 Rectifier Regulator 5 Ignition coil 6 Vapor shut off valve 7 Speed sensor coupler 8 Water pressure sensor coupler 9 Oil pressure sensor 10 Fuse holder A Run the pulser coil lead under the breather hose and the wiring harness B Run the oil pressure sensor lead behind the Rectifier Regulator coupler 1 2 3 4 5 D B A E 6 7 8 9 10 ...

Страница 133: ... 5 6 7 8 9 10 A D Install the ignition coil lead water pres sure sensor lead vapor shut off valve lead and speed sensor lead to the holder E Install the ignition coil lead vapor shut off valve lead and speed sensor lead to the holder 1 2 3 4 5 D B A E 6 7 8 9 10 ...

Страница 134: ...ash indicator connector 6 Fuse 30 A starter relay 7 Main relay 8 Fuse 30 A 20 A spare 9 Fuse 20 A engine start switch PTT switch 10 Fuse 20 A engine ECM ISC valve fuel injector high pressure fuel pump ignition coil YDIS 11 Fuse 50 A house battery 12 Fuse 50 A engine battery 13 Air temperature sensor a A A 13 14 A A 1 D 2 E F 4 5 6 3 8 9 10 7 11 12 B A ...

Страница 135: ...not fasten the starter motor lead using a plastic tie D Fasten the wiring harness Rectifier Reg ulator lead and power supply lead using the plastic tie E Install the starter motor lead PTT motor lead and isolator lead and tilt limiter lead F150A FL150A to the holder F Route the ground lead between the PTT relay and the starter relay a A A 13 14 A A 1 D 2 E F 4 5 6 3 8 9 10 7 11 12 B A ...

Страница 136: ...Fuel injector 4 Shift cut off switch coupler 5 Shift position switch coupler A Route the fuel injector lead behind the fuel rail B Fasten the spark plug wires 1 and 2 using the holder D Fasten the spark plug wires 2 and 4 using the holder E Fasten the spark plug wires 3 and 4 using the holder 1 E D B A 2 3 4 5 A ...

Страница 137: ...ng coil stator assembly 4 Pulser coil 5 Engine temperature sensor 6 TPS A F150A FL150A B F150B FL150B D Install the pulser coil coupler to the junc tion box E Bend the engine temperature sensor lead and then fasten it using the holder F Fasten the engine temperature sensor lead using the plastic tie 4 1 6 E 5 2 3 D F E B A ...

Страница 138: ...hift position switch 3 PTT switch 4 6Y8 Multifunction Meter communication coupler 5 Gauge harness coupler 6 Isolator coupler 7 6Y8 Multifunction Meter communication lead 8 Trim meter lead 9 Isolator lead 10 Trim sensor lead 11 PTT switch lead H H G G G G H H 1 2 3 3 4 5 6 7 8 9 10 11 A D B E F ...

Страница 139: ...n model B Counter rotation model D Route the wiring harness along the groove in the bottom cowling E Install the PTT motor lead and isolator lead to the holder F Align the white paint mark on the flushing hose with the outer end of the grommet H H G G G G H H 1 2 3 3 4 5 6 7 8 9 10 11 A D B E F ...

Страница 140: ...6 Water pressure sensor 7 Speed sensor 8 Ground 9 Engine temperature sensor 10 Air temperature sensor 11 Shift cut off switch 13 Thermoswitch 12 Engine shut off switch 16 Shift position switch 15 Water detection switch 19 Rectifier Regulator 20 Battery 22 Main relay 18 Engine start switch 38 6Y8 Multifunction Meter 37 High pressure fuel pump 31 Oil pressure alert indicator 32 Overheat alert indica...

Страница 141: ... switch 16 Shift position switch 17 YDIS 18 Engine start switch 19 Rectifier Regulator 20 Battery 21 Engine ECM 22 Main relay 23 Fuel injector 1 24 Fuel injector 2 25 Fuel injector 3 26 Fuel injector 4 27 Vaper shut off valve 28 ISC valve 29 Ignition coil 1 4 30 Ignition coil 2 3 31 Oil pressure alert indicator 32 Overheat alert indicator 33 Diagnostic flash indicator 34 Alert buzzer 35 Multi engi...

Страница 142: ...ellow Green 17 Fuel injector 4 Purple Green 18 ISC valve Green Black 19 ISC valve Green 20 ISC valve Green Red 21 ISC valve Green Yellow 22 Ignition coil 1 4 Black Orange 23 6Y8 Multifunction Meter Blue 24 Low oil pressure alert indicator Pink White 25 26 YDIS White Black 27 Diagnostic flash indi cator Blue White 28 Overheat alert indica tor Pink Black 29 Oil pressure sensor Pink White 30 Battery ...

Страница 143: ...ge use the special ser vice tools A malfunctioning electrical component can be checked easily by mea suring the peak voltage The specified engine speed when measuring the peak voltage is affected by many factors such as fouled spark plugs or a weak battery If one of these factors is present the peak voltage cannot be measured properly TIP Before measuring the peak voltage check all of the wiring h...

Страница 144: ...t and component Checking the main relay 1 Remove the main relay 1 2 Connect the positive battery lead to the terminal a connect the negative battery lead to the terminal b and then check for continuity between the terminals c and d Replace the relay if out of speci fication Do not reverse the battery leads 3 Measure the input voltage between the terminal a and ground and the terminal b and ground ...

Страница 145: ...ngine ECM coupler terminals and ground 3 Measure the input voltage at the engine ECM coupler terminal and ground 4 Turn the engine start switch to ON and then measure the input voltage at the engine ECM coupler terminal and ground Main relay input voltage Terminal a Terminal b 12 V battery voltage b a a Wiring harness continuity Terminal 32 Ground Terminal 42 Ground Engine ECM input voltage Termin...

Страница 146: ...Turn the engine start switch to OFF 6 Connect the TPS coupler Checking the ISC valve 1 Check the operation of the ISC valve using the YDIS Stationary test and check the operating sound 2 Start the engine and then check the engine speed increases using the YDIS Active test 3 Disconnect the ISC valve coupler a 4 Turn the engine start switch to ON and then measure the ISC valve input voltage at the I...

Страница 147: ...sconnect the special service tool and pressure pump 6 Install the oil pressure sensor See Cyl inder block F150A FL150A 7 52 7 Connect the oil pressure sensor coupler Fuel control unit and component Checking the water detection switch 1 Disconnect the water detection switch coupler a 2 Turn the engine start switch to ON and then measure the input voltage at the water detection switch coupler ISC va...

Страница 148: ... Check the operation of the fuel injectors using the YDIS Stationary test and check the operating sound 2 Disconnect the fuel injector couplers a 3 Turn the engine start switch to ON and then measure the input voltage between the fuel injector coupler terminal and ground 4 Turn the engine start switch to OFF 5 Measure the fuel injector resistance Water detection switch input voltage Blue White L W...

Страница 149: ...l pump coupler Checking the vapor shut off valve 1 Disconnect the vapor shut off valve cou pler a 2 Turn the engine start switch to ON and then measure the input voltage between the vapor shut off valve coupler terminal and ground 3 Remove the vapor shut off valve and then connect the special service tool 1 to the vapor shut off valve 4 Apply the specified negative pressure to the vapor shut off v...

Страница 150: ... voltage between all combinations of the connectors Replace the stator assembly if below specification TIP When measuring the lighting coil output peak voltage under the cranking unloaded condi tion remove the clip from the engine shut off switch to prevent the engine from starting 4 Measure the lighting coil resistance 5 Disconnect the special service tool and then connect the lighting coil coupl...

Страница 151: ...when measuring the Rectifier Regulator output volt age 3 Disconnect the special service tool 1 and lighting coil coupler a 4 Set the digital circuit tester to the diode mode and then check the Rectifier Reg ulator for continuity Test harness 3 pins 1 90890 06846 Rectifier Regulator output voltage Red R Black B r min Loaded 1500 3500 DC V 13 13 a R R R R B B 1 1 1 a a b c d e f a b c d e f ...

Страница 152: ... plug wire Checking the spark plug wire 1 Remove the spark plug wires 2 Measure the spark plug wire resistance 3 Install the spark plug wires Checking the ignition coil 1 Disconnect the ignition coil couplers a and b Rectifier Regulator continuity testing diode mode Tester probe Display value reference data a b OL c d 0 439 V e 0 434 V f OL b a OL c d 0 440 V e 0 436 V f OL c a OL b d 0 439 V e 0 ...

Страница 153: ...of ignition coil for cylinders 2 and 3 in the same way 6 Disconnect the special service tool and spark plug wires from the ignition coils 7 Measure the ignition coil resistance 8 Connect the spark plug wires and ignition coil couplers Checking the pulser coil 1 Disconnect the pulser coil coupler a 2 Connect the special service tool 1 Ignition coil input voltage Red Yellow R Y Ground 12 V battery v...

Страница 154: ...re is within 5 C 9 F TIP Check the air temperature sensor when the engine is cold When checking the air temperature sensor remove the top cowling and do not start the engine 4 Disconnect the air temperature sensor coupler a 5 Turn the engine start switch to ON and then measure the input voltage at the air temperature sensor coupler 6 Turn the engine start switch to OFF and then remove the air temp...

Страница 155: ... to OFF 8 Disconnect the special service tools 9 Install the air pressure sensor See Intake manifold and vapor separator 6 34 10 Connect the air pressure sensor coupler Checking the engine temperature sensor 1 Disconnect the engine temperature sen sor coupler a 2 Turn the engine start switch to ON and then measure the input voltage at the engine temperature sensor coupler Air temperature sensor re...

Страница 156: ...engine start switch to ON and then measure the input voltage at the thermoswitch connectors 3 Turn the engine start switch to OFF 4 Remove the thermoswitch 5 Place the thermoswitch in a container of water and heat the water slowly 6 Check the switch for continuity at the specified temperatures Replace if out of specification a Temperature b Time Engine temperature sensor input voltage Black Yellow...

Страница 157: ...t bracket 9 1 7 Connect the shift cut off switch coupler Checking the shift position switch 1 Disconnect the shift position switch cou pler a 2 Turn the engine start switch to ON and then measure the input voltage at the shift position switch coupler 3 Turn the engine start switch to OFF 4 Remove the shift position switch 5 Check the shift position switch for conti nuity Thermoswitch continuity te...

Страница 158: ...put voltage between the starter relay terminal a and ground 2 Disconnect the starter relay leads and then remove the starter relay Before disconnecting the starter relay ter minals make sure to disconnect the neg ative battery terminal 3 Connect the positive battery lead to the relay connector a and the negative bat tery lead to the relay lead b and then check for continuity between terminals c an...

Страница 159: ...upler 2 Check the engine start switch for continu ity 1 OFF 2 ON 3 START A 704 remote control B 703 remote control 3 Connect the 10 pin coupler or engine start switch coupler Engine start switch continuity Switch position OFF Terminal a Terminal b Switch position ON Terminal c Terminal d Switch position START Terminal c Terminal d Terminal d Terminal e Terminal c Terminal e a a b b c c d d e e B A...

Страница 160: ...optional for Oceanian market No Part name Q ty Remarks 1 Cover 1 2 Control unit assembly 1 3 Transmitter 2 4 Screw 2 M6 15 mm 5 Buzzer 1 6 Bracket 1 7 Screw 1 ø6 19 mm 8 Main wiring harness 1 9 O ring 1 10 Plastic tie 1 11 Seal 4 1 2 3 4 5 8 10 11 11 11 11 9 6 7 4 N m 0 4 kgf m 3 0 ft lb 2 N m 0 2 kgf m 1 5 ft lb ...

Страница 161: ...1 Remove the Y COP buzzer 1 2 Connect the battery leads to the Y COP buzzer connectors and then check that the Y COP buzzer comes on Replace the Y COP buzzer if it does not come on 3 Measure the Y COP buzzer input voltage Checking the Y COP main wiring harness 1 Remove the Y COP main wiring harness 1 Y COP input voltage Red R Black B 12 V battery voltage R B a 1 Y COP buzzer input voltage Yellow Y...

Страница 162: ...and once every two years thereafter 1 Remove the transmitter cover 1 2 Push the Yamaha logo on the transmitter cover 1 and remove the button cell battery 2 Do not touch the button cell battery directly Otherwise button cell battery could be corroded Wiring harness continuity a Terminal 1 b Terminal 3 a Terminal 2 d Pink P a Terminal 7 b Terminal 2 a Terminal 8 f White W a Terminal 9 g White W a Te...

Страница 163: ... follow local disposal regulations 4 Install the button cell battery 1 so that the positive side is facing the transmitter cover 2 5 Install the transmitter cover 1 and then tighten the transmitter screws 2 to the specified torque in the order 1 2 and so on Button cell battery voltage CR2016 reference data 3 V 1 1 2 1 2 1 Transmitter screw 2 0 1 N m 0 01 kgf m 0 1 ft lb 1 2 2 2 2 4 5 1 3 6 2 1 ...

Страница 164: ... 4 Starting motor gear assembly 1 5 Washer set 1 6 Bracket 1 7 Bolt 2 M6 117 mm 8 Screw 2 M4 16 mm 9 Planetary gear 3 10 Plate 1 11 Stator 1 12 Armature 1 13 Clutch assembly 1 14 Washer set 1 15 Bracket 1 16 Bracket 1 17 Outer gear 1 17 18 12 7 8 6 5 14 3 1 1 1 1 2 9 9 10 11 14 25 26 27 24 23 16 15 13 14 21 22 21 19 20 4 ...

Страница 165: ...marks 18 Pinion shaft 1 19 Pinion 1 20 Pinion stopper set 1 21 Bolt 2 M6 37 mm 22 Cover 1 23 Lever assembly 1 24 Seal set 1 Not reusable 25 Magnet switch 1 26 Washer 1 27 Nut 1 17 18 12 7 8 6 5 14 3 1 1 1 1 2 9 9 10 11 14 25 26 27 24 23 16 15 13 14 21 22 21 19 20 4 ...

Страница 166: ...ounterclockwise to check that it operates smoothly and turn it clockwise to check that it locks in place Disassembling the starter motor 1 Remove the magnet switch 1 and spring 2 2 Push the pinion stopper 1 down and then remove the clip 2 3 Remove the pinion stopper 1 pinion 2 and spring 3 4 Remove the stator assembly 1 5 Remove the plate 1 outer gear 2 and planetary gears 3 6 Remove the rubber se...

Страница 167: ...line in direction b and then remove it in direction c 8 Remove the shim 1 bracket 2 gasket 3 and shim 4 9 Remove the stator 1 10 Remove the armature 2 along with the brush holder assembly 3 from the bracket 4 Do not disassemble the stator Do not remove the magnets 5 from it 11 Remove the plate 1 and then remove the armature 2 from the brush holder assembly 3 1 2 3 2 c b a 3 3 1 c a b 2 1 2 3 4 5 2...

Страница 168: ...tator undercut a 4 Check the armature for continuity Replace if out of specification Checking the brush holder 1 Check the brush holder assembly for continuity Replace if out of specification Commutator standard diameter a 29 0 mm 1 14 in Wear limit 28 0 mm 1 10 in 2 2 3 1 1 3 a Commutator standard undercut a 0 8 mm 0 03 in Wear limit 0 2 mm 0 01 in Armature continuity Continuity a b No continuity...

Страница 169: ...ssembly 2 to the bracket 3 and then install the stator 4 TIP Align the holes a and b in the plate 5 with the holes c and d in the bracket 3 4 Install the shim 1 a new gasket 2 the brackets 3 and the shim 4 5 Push the clutch assembly 1 down com pletely onto the pinion shaft 2 in direc tion a turn it one spline in direction b and then slide it in direction c 6 Install the E clip 3 Brush holder assem...

Страница 170: ... 8 Align the protrusion a on the stator 1 with the slot b in the cover assembly 2 and then assemble the starter motor 9 Install the spring 1 pinion 2 pinion stopper 3 and clip 4 10 Install a new gasket 1 the spring 2 and the magnet switch 3 Installing the starter motor 1 Install the starter motor to the power unit See Installing the starter motor 7 21 3 3 c 1 2 2 b a b c 1 a C 1 2 2 1 4 3 5 6 1 a ...

Страница 171: ...then connect the water pressure sensor coupler See Installing the water pres sure sensor 3 14 Checking the speed sensor optional 1 Disconnect the speed sensor coupler a 2 Turn the engine start switch to ON and then measure the input voltage at the speed sensor coupler 3 Remove the speed sensor and then con nect the pressure pump 1 and special service tool 2 4 Apply positive pressure to the speed s...

Страница 172: ...t the special service tool 1 5 Check the PTT relay for continuity Replace if out of specification 6 Connect the positive battery lead to the terminal a and the negative battery lead to the terminal b and then check the PTT relay for continuity Replace the PTT relay if out of specification Pressure pump 1 commercially available Test harness 3 pins 2 90890 06869 Speed sensor output voltage reference...

Страница 173: ... Measure the input voltage between the PTT switch coupler terminal and ground 3 Check the PTT switch for continuity Replace the PTT switch if out of specifi cation 4 Connect the PTT switch coupler Checking the trim sensor 1 Disconnect the trim sensor coupler a and then remove the trim sensor PTT relay continuity Terminal c Terminal e Terminal b Terminal d PTT relay continuity Terminal c Terminal d...

Страница 174: ...he up side of the PTT switch pushed 3 Connect the battery leads to the tilt lim iter couplers 4 Loosen the screw 1 and then measure the output voltage when sliding the mag net 2 against the tilt limiter 5 Connect the tilt limiter couplers 6 Set the tilt limiter See Setting the tilt lim iter 3 18 Trim sensor resistance reference data 239 379 Ω at a 9 0 11 0 Ω at b setting resistance a 1 a b Sb a b ...

Страница 175: ...5 44 PTT system 0 1 2 3 4 5 6 7 8 9 10 A MEMO ...

Страница 176: ...pump 6 9 Assembling the fuel filter assembly 6 9 Installing the fuel filter assembly 6 10 Fuel pump 6 11 Removing the fuel pump assembly 6 13 Checking the fuel pump assembly 6 13 Disassembling the fuel pump assembly 6 14 Checking the diaphragm and valve 6 14 Assembling the fuel pump assembly 6 14 Installing the fuel pump assembly 6 15 Canister and vapor shut off valve 6 17 Removing the canister 6 ...

Страница 177: ... fuel rail and fuel injector 6 32 Installing the fuel cooler 6 32 Installing the fuel injector 6 33 Intake manifold and vapor separator 6 34 Draining the fuel 6 37 Removing the intake manifold 6 37 Removing the vapor separator 6 37 Checking the fuel filter 6 38 Checking the intake manifold 6 38 Checking the air pressure sensor 6 38 Checking the ISC valve 6 38 Installing the vapor separator 6 39 In...

Страница 178: ...to joint 7 Fuel hose fuel pump to joint 8 Fuel hose joint to filter 9 Fuel hose filter to vapor separator 10 Fuel hose vapor separator to fuel rail 11 Fuel hose pressure regulator to fuel cooler 12 Fuel hose fuel cooler to vapor separator a Primer pump b Joint c Fuel filter assembly d Joint e Fuel pump f Filter g Vapor separator h Fuel rail k Pressure regulator m Fuel cooler A 10 f g k m h d e e d...

Страница 179: ...ort to vapor shut off valve 6 Vapor gas hose vapor shut off valve to joint 7 Vapor gas hose joint to joint 8 Air hose joint to intake manifold 9 Vapor gas hose canister atmospheric port to filter 10 Vapor gas hose filter to joint 11 Vapor gas hose joint to bottom cowling 12 Pressure regulator hose intake manifold to pressure regulator a Vapor separator b Joint c Filter d Canister e Vapor shut off ...

Страница 180: ...6 3 Hose routing f Joint g Joint h Filter k Joint m Pressure regulator A B 3 6 a 8 c 4 7 f m d 5 A C 7 1 g 8 2 12 b 3 k C B 10 m 4 5 d 9 h 6 e 11 7 3 3 b 1 2 ...

Страница 181: ...ntake silencer 2 Blowby hose cylinder head cover to cyl inder block 3 Cooling water hose exhaust cover to fuel cooler 4 Cooling water pilot hose fuel cooler to cooling water pilot hole 5 Flushing hose flushing hose adapter to exhaust cover a Fuel cooler b Cooling water pilot hole on the bottom cowling 3 1 5 2 4 a b ...

Страница 182: ...t is connected firmly 4 Turn the engine start switch to ON and then measure the fuel pressure within 3 seconds TIP The fuel pressure will decrease 3 seconds after the engine start switch is turned to ON 5 Start the engine and warm it up until the engine idle speed stabilizes at 650 750 r min 6 Turn the engine start switch to OFF 7 Disconnect the special service tool and then install the cap Before...

Страница 183: ... rubber plug 4 5 Start the engine and let it idle 6 Check that the fuel pressure is reduced when negative pressure is applied to the pressure regulator 7 Turn the engine start switch to OFF 8 Disconnect the special service tool and then connect the pressure regulator hose 9 Disconnect the special service tools See step 6 in Measuring the fuel pressure 6 5 Vacuum pressure pump gauge set 2 90890 069...

Страница 184: ...fuel filter assembly 5 Bolt 2 M6 30 mm 6 Bolt 2 M6 14 mm 7 Collar 2 8 Grommet 2 9 Bracket 1 10 Hose 1 Fuel filter assembly to joint 11 Fuel filter assembly 1 12 O ring 1 Not reusable 13 Fuel filter element 1 14 Fuel cup assembly 1 15 Clip 1 16 Float 1 2 2 4 6 8 9 10 5 7 11 13 15 16 14 12 1 2 1 2 3 5 N m 0 5 kgf m 3 7 ft lb ...

Страница 185: ...ct the special service tool 1 to the fuel inlet a 2 Block the fuel outlet b using a rubber plug 2 and then apply the specified positive pressure Replace the O ring fuel cup assembly or fuel filter assembly if the specified pressure cannot be main tained for 15 seconds or more 3 Connect the special service tool 1 to the fuel outlet a 4 Block the fuel inlet b using a rubber plug 2 and then apply the...

Страница 186: ...tection switch 5 16 Checking the primer pump 1 Connect the special service tool 1 to the primer pump inlet a 2 Block the fuel outlet b using a rubber plug 2 3 Apply the specified positive pressure Replace the primer pump if the specified pressure cannot be maintained for 30 seconds or more Assembling the fuel filter assembly 1 Install the fuel filter element 1 a new O ring 2 and the fuel cup assem...

Страница 187: ...rigging grommet See Rigging grommet mounting 3 9 5 Install the retaining plate See steps 4 6 in Installing the rigging grommet 3 13 6 Connect the fuel hoses 1 and 2 and then fasten them using the plastic ties 3 7 Connect the water detection switch cou pler a 8 Install the fuel hose 1 to the holders 2 and 3 9 Connect the fuel hose 1 and then fas ten it using the plastic tie 4 Fuel cup assembly 3 5 ...

Страница 188: ... 10 Pin 2 11 Fuel pump assembly 2 12 Hose 1 Fuel pump to joint 13 Joint 2 14 Plastic tie 10 15 Hose 1 Fuel pump to joint 16 Bolt 3 M6 30 mm 17 Bolt 1 M6 42 mm 10 N m 1 0 kgf m 7 4 ft lb 10 N m 1 0 kgf m 7 4 ft lb 1 1 2 3 4 1 2 3 4 5 5 4 N m 0 4 kgf m 3 0 ft lb 4 N m 0 4 kgf m 3 0 ft lb 6 7 7 8 9 10 18 12 13 14 14 16 16 16 17 14 14 15 7 8 9 10 7 6 18 14 14 14 14 20 13 19 11 11 ...

Страница 189: ...eusable 19 Hose 1 Joint to fuel pump 20 Hose 1 Joint to fuel pump 10 N m 1 0 kgf m 7 4 ft lb 10 N m 1 0 kgf m 7 4 ft lb 1 1 2 3 4 1 2 3 4 5 5 4 N m 0 4 kgf m 3 0 ft lb 4 N m 0 4 kgf m 3 0 ft lb 6 7 7 8 9 10 18 12 13 14 14 16 16 16 17 14 14 15 7 8 9 10 7 6 18 14 14 14 14 20 13 19 11 11 ...

Страница 190: ...en apply the speci fied positive pressure Check that there is no air leakage 3 Apply the specified negative pressure and then check that there is no air leak age 4 Connect the special service tool 1 to the fuel pump outlet a 5 Block the fuel pump inlet b using a rub ber plug 2 6 Apply the specified positive pressure and then check that there is no air leak age 4 5 3 1 2 1 Vacuum pressure pump gaug...

Страница 191: ...ngs 3 and 4 Checking the diaphragm and valve 1 Check the diaphragm 1 Replace if torn 2 Check the valve 2 Replace fuel pump body 2 3 if deformed or worn Assembling the fuel pump assembly Before assembling the fuel pump assembly clean the parts and soak the valves and dia phragm in gasoline to obtain prompt opera tion of the fuel pump assembly 1 Install the springs 1 and 2 plunger 3 and diaphragm 4 ...

Страница 192: ...he slot c in fuel pump body 1 1 6 Install fuel pump body 2 1 diaphragm 2 and cover 3 and then tighten the fuel pump screws 4 to the specified torque TIP Make sure to align the protrusions a b and c Installing the fuel pump assembly 1 Install new O rings 1 and the fuel pump assemblies 2 and then tighten the fuel pump bolts 3 to the specified torque Small end bearing installer 2 90890 06528 3 1 2 4 ...

Страница 193: ...6 16 Fuel pump 0 1 2 3 4 5 6 7 8 9 10 A 2 Connect the fuel hoses 1 2 3 4 and 5 and then fasten them using the plastic ties 6 Fuel pump bolt 3 10 N m 1 0 kgf m 7 4 ft lb 2 3 3 3 1 1 2 1 6 3 5 4 6 6 6 ...

Страница 194: ...Plastic tie 8 4 Joint 1 5 Hose 1 Joint to bottom cowling 6 Clamp 1 7 Filter 1 8 Vapor shut off valve 1 9 Hose 1 Canister to filter 10 Canister 1 11 Bolt 1 M6 16 mm 12 Bracket 1 13 Hose 1 Vapor shut off valve to joint 14 Hose 1 Canister to vapor shut off valve 15 Holder 1 16 Holder 1 7 3 4 3 5 6 8 3 3 3 3 3 3 9 11 10 12 14 13 2 1 15 16 ...

Страница 195: ...t off valve 1 Disconnect the vapor shut of valve cou pler a 2 Disconnect the vapor gas hoses 1 and 2 3 Remove the vapor shut of valve 1 4 Disconnect the vapor gas hoses 1 Checking the canister 1 Check the canister Replace if cracked 2 Connect the special service tool 1 to the atmospheric port a and block the other ports using rubber plugs b 3 Apply positive pressure and check that air comes out of...

Страница 196: ...r shut off valve 1 2 Install the holders 1 and 2 to the vapor gas hoses 3 and 4 3 Connect the vapor gas hoses 1 and 2 and then fasten them using the plastic ties 3 TIP Connect the vapor gas hose 1 that has a white paint mark a to the upper port of the vapor shut off valve 4 Connect the vapor shut of valve coupler b 5 Connect the vapor gas hose 1 and then install the vaper gas hose 1 to the holders...

Страница 197: ...e 4 to the holder 6 4 Connect the vapor gas hoses 1 2 and 3 and then fasten them using the plastic ties 4 5 Connect the vapor gas hose 1 and then fasten it using the plastic tie 2 6 Connect the vapor gas hose 3 and then fasten it using the clamp 4 7 Install the vapor gas hose 5 to the holder 6 8 Install the spark plug wires to the hold ers 4 6 1 1 5 3 2 3 4 4 1 2 3 5 2 4 6 1 ...

Страница 198: ...me Q ty Remarks 1 Intake silencer assembly 1 2 O ring 4 Not reusable 3 Collar 6 4 Collar 2 5 Grommet 4 6 Bolt 6 M6 20 mm 7 Clamp 1 8 Bolt 2 M6 45 mm 1 2 2 3 4 5 7 8 2 3 3 8 5 4 5 5 6 6 6 3 3 6 6 6 6 N m 0 6 kgf m 4 4 ft lb 6 N m 0 6 kgf m 4 4 ft lb ...

Страница 199: ...k No Part name Q ty Remarks 1 Bolt 1 M6 35 mm 2 Collar 1 3 Wave washer 3 4 Throttle cam 1 5 Roller 1 6 Bolt 2 M6 25 mm 7 Collar 2 8 Throttle lever 1 1 9 Washer 3 10 Spring 1 11 Throttle link rod 1 12 Throttle lever 2 1 1 2 3 3 3 4 5 6 6 7 7 8 9 9 9 10 11 12 ...

Страница 200: ...od 5 5 Disconnect the throttle link joint assembly 1 6 Remove the collar 1 wave washer 2 throttle lever 1 3 washer 4 and roller 5 Checking the throttle link 1 Check throttle lever 1 roller and throttle cam Replace if cracked or worn 2 Check throttle lever 2 and throttle link rod Replace if cracked or worn 3 Check the spring Replace if deformed or fatigued Installing the throttle link 1 Install the...

Страница 201: ...of the spring 1 under the protrusion b on the cylinder block and then install the throttle cam 2 to the cylinder block 5 Install the throttle link rod 1 washer 2 wave washer 3 and collar 4 onto the throttle lever 2 5 6 Install throttle lever 2 5 to the cylinder block 7 Install the throttle link rod 1 to the throt tle cam 2 8 Check that throttle lever 1 throttle cam and throttle control lever 2 mov...

Страница 202: ... mm 6 Bolt 2 M8 20 mm 7 Bolt 6 M8 70 mm 8 Throttle body assembly 1 9 Screw 2 M4 12 mm 10 TPS 1 11 O ring 1 Not reusable 12 Synchronizing screw 1 13 Throttle stop screw 1 14 Spring 3 15 Nut 2 16 Spring washer 1 17 Screw 8 M6 16 mm 14 2 3 9 11 14 12 17 17 16 13 15 14 9 10 4 5 5 6 6 7 7 7 7 17 17 14 13 12 UP A 1 14 A 13 N m 1 3 kgf m 9 6 ft lb 4 8 ...

Страница 203: ...ked 2 Check the electrical performance of the TPS See Checking the TPS 5 15 Installing the throttle body assembly 1 Install the throttle link joint assembly 1 2 Install new gaskets 1 3 Install the throttle body assembly 2 and then tighten the throttle body assembly bolts 3 to the specified torque 4 Install the brackets 1 5 Connect the TPS coupler a a 1 1 1 Throttle body assembly bolt 3 13 N m 1 3 ...

Страница 204: ...ottle lever 4 Tighten the locknut 1 Adjusting the throttle valve reference opening angle If there is dirt in the passages in the throttle body it may affect the intake air pressure and correct adjustments of the throttle valve refer ence opening angle cannot be obtained Clean the passages in the throttle body before adjusting the throttle valve reference opening angle 1 Connect the YDIS to display...

Страница 205: ...t voltage is within specification 9 Start the engine and warm it up TIP Warm up the engine so that the engine tem perature displayed on the YDIS screen is 51 C 123 8 F or more 10 Perform the Active test using the YDIS to fix the ISC valve 11 Adjust the throttle stop screw 1 so that the engine speed is 850 r min TIP To increase the engine speed turn the throttle stop screw 1 in direction a To decre...

Страница 206: ... the caps 1 and then connect the special service tool 2 to the intake manifold TIP Use a commercially available vacuum gauge 3 or 4 with 4 adapters 2 Start the engine and warm it up for 5 min utes 3 Check the vacuum pressure of all cylin ders 4 Check that the difference of the vacuum pressure between cylinders 1 or 2 and 3 or 4 is less than 2 0 kPa 15 0 mmHg If the difference is more than 2 0 kPa ...

Страница 207: ...2 M8 18 mm 4 Fuel rail 1 5 Clamp 3 6 O ring set 1 Not reusable 7 Fuel injector 4 8 Rubber seal 4 Not reusable 9 Bolt 2 M6 25 mm 10 Fuel cooler 1 11 Clamp 1 1 2 3 3 4 5 6 7 7 7 7 8 8 8 8 5 5 11 9 9 10 11 5 12 mm 0 47 in 10 mm 0 39 in 5 N m 0 5 kgf m 3 7 ft lb 13 N m 1 3 kgf m 9 6 ft lb 13 N m 1 3 kgf m 9 6 ft lb ...

Страница 208: ...holder 1 4 Disconnect the fuel hose 2 5 Remove the holders 1 from the fuel rail 2 6 Remove the fuel pump coupler a from the fuel rail 1 and then remove the fuel rail 1 7 Remove the fuel injectors 1 Removing the fuel cooler Cover the fuel components using a rag to prevent fuel from spilling out 1 Drain the fuel See Draining the fuel 6 37 2 Disconnect the fuel hoses 1 and 2 3 Disconnect the cooling ...

Страница 209: ...n correct measure ments under disparate test conditions Make sure to fully charge the battery The cylinder is graduated in increments of 2 5 cm3 2 5 cc Make sure to comply with the laws and reg ulations of the region when disposing of the used test fuel Installing the fuel cooler 1 Install the fuel cooler 1 2 Connect the fuel hoses 1 and 2 and then fasten them using the clamps 3 3 Connect the cool...

Страница 210: ...ghten the fuel rail bolts 2 equally and gradually to the specified torque 5 Install the fuel pump coupler a to the fuel rail 6 Route the wiring harness 1 and then install the holders 2 to the fuel rail 3 7 Connect the fuel injector couplers a and fuel pump coupler b 8 Connect the fuel hose 1 and the fasten it using the clamp 2 9 Install the holder 3 1 2 3 1 2 2 1 Fuel rail bolt 2 13 N m 1 3 kgf m ...

Страница 211: ... 1 Vapor separator to fuel rail 9 Holder 1 10 Hose 1 Intake manifold to pressure regulator 11 Clamp 6 12 Joint 1 13 Hose 1 Vapor separator to joint 14 Hose 1 Vapor separator to joint 15 Vapor separator 1 16 Hose 1 Joint to filter 17 Hose 1 Joint to intake manifold 3 4 5 34 11 11 37 20 6 9 8 7 10 11 7 13 12 14 15 36 32 33 33 32 32 30 35 23 24 25 31 22 21 26 27 17 28 29 30 29 16 19 18 5 29 29 28 11 ...

Страница 212: ...ter 1 24 Cap 1 25 O ring 1 Not reusable 26 Screw 3 M4 15 mm 27 ISC valve 1 28 Grommet 3 29 Collar 6 30 Bolt 3 M6 35 mm 31 Gasket 2 Not reusable 32 Bolt 5 M8 40 mm 33 Cap 4 34 Drain hose 1 3 4 5 34 11 11 37 20 6 9 8 7 10 11 7 13 12 14 15 36 32 33 33 32 32 30 35 23 24 25 31 22 21 26 27 17 28 29 30 29 16 19 18 5 29 29 28 11 11 11 1 2 2 1 5 N m 0 5 kgf m 3 7 ft lb 5 N m 0 5 kgf m 3 7 ft lb ...

Страница 213: ...ake manifold 1 36 Hose 1 Fuel cooler to vapor separator 37 Hose 1 Pressure regulator to fuel cooler 3 4 5 34 11 11 37 20 6 9 8 7 10 11 7 13 12 14 15 36 32 33 33 32 32 30 35 23 24 25 31 22 21 26 27 17 28 29 30 29 16 19 18 5 29 29 28 11 11 11 1 2 2 1 5 N m 0 5 kgf m 3 7 ft lb 5 N m 0 5 kgf m 3 7 ft lb ...

Страница 214: ... 1 from the intake manifold 3 Remove the vapor gas hose with filter 1 from the holder 2 4 Remove the intake manifold 1 and dow els 2 Removing the vapor separator 1 Remove the drain hose 1 from the intake manifold 2 Remove the vapor separator bolts 2 3 Remove the plastic ties 1 4 Disconnect the pressure regulator hose 2 from the intake manifold 5 Remove the vapor separator 3 TIP Remove the fuel hos...

Страница 215: ...r 1 Check the fuel filter Replace the fuel fil ter if there is dirt residue or external damage Checking the intake manifold 1 Check the intake manifold Replace if cracked or deformed Checking the air pressure sensor 1 Check the air pressure sensor exterior Replace if cracked 2 Check the electrical performance of the air pressure sensor See Checking the air pressure sensor 5 24 Checking the ISC val...

Страница 216: ...lter 3 and then fasten them using the clamps 4 6 Connect the fuel hose 1 to the vapor separator and then fasten it using the clamp 5 7 Connect the fuel hose 6 and then fas ten it using the clamp 7 8 Install the drain hose 1 and fuel hose 2 and then fasten the fuel hose 2 using the clamp 3 9 Install the grommets 1 and collars 2 10 Connect the air hose 3 and vapor gas hose 4 to the joint 5 11 Connec...

Страница 217: ...n the vapor separator bolts 1 to the specified torque 18 Install the drain hose 2 to the intake manifold 19 Fasten the fuel filter 1 vapor gas hose with filter 2 and air hose 3 using the plastic ties 4 Installing the intake manifold 1 Install new gaskets 1 onto the intake manifold 2 Install the holders 2 and 3 to the vapor gas hoses 3 Install the dowels 1 and intake manifold 2 4 Install the vaper ...

Страница 218: ...6 41 Intake manifold and vapor separator 5 Connect the ISC valve coupler a and air pressure sensor coupler b 6 Install the holder 1 to the intake mani fold 2 1 a b 1 1 ...

Страница 219: ...crew 7 M4 16 mm 4 Cover assembly 1 5 Gasket 1 Not reusable 6 Pin 1 7 Cap 1 8 Grommet 1 9 Plate 1 10 Plate 1 11 Screw 3 M4 8 mm 12 Needle valve assembly 1 13 Float 1 14 High pressure fuel pump 1 15 Filter 1 16 Filter holder 1 17 Drain screw 1 5 1 2 3 4 6 7 8 9 10 11 11 12 13 14 15 16 17 2 N m 0 2 kgf m 1 5 ft lb 2 N m 0 2 kgf m 1 5 ft lb 2 N m 0 2 kgf m 1 5 ft lb 5 N m 0 5 kgf m 3 7 ft lb ...

Страница 220: ...mmet 3 4 Remove the pin 1 in the direction of the arrow and then remove the float 2 5 Disconnect the lead coupler a 6 Remove the needle valve assembly 1 7 Remove the plates 1 and 2 Checking the high pressure fuel pump 1 Check the electrical performance of the high pressure fuel pump See Checking the high pressure fuel pump 5 18 Checking the vapor separator 1 Check the needle valve Replace the need...

Страница 221: ...d torque 2 Connect the lead coupler a 3 Install the needle valve assembly 1 and then tighten the needle valve screw 2 to the specified torque 4 Install the float 1 5 Insert the float pin 2 in the direction of the arrow 6 Install the filter 1 to the high pressure fuel pump 2 7 Install the grommet 3 and then install the high pressure fuel pump 2 Make sure to install the grommet to the float chamber ...

Страница 222: ... and then tighten the float chamber cover screws 4 to the specified torque 10 Install the pressure regulator 1 and then tighten the pressure regulator screw 2 to the specified torque Float chamber cover screw 4 2 N m 0 2 kgf m 1 5 ft lb Pressure regulator screw 2 5 N m 0 5 kgf m 3 7 ft lb 3 1 2 a a 2 3 1 4 2 1 ...

Страница 223: ... Installing the flywheel magnet 7 15 Timing belt 7 16 Removing the timing belt 7 17 Removing the drive sprocket 7 17 Checking the timing belt 7 17 Installing the drive sprocket 7 17 Installing the timing belt 7 18 Starter motor 7 20 Removing the starter motor 7 21 Installing the starter motor 7 21 Rectifier Regulator and ignition coil 7 23 Removing the Rectifier Regulator 7 25 Removing the ignitio...

Страница 224: ...ecking the cylinder head and cylinder block anode 7 45 Assembling the cylinder head 7 45 Installing the cylinder head 7 46 Exhaust cover 7 48 Removing the exhaust cover 7 50 Checking the PCV 7 50 Checking the thermostat 7 50 Checking the exhaust cover anode 7 50 Installing the exhaust cover 7 51 Cylinder block F150A FL150A 7 52 Removing the oil pump assembly 7 54 Removing the oil filter bracket 7 ...

Страница 225: ...ecking the piston ring end gap 7 65 Checking the piston ring groove 7 65 Checking the piston ring side clearance 7 65 Checking the piston pin boss inside diameter 7 65 Checking the piston pin diameter 7 66 Checking the connecting rod small end inside diameter and big end inside diameter 7 66 Checking the connecting rod big end side clearance 7 66 Checking the crankshaft 7 66 Checking the big end o...

Страница 226: ...Start the engine and warm it up until the engine idle speed stabilizes at 650 750 r min 3 Measure the oil pressure Checking the valve clearance Measure the valve clearances when the engine is cold Cover the fuel components using a rag to prevent fuel from spilling out Do not turn the flywheel magnet counter clockwise Otherwise the water pump impeller could be damaged 1 Reduce the fuel pressure See...

Страница 227: ...marks c and d on the driven sprockets are aligned 7 Measure the valve clearances a and b according to steps 8 10 TIP Write down the measurement data 8 Measure the intake and exhaust valve clearances of the specified cylinders Adjust if out of specification Not applicable Specified cylinder 9 Turn the flywheel magnet clockwise 360 to align the TDC mark on the flywheel magnet with the pointer 1 2 3 ...

Страница 228: ... fuel pump assembly 6 15 17 Connect the fuel hoses 1 and 2 and then fasten the fuel hoses 1 and 2 using the plastic ties 3 Adjusting the valve clearance Adjust the valve clearances when the engine is cold Do not turn the flywheel magnet coun terclockwise Otherwise the water pump impeller could be damaged Do not turn the flywheel magnet or the driven sprockets when the timing belt is not installed ...

Страница 229: ...hickness Measured valve clear ance Specified valve clearance Example Removed valve lifter thickness 3 000 mm Measured valve clearance 0 30 mm Specified valve clearance 0 20 mm Necessary valve lifter thickness 3 000 mm 0 30 mm 0 20 mm 3 100 mm 8 Install the selected valve lifter into the cylinder head See step 5 in Installing the cylinder head 7 46 9 Install the camshafts camshaft caps and driven s...

Страница 230: ... 35 mm 8 Bolt 8 M10 140 mm 9 Bolt 4 M10 35 mm 10 Bolt 4 M6 16 mm 11 Rigging grommet 1 12 Plastic tie 1 13 Retaining plate 1 14 Bolt 2 M6 30 mm 15 Dowel 2 16 Gasket 1 Not reusable 17 O ring 1 Not reusable 1 1 2 3 4 5 6 7 9 10 10 10 11 12 13 14 15 15 16 17 18 19 20 8 8 4 N m 0 4 kgf m 3 0 ft lb 42 N m 4 2 kgf m 31 0 ft lb 42 N m 4 2 kgf m 31 0 ft lb 20 N m 2 0 kgf m 14 8 ft lb ...

Страница 231: ...Q ty Remarks 18 Dipstick guide 1 19 Bolt 1 M6 16 mm 20 Dipstick 1 1 1 2 3 4 5 6 7 9 10 10 10 11 12 13 14 15 15 16 17 18 19 20 8 8 4 N m 0 4 kgf m 3 0 ft lb 42 N m 4 2 kgf m 31 0 ft lb 42 N m 4 2 kgf m 31 0 ft lb 20 N m 2 0 kgf m 14 8 ft lb ...

Страница 232: ... 2 Disconnect the battery cables 1 3 Remove the junction box cover 2 4 Disconnect the PTT motor leads 1 5 Disconnect the 10 pin coupler a 6 Disconnect the fuel hose 1 7 Disconnect the vapor gas hose 1 8 Remove the dipstick guide 1 9 Disconnect the PTT switch coupler a and trim sensor coupler b 1 2 1 2 1 1 a 1 1 1 ...

Страница 233: ...isconnect the 6Y8 Multifunction Meter harness coupler a or gauge coupler b A 6Y8 Multifunction Meter B Conventional gauge 12 Disconnect the shift cut off switch cou pler a and shift position switch coupler b 13 Disconnect the cooling water pilot hose 1 14 Disconnect the flushing hose 1 15 Remove the apron 1 a b 1 b a a A b B a b 1 1 ...

Страница 234: ...s 1 and a new gas ket 2 2 Install the power unit and then tighten the power unit mounting bolts 3 4 and 5 to the specified torque 3 Install the apron 1 and then tighten the apron screw 2 to the specified torque 4 Connect the flushing hose 1 and then fasten it using the plastic tie 2 1 1 1 2 2 2 3 3 3 3 3 4 4 4 Power unit mounting bolt M8 3 20 N m 2 0 kgf m 14 8 ft lb Power unit mounting bolts M10 ...

Страница 235: ...nnect the 6Y8 Multifunction Meter har ness coupler a or gauge coupler b A 6Y8 Multifunction Meter B Conventional gauge harness 8 Install the 6Y8 Multifunction Meter har ness coupler a and gauge harness cou pler b to the bracket 1 9 Connect the PTT switch coupler a and trim sensor coupler b 10 Install the dipstick guide 1 1 2 1 a b a A b B 1 b a a b 1 ...

Страница 236: ...he PTT motor leads 1 and then tighten the PTT motor lead bolts 2 to the specified torque 15 Install the junction box cover 1 16 Connect the battery cables 2 and then tighten the battery cable nut 3 to the specified torque 17 Install the rubber cap 4 18 Install the throttle cable See Installing the throttle cable 3 11 1 2 1 2 a 1 1 2 PTT motor lead bolt 2 4 N m 0 4 kgf m 3 0 ft lb Battery cable nut...

Страница 237: ...sides of the washer 3 Base assembly 1 4 Screw 4 M6 30 mm 5 Stator assembly 1 6 Pulser coil 1 7 Holder 1 8 Bracket 2 9 Bolt 4 M6 35 mm 10 Holder 1 11 Dowel 2 12 Flywheel magnet 1 13 Woodruff key 1 14 Bolt 1 M6 16 mm 15 Bracket 1 16 Blowby hose 1 1 2 3 4 4 5 6 7 8 8 9 9 9 9 10 11 11 12 13 14 15 16 270 N m 27 0 kgf m 199 1 ft lb ...

Страница 238: ...ler set bolts evenly and completely so that the fly wheel puller 1 is parallel to the flywheel magnet TIP Fit the protrusion a on the hydro puller spacer 2 into the hole b in the hydro pusher 3 A Conventional special service tool B New special service tool Removing the stator assembly 1 Remove the pulser coil coupler a from the junction box 1 and then disconnect the pulser coil coupler a 2 Disconn...

Страница 239: ...s 2 5 Remove the stator assembly 1 and pulser coil 2 Installing the stator assembly 1 Install the dowels 1 pulser coil 2 and stator assembly 3 2 Install the wiring harness 1 to the hold ers 2 3 Install the blowby hose 1 and holders 2 and 3 4 Connect the lighting coil coupler a 1 2 3 1 2 2 1 2 3 2 1 1 1 2 2 2 3 1 a ...

Страница 240: ...et nut 3 TIP Make sure to clean the tapered portions of the crankshaft a and flywheel magnet b 2 Tighten the flywheel magnet nut 1 to the specified torque Apply force in the direction of the arrow to prevent the flywheel holder 2 from slip ping off easily A Conventional special service tool B New special service tool a 1 1 2 3 2 a b Flywheel holder 2 90890 06522 Flywheel stopper 3 90890 06598 Flyw...

Страница 241: ...elt No Part name Q ty Remarks 1 Timing belt 1 2 Timing belt tensioner 1 3 Plate 1 4 Dowel 1 5 Screw 1 M6 10 mm 6 Plate 1 7 Drive sprocket 1 8 Bolt 4 M5 40 mm 7 N m 0 7 kgf m 5 2 ft lb 39 N m 3 9 kgf m 28 8 ft lb 1 2 8 7 6 5 3 4 ...

Страница 242: ...h and then insert a 5 0 mm 0 2 in diameter pin 1 into the hole a TIP When turning the timing belt tensioner apply a force of 15 N m 1 5 kgf m 11 1 ft lb or less Leave the pin 1 inserted into the hole a of the timing belt tensioner until the timing belt is installed again 3 Remove the timing belt 1 from the driven sprocket side Removing the drive sprocket 1 Remove the drive sprocket 1 plate 2 and d...

Страница 243: ...iming belt with its part num ber in the proper orientation from the drive sprocket side to the port and star board driven sprockets in the counter clockwise direction Do not apply grease or oil to the timing belt 3 Adjust the timing belt to the specified installation height a 4 Turn the timing belt tensioner gradually clockwise using a hexagon wrench and then remove the pin 1 TIP When turning the ...

Страница 244: ... 10 A 5 Turn the crankshaft clockwise 2 full turns and then check that the mark a in the drive sprocket and the protrusion b on the cylinder block are aligned Also check that the I marks c and d on the driven sprockets are aligned a b d c ...

Страница 245: ...t 1 3 Terminal 1 4 Starter motor 1 5 Bolt 3 M8 45 mm 6 Cap 1 7 Bolt 1 M6 10 mm 8 Battery cable 1 9 Bolt 1 M8 16 mm 10 Spring washer 1 11 Nut 1 7 10 9 5 4 9 N m 0 9 kgf m 6 6 ft lb 3 2 1 6 9 N m 0 9 kgf m 6 6 ft lb 8 4 N m 0 4 kgf m 3 0 ft lb 11 30 N m 3 0 kgf m 22 1 ft lb ...

Страница 246: ...d then tighten the starter motor mounting bolts 2 to the specified torque 2 Connect the starter motor lead 1 and then tighten the starter motor lead bolt 2 to the specified torque 3 Install the cap 3 4 Install the starter motor lead 1 to the holder 4 5 Install the positive lead 1 and terminal 2 and then tighten the terminal nut 3 to the specified torque 6 Install the cap 4 1 2 3 1 2 1 2 1 Starter ...

Страница 247: ...7 22 Starter motor Terminal nut 3 9 N m 0 9 kgf m 6 6 ft lb ...

Страница 248: ...olt 6 M6 30 mm 4 Bolt 1 M6 16 mm 5 Spark plug wire 1 1 6 Spark plug wire 2 1 7 Spark plug wire 3 1 8 Spark plug wire 4 1 9 Holder 2 10 Holder 2 11 Bolt 2 M6 10 mm 12 Holder 2 13 Holder 1 14 Ignition coil 2 15 Bracket 2 16 Holder 2 17 Bolt 4 M6 25 mm 18 19 9 13 9 19 19 11 10 12 12 17 10 11 17 14 15 15 16 16 14 3 3 3 1 2 4 8 7 6 5 7 N m 0 7 kgf m 5 2 ft lb 25 N m 2 5 kgf m 18 4 ft lb ...

Страница 249: ... ignition coil No Part name Q ty Remarks 18 Hose 1 Exhaust cover to fuel cooler 19 Spark plug 4 18 19 9 13 9 19 19 11 10 12 12 17 10 11 17 14 15 15 16 16 14 3 3 3 1 2 4 8 7 6 5 7 N m 0 7 kgf m 5 2 ft lb 25 N m 2 5 kgf m 18 4 ft lb ...

Страница 250: ...2 3 and 4 2 Disconnect the ignition coil couplers a and then remove the wiring harness 1 from the holders 2 3 Remove the ignition coils 3 Checking the spark plug 1 Clean the electrodes a using a spark plug cleaner 2 Check the spark plug Replace if the electrodes are eroded or there is carbon or other deposits 3 Check the spark plug gap a Replace if out of specification a 1 1 1 3 4 2 Specified spar...

Страница 251: ... hold ers 4 and then connect the ignition coil couplers a 3 Install the spark plug wires 1 2 3 and 4 and then fasten them using the holders 5 6 and 7 Installing the Rectifier Regulator 1 Install a new gasket 1 and the Rectifier Regulator 2 2 Connect the Rectifier Regulator coupler a and then install the ground lead 1 Ignition coil bolt 2 7 N m 0 7 kgf m 5 2 ft lb a 2 2 2 a 3 4 1 1 1 2 3 4 5 5 6 7 ...

Страница 252: ...name Q ty Remarks 1 Fuse box assembly 1 2 Fuse 2 50 A 3 Screw 4 M5 10 mm 4 Fuse 2 20 A 5 Relay 1 6 Fuse 1 30 A 7 Screw 3 M5 20 mm 8 Cover 1 9 Gasket 1 10 Fuse puller 1 11 Fuse 1 20 A Spare 12 Fuse 1 30 A Spare 10 1 9 8 7 6 4 11 5 3 3 2 2 7 2 4 4 6 5 11 12 12 ...

Страница 253: ...ie 2 7 Bolt 2 M6 20 mm 8 Bolt 2 M6 10 mm 9 PTT relay 1 10 Cap 1 11 Bolt 1 M6 10 mm 12 Screw 1 ø6 19 mm 13 Bracket 1 14 Starter relay 1 15 Holder 1 16 Bolt 1 M6 12 mm 17 Bolt 3 M6 35 mm 4 N m 0 4 kgf m 3 0 ft lb 4 N m 0 4 kgf m 3 0 ft lb 22 21 20 17 18 19 17 16 10 7 8 8 4 1 5 6 3 2 18 24 23 19 18 26 25 17 19 11 12 13 14 28 27 15 9 3 4 N m 0 4 kgf m 3 0 ft lb ...

Страница 254: ...Junction box 1 22 Bolt 1 M6 16 mm 23 Screw 1 ø6 19 mm 24 Holder 1 25 Screw 1 ø6 19 mm 26 Bracket 1 27 Grommet 1 28 Air temperature sensor 1 4 N m 0 4 kgf m 3 0 ft lb 4 N m 0 4 kgf m 3 0 ft lb 22 21 20 17 18 19 17 16 10 7 8 8 4 1 5 6 3 2 18 24 23 19 18 26 25 17 19 11 12 13 14 28 27 15 9 3 4 N m 0 4 kgf m 3 0 ft lb ...

Страница 255: ...ature sen sor coupler a 6 Remove the 10 pin wiring harness cou pler a from the holder 1 7 Remove the joint connectors b 8 Remove the junction box 1 along with the wiring harness 9 Disconnect the engine ECM coupler a and then remove the engine ECM 1 10 Disconnect the starter relay lead connec tor a and PTT relay coupler b 11 Remove the PTT relay leads 1 and 2 ground lead 3 and starter relay lead 4 ...

Страница 256: ...und lead 3 and starter relay lead 4 and then tighten the PTT relay lead nuts 5 and starter relay lead bolt 6 to the specified torque 3 Connect the starter relay lead connector c and PTT relay coupler d 4 Install the holder 7 to the junction box and then fasten the wiring harnesses using the plastic ties 8 and 9 5 Install the engine ECM 1 and then con nect the engine ECM coupler a 6 Install the jun...

Страница 257: ...l the 10 pin wiring harness coupler b to the holder 1 9 Connect the engine temperature sensor coupler a 10 Install the ground leads 1 11 Connect the oil pressure sensor coupler a 12 Install the bracket 1 13 Connect the thermoswitch connectors a 1 b a 1 a a 1 1 a ...

Страница 258: ...ead cover 1 10 Screw 8 M4 8 mm 11 Plate 1 12 Clamp 2 13 Hose 1 Cylinder head cover to cylinder block 14 Bolt 16 M7 37 mm 15 Camshaft cap 8 16 Bolt 4 M7 48 mm 17 Camshaft cap 2 11 9 8 10 5 5 7 5 25 23 23 22 24 22 19 19 20 20 17 16 15 14 18 21 12 12 13 8 8 8 4 4 3 3 2 1 3 24 24 6 7 6 60 N m 6 0 kgf m 44 3 ft lb a b 9 N m 0 9 kgf m 6 6 ft lb 17 N m 1 7 kgf m 12 5 ft lb 2 N m 0 2 kgf m 1 5 ft lb ...

Страница 259: ...aft 1 IN 22 Driven sprocket 2 23 Bolt 2 M10 35 mm 24 Dowel 4 25 Gasket 1 Not reusable 11 9 8 10 5 5 7 5 25 23 23 22 24 22 19 19 20 20 17 16 15 14 18 21 12 12 13 8 8 8 4 4 3 3 2 1 3 24 24 6 7 6 60 N m 6 0 kgf m 44 3 ft lb a b 9 N m 0 9 kgf m 6 6 ft lb 17 N m 1 7 kgf m 12 5 ft lb 2 N m 0 2 kgf m 1 5 ft lb ...

Страница 260: ...amshaft caps 1 and 2 camshafts 3 and 4 and oil seals 5 Checking the driven sprocket 1 Check the driven sprockets Replace if cracked damaged or worn Checking the camshaft 1 Measure the cam lobe height a and width b 2 Measure the camshaft runout 3 Measure the camshaft journal diameter a and cylinder head journal inside diameter b 1 1 2 2 2 2 1 3 5 2 2 2 2 1 4 5 Cam lobe height a Intake 45 310 45 410...

Страница 261: ...ey are aligned with the mating surface of the cyl inder head TIP Make sure that pistons 1 and 4 are posi tioned at the TDC 3 Apply a thin even coat of sealant to the mating surface of the camshaft caps 1 4 Install the dowels 1 camshaft caps 2 and 3 and camshaft cap bolts 4 and 5 TIP Install the camshaft caps 2 and 3 in the proper positions so that the stamped num bers are upside down Camshaft jour...

Страница 262: ... using a wrench and then tighten the driven sprocket bolts 2 to the specified torque 8 Install the cylinder head cover See step 11 in Checking the valve clearance 7 1 Camshaft cap bolts 4 and 5 1st 9 N m 0 9 kgf m 6 6 ft lb 2nd 17 N m 1 7 kgf m 12 5 ft lb 3 3 3 3 2 4 3 5 3 3 3 2 1 EX IN 1 2 3 4 1 2 3 4 5 6 7 8 9 10 2 3 EX IN 1 2 3 4 1 2 5 1 4 2 3 5 1 4 2 3 Driven sprocket bolt 2 60 N m 6 0 kgf m 4...

Страница 263: ...alve 8 9 Exhaust valve 8 10 Anode assembly 2 11 Bolt 2 M8 40 mm 12 Bolt 2 M6 20 mm 13 Gasket 2 Not reusable 14 Cover 2 15 Grommet 2 16 Anode 2 17 Bolt 10 M10 120 mm 5 6 a b c 28 N m 2 8 kgf m 20 7 ft lb 56 N m 5 6 kgf m 41 3 ft lb 90 1 2 3 4 7 6 5 9 19 20 21 22 26 23 23 27 25 8 18 17 24 23 25 10 12 13 16 15 14 11 1 2 3 4 7 a b 14 N m 1 4 kgf m 10 3 ft lb 28 N m 2 8 kgf m 20 7 ft lb 23 N m 2 3 kgf ...

Страница 264: ...ket 1 Not reusable 23 Screw 3 M6 16 mm 24 Anode 1 25 Dowel 2 26 Anode 1 27 Anode 1 5 6 a b c 28 N m 2 8 kgf m 20 7 ft lb 56 N m 5 6 kgf m 41 3 ft lb 90 1 2 3 4 7 6 5 9 19 20 21 22 26 23 23 27 25 8 18 17 24 23 25 10 12 13 16 15 14 11 1 2 3 4 7 a b 14 N m 1 4 kgf m 10 3 ft lb 28 N m 2 8 kgf m 20 7 ft lb 23 N m 2 3 kgf m 17 0 ft lb 10 12 13 16 15 14 11 ...

Страница 265: ...nder block Disassembling the cylinder head 1 Remove the intake and exhaust valves TIP Make sure to keep the parts in the order of removal Checking the valve lifter 1 Check the valve lifters Replace if dam aged scratched or worn 2 Measure the valve lifter outside diameter a 1 1 Valve spring compressor 1 90890 04019 Valve spring compressor attachment 2 90890 06320 Valve lifter outside diameter a 30 ...

Страница 266: ...ation Checking the valve spring 1 Measure the valve spring free length a 2 Measure the valve spring tilt a Replace if above specification Checking the valve 1 Check the valve face Replace if pitted or worn 2 Measure the valve margin thickness a 3 Measure the valve stem diameter a Cylinder head warpage limit 0 10 mm 0 0039 in Valve spring free length a 48 08 mm 1 8929 in 2 1 a Valve spring tilt lim...

Страница 267: ...ide to the specified installation height a 3 Insert the special service tool 1 into the valve guide 2 and then ream the valve guide Valve stem diameter a Intake 5 477 5 492 mm 0 2156 0 2162 in Exhaust 5 464 5 479 mm 0 2151 0 2157 in Valve stem runout Intake and exhaust 0 01 mm 0 0004 in Valve guide inside diameter a Intake and exhaust 5 504 5 522 mm 0 2167 0 2174 in Valve guide clearance Intake 0 ...

Страница 268: ...the valve seat contact width a where the blueing dye is adhered to the valve face Reface the valve seat if the valve is not seated properly or if the valve seat contact width is out of specification Check the valve guide if the valve seat contact width is uneven Refacing the valve seat After every lapping procedure make sure to clean off any remaining lapping com pound from the cylinder head and v...

Страница 269: ...ious contact width 4 Adjust the bottom edge of the valve seat contact width using a 60 cutter a Previous contact width 5 Adjust the valve seat contact width to specification using a 45 cutter a Previous contact width b Specified contact width 6 Check the valve seat contact area of the valve See Checking the valve seat 7 43 Valve seat cutter holder 90890 06316 Intake Valve seat cutter 30 90890 0632...

Страница 270: ... near the bottom edge of the valve face cut the bottom edge of the valve seat using a 60 cutter Set its width using a 45 cutter a Previous contact width 7 After refacing the valve seat to the speci fied contact width apply a thin even layer of lapping compound onto the valve seat and then lap the valve using the special service tool 1 Do not get the lapping compound on the valve stem and valve gui...

Страница 271: ...at the valve cot ters 1 securely Installing the cylinder head 1 Install the dowels 1 a new gasket 2 the cylinder head 3 and the cylinder head bolts 4 and 5 2 Tighten the cylinder head bolts 1 to the specified torques in 2 stages and in the order 1 2 and so on 3 Mark the M10 bolts and cylinder head with paint marks a and then tighten the M10 bolts 90 from the marks on the cyl inder head Valve sprin...

Страница 272: ...nd in the order 11 12 and so on 5 Install the valve lifters 1 Cylinder head bolt 1 1 10 M10 1st 28 N m 2 8 kgf m 20 7 ft lb 2nd 56 N m 5 6 kgf m 41 3 ft lb 3rd 90 Cylinder head bolt 2 11 20 M8 4th 14 N m 1 4 kgf m 10 3 ft lb 5th 28 N m 2 8 kgf m 20 7 ft lb 10 1 9 6 2 3 7 18 19 20 2 15 13 11 12 14 16 8 5 1 4 17 90q a 1 ...

Страница 273: ...Anode assembly 1 10 Bolt 1 M6 20 mm 11 Gasket 1 Not reusable 12 Cover 1 13 Grommet 1 14 Anode 1 15 Bolt 1 M8 40 mm 16 Bolt 3 M6 20 mm 17 Cover 1 30 31 32 33 25 24 29 28 21 20 19 18 17 16 27 22 26 22 23 4 5 7 8 6 3 1 2 15 14 13 12 11 10 9 6 N m 0 6 kgf m 4 4 ft lb 12 N m 1 2 kgf m 8 9 ft lb 56 N m 5 6 kgf m 41 3 ft lb 23 N m 2 3 kgf m 17 0 ft lb 6 N m 0 6 kgf m 4 4 ft lb 12 N m 1 2 kgf m 8 9 ft lb ...

Страница 274: ...e 26 Bolt 1 M6 12 mm 27 Holder 1 28 Plug 1 M14 12 mm 29 Gasket 1 Not reusable 30 Exhaust cover 1 31 Gasket 1 Not reusable 32 Screw 7 M5 27 mm 33 Anode 7 30 31 32 33 25 24 29 28 21 20 19 18 17 16 27 22 26 22 23 4 5 7 8 6 3 1 2 15 14 13 12 11 10 9 6 N m 0 6 kgf m 4 4 ft lb 12 N m 1 2 kgf m 8 9 ft lb 56 N m 5 6 kgf m 41 3 ft lb 23 N m 2 3 kgf m 17 0 ft lb 6 N m 0 6 kgf m 4 4 ft lb 12 N m 1 2 kgf m 8 ...

Страница 275: ...or fatigued Checking the thermostat 1 Suspend the thermostat in a container of water 2 Place a thermometer in the water and then heat the water slowly 3 Measure the thermostat valve opening a at the specified water temperatures Replace if out of specification Checking the exhaust cover anode 1 Check the anodes Clean if there is grease oil or scales 1 3 2 1 Water temperature Valve opening a 58 62 C...

Страница 276: ...ostat 2 3 Install the thermostat 2 a new gasket 3 and the thermostat cover 4 and then tighten the thermostat cover bolts 5 to the specified torques in 2 stages 4 Install the thermoswitch 6 5 Install the grommet 7 the PCV 8 the spring 9 a new gasket 10 and the cover 11 Exhaust cover bolt 3 1st 6 N m 0 6 kgf m 4 4 ft lb 2nd 12 N m 1 2 kgf m 8 9 ft lb 2 3 1 3 3 15 3 10 5 1 6 11 16 12 17 8 13 4 9 14 1...

Страница 277: ...3 Engine temperature sensor 1 14 Washer 1 15 Screw 1 M5 12 mm 16 Anode 1 17 Gasket 1 Not reusable 13 14 18 17 16 15 19 7 21 20 22 23 27 26 24 24 25 1 3 2 10 8 9 11 12 7 6 34 33 33 32 31 30 28 29 5 4 15 N m 1 5 kgf m 11 1 ft lb 23 N m 2 3 kgf m 17 0 ft lb 18 N m 1 8 kgf m 13 3 ft lb 34 N m 3 4 kgf m 25 1 ft lb 12 N m 1 2 kgf m 8 9 ft lb 12 N m 1 2 kgf m 8 9 ft lb 7 N m 0 7 kgf m 5 2 ft lb 13 N m 1 ...

Страница 278: ... Not reusable 31 Oil seal 1 Not reusable 32 Gasket 1 Not reusable 33 O ring 2 Not reusable 34 Oil seal 1 Not reusable 13 14 18 17 16 15 19 7 21 20 22 23 27 26 24 24 25 1 3 2 10 8 9 11 12 7 6 34 33 33 32 31 30 28 29 5 4 15 N m 1 5 kgf m 11 1 ft lb 23 N m 2 3 kgf m 17 0 ft lb 18 N m 1 8 kgf m 13 3 ft lb 34 N m 3 4 kgf m 25 1 ft lb 12 N m 1 2 kgf m 8 9 ft lb 12 N m 1 2 kgf m 8 9 ft lb 7 N m 0 7 kgf m...

Страница 279: ...2 outer rotor 3 inner rotor 4 and oil seals 5 and 6 Checking the oil pump 1 Check the inner surface of the oil pump housing Replace the oil pump assembly if scratched 2 Check the gear teeth of the inner rotor and outer rotor Replace the oil pump assembly if the gear teeth are cracked or worn Assembling the oil pump 1 Install new oil seals 1 into the oil pump housing 2 TIP Install an oil seal halfw...

Страница 280: ...direction Installing the oil pump assembly 1 Fill the oil pump assembly with engine oil through the oil passage 2 Install new O rings 1 and the oil pump assembly 2 by aligning the oil pump gear with the crankshaft Installing the balancer assembly 1 Align the keyway a in the crankshaft with the cylinder block and crankcase mating surfaces STBD b Driver rod L3 3 90890 06652 Needle bearing attachment...

Страница 281: ...o the specified torque in 2 stages and in the order 1 2 and so on 5 Install new seals 1 Installing the oil filter bracket 1 Install new O rings 1 and the oil filter bracket 2 2 Install the oil filter 1 and then tighten it to the specified torque a b 1 3 2 Balancer assembly bolt 2 1st 18 N m 1 8 kgf m 13 3 ft lb 2nd 31 N m 3 1 kgf m 22 9 ft lb Balancer assembly bolt 3 1st 7 N m 0 7 kgf m 5 2 ft lb ...

Страница 282: ...7 57 Cylinder block F150A FL150A 0 1 2 3 4 5 6 7 8 9 10 A Oil filter wrench 2 90890 06830 Oil filter 1 18 N m 1 8 kgf m 13 3 ft lb 1 2 1 ...

Страница 283: ...sensor 1 13 Washer 1 14 Screw 1 M5 12 mm 15 Anode 1 16 Gasket 1 Not reusable 17 Plug 1 M14 12 mm 12 13 17 16 15 14 18 6 20 19 21 22 26 25 23 23 24 1 3 2 9 7 8 10 11 6 5 33 32 32 31 30 29 27 28 4 15 N m 1 5 kgf m 11 1 ft lb 23 N m 2 3 kgf m 17 0 ft lb 18 N m 1 8 kgf m 13 3 ft lb 34 N m 3 4 kgf m 25 1 ft lb 12 N m 1 2 kgf m 8 9 ft lb 12 N m 1 2 kgf m 8 9 ft lb 7 N m 0 7 kgf m 5 2 ft lb 13 N m 1 3 kg...

Страница 284: ...le 30 Oil seal 1 Not reusable 31 Gasket 1 Not reusable 32 O ring 2 Not reusable 33 Oil seal 1 Not reusable 12 13 17 16 15 14 18 6 20 19 21 22 26 25 23 23 24 1 3 2 9 7 8 10 11 6 5 33 32 32 31 30 29 27 28 4 15 N m 1 5 kgf m 11 1 ft lb 23 N m 2 3 kgf m 17 0 ft lb 18 N m 1 8 kgf m 13 3 ft lb 34 N m 3 4 kgf m 25 1 ft lb 12 N m 1 2 kgf m 8 9 ft lb 12 N m 1 2 kgf m 8 9 ft lb 7 N m 0 7 kgf m 5 2 ft lb 13 ...

Страница 285: ...ing the oil pump assembly See Installing the oil pump assembly 7 55 Installing the crankcase cover 1 Apply a thin even layer of sealant onto the mating surface of the crankcase cover 2 Install the crankcase cover 1 and then tighten the crankcase cover bolts 2 and 3 to the specified torque in 2 stages and in the order 1 2 and so on Installing the oil filter bracket See Installing the oil filter bra...

Страница 286: ...ust bearing 1 11 O ring 1 Not reusable 12 Cylinder block 1 13 Collar 1 Not reusable 14 Crankpin bearing 8 15 Connecting rod assembly 4 16 Connecting rod bolt 8 Not reusable M9 44 mm 17 Clip 8 Not reusable 2 2 3 1 5 4 12 7 9 10 6 8 11 6 6 6 6 9 13 16 15 20 14 14 16 17 18 17 19 a b c 13 N m 1 3 kgf m 9 6 ft lb 23 N m 2 3 kgf m 17 0 ft lb 90 a b 30 N m 3 0 kgf m 22 1 ft lb 90q a b 14 N m 1 4 kgf m 10...

Страница 287: ... ring set 4 2 2 3 1 5 4 12 7 9 10 6 8 11 6 6 6 6 9 13 16 15 20 14 14 16 17 18 17 19 a b c 13 N m 1 3 kgf m 9 6 ft lb 23 N m 2 3 kgf m 17 0 ft lb 90 a b 30 N m 3 0 kgf m 22 1 ft lb 90q a b 14 N m 1 4 kgf m 10 3 ft lb 28 N m 2 8 kgf m 20 7 ft lb a b 30 N m 3 0 kgf m 22 1 ft lb 90q ...

Страница 288: ...the piston and connecting rod assemblies 3 TIP To prevent mixing the piston and connect ing rod assemblies 3 and connecting rod caps 2 mark each with an identification number a of the corresponding cylinder Make sure to keep the parts in the order of removal 4 Remove the crankshaft 1 crankshaft journal bearings 2 thrust bearing 3 and oil seal 4 5 Remove the collar 1 1 1 a 1 2 3 1 2 2 2 2 2 3 4 a b...

Страница 289: ...e crankshaft Checking the piston ring 1 Measure piston ring dimensions B and T Bearing separator 2 90890 06534 Gear puller 3 90890 06540 General cylindrical tool 4 a 19 9 mm 0 78 in b 90 0 mm 3 54 in Piston diameter a 93 921 93 941 mm 3 6977 3 6985 in Measuring point b 13 5 mm 0 53 in above the bottom of the piston skirt 1 1 2 3 a b Cylinder bore D1 D6 94 000 94 017 mm 3 7008 3 7014 in Piston ring...

Страница 290: ...g the piston pin boss inside diameter do not measure it at the ring groove b or oil groove c Measuring point a 10 0 mm 0 39 in Piston ring end gap b reference data Top ring 0 20 0 30 mm 0 0079 0 0118 in 2nd ring 0 30 0 45 mm 0 0118 0 0177 in Oil ring 0 15 0 60 mm 0 0059 0 0236 in Piston ring groove Top ring a 1 23 1 25 mm 0 0484 0 0492 in 2nd ring b 1 22 1 24 mm 0 0480 0 0488 in Oil ring c 2 51 2 ...

Страница 291: ...necting rod cap 2 Measure the connecting rod small end inside diameter b and big end inside diameter c Checking the connecting rod big end side clearance 1 Measure the connecting rod big end side clearance a Checking the crankshaft 1 Measure the crankshaft journal diame ters a crankpin diameters b and crankpin widths c Piston pin outside diameter a 21 008 21 017 mm 0 8271 0 8274 in Connecting rod ...

Страница 292: ...the crankshaft 4 Install the connecting rod 1 and con necting rod cap 2 onto the crankpin TIP When checking the oil clearance reuse the removed connecting rod bolts Make sure that the marks a on the con necting rod 1 and connecting rod cap 2 face toward the flywheel magnet end of the crankshaft Do not turn the connecting rod until the big end oil clearance measurement has been completed 5 Tighten ...

Страница 293: ...cing the crankpin bearing select the bearing as follows 1 Measure the connecting rod big end inside diameter a Example 2 Check the crankpin mark a on the crankshaft 3 Select the suitable colors 1 for the crankpin bearing from the Crankpin bearing selection table Connecting rod bolt 1 1st 13 N m 1 3 kgf m 9 6 ft lb 2nd 23 N m 2 3 kgf m 17 0 ft lb 3rd 90 Big end oil clearance 0 030 0 057 mm 0 0012 0...

Страница 294: ...inside diameter is 35 and the crankpin mark is 81 select the bearing colors in d The upper bearing color is blue and the lower bearing color is red Upper bearing color Lower bearing color a Green Green b Green Blue c Blue Blue d Blue Red e Red Red 1 1 d 25 26 80 81 82 34 35 36 37 ...

Страница 295: ...in bearing selection table A Connecting rod big end inside diameter B Crankpin mark 25 26 27 28 29 30 31 32 33 34 35 36 37 38 39 40 41 42 43 44 45 80 81 82 83 84 85 86 87 88 89 90 91 92 93 94 95 96 97 98 99 00 A B a b c d e ...

Страница 296: ...e in each crankshaft journal 5 Install the crankshaft journal bearings into the main bearing cap and crankcase TIP Install the crankshaft journal bearings in the original positions 6 Install the main bearing cap 1 and then tighten the main bearing cap bolts 2 to the specified torques in 2 stages and in the order 1 2 and so on TIP Do not turn the crankshaft until the journal oil clearance measureme...

Страница 297: ...Remove the crankcase and then mea sure the width of the compressed Plasti gauge PG 1 on each crankshaft journal Selecting the crankshaft journal bearing When replacing the crankshaft journal bear ing select the bearing as follows 1 Check the crankshaft journal mark a on the crankshaft and the cylinder block mark b on the cylinder block Crankcase bolts 2 1 4 M10 1st 30 N m 3 0 kgf m 22 1 ft lb 2nd ...

Страница 298: ...urnal mark is 81 and the cylinder block mark is 30 select the bearing colors in e J1 J2 J4 J5 Upper bearing color Lower bearing color a Green Green b Green Red c Red Red d Red Yellow e Yellow Yellow f Yellow Blue J3 Upper bearing color Lower bearing color a Green Brown b Green Green c Red Green d Red Red e Yellow Red f Yellow Yellow J5 J4 J3 J2 J1 b 1 1 e 20 21 80 81 82 30 29 31 32 33 ...

Страница 299: ...shaft journal bearing selection table A Cylinder block mark B Crankshaft journal mark 20 21 22 23 24 25 26 27 28 29 30 31 32 33 34 35 36 37 38 80 81 82 83 84 85 86 87 88 89 90 91 92 93 94 95 96 97 98 99 00 a A B b c d e f ...

Страница 300: ...not scratch the pistons or break the piston rings 4 Offset the piston ring end gaps TIP Make sure that the 2R mark a on the 2nd ring 2 and R mark b on the top ring 1 are facing up Make sure that the piston rings move smoothly 5 Install the crankpin bearings 1 into the connecting rod 2 and connecting rod cap 3 TIP Install the crankpin bearings in the original positions 6 Apply engine oil to the sid...

Страница 301: ...ghten new connecting rod bolts 2 to the specified torques in 3 stages TIP Make sure that the protrusions a on the piston and connecting rod assemblies and connecting rod caps 1 are facing toward the flywheel magnet end of the crankshaft In the third tightening stage for the connect ing rod bolts 2 mark the connecting rod bolts and connecting rod cap with paint marks b and then tighten the connecti...

Страница 302: ...arks on the main bearing cap 12 Install the crankshaft journal bearings 1 into the crankcase 13 Apply a thin even layer of sealant onto the mating surface of the crankcase TIP Install the crankshaft journal bearings 1 in the original positions Do not apply any sealant to the crankshaft journal bearings 1 14 Install a new O ring 1 and the crank case 2 and then tighten the crankcase bolts 3 and 4 to...

Страница 303: ...k case with identification marks a and then tighten the bolts 90 from the marks on the crankcase Crankcase bolts 3 1 4 M10 1st 30 N m 3 0 kgf m 22 1 ft lb 2nd 90 Crankcase bolts 4 5 14 M8 1st 14 N m 1 4 kgf m 10 3 ft lb 2nd 28 N m 2 8 kgf m 20 7 ft lb 2 1 3 4 3 4 1 2 4 3 90q 13 9 5 8 12 14 10 6 7 11 a ...

Страница 304: ...8 11 Checking the water pump and shift rod 8 11 Assembling the water pump housing 8 12 Propeller shaft housing regular rotation model 8 13 Removing the propeller shaft housing assembly 8 15 Disassembling the propeller shaft assembly 8 15 Disassembling the propeller shaft housing assembly 8 16 Checking the propeller shaft 8 16 Checking the dog clutch 8 16 Checking the propeller shaft housing 8 16 C...

Страница 305: ... reverse gear backlash before disassembly 8 35 Shimming procedure 8 38 Shim location 8 38 Selecting the pinion shim T3 8 39 Measuring the forward gear backlash 8 41 Adjusting the forward gear shim thickness T1 8 41 Measuring the reverse gear backlash 8 43 Adjusting the reverse gear shim thickness T2 8 43 Lower unit counter rotation model L transom model 8 45 Removing the lower unit 8 47 Disassembl...

Страница 306: ... 57 Drive shaft and lower case counter rotation model 8 60 Removing the drive shaft 8 62 Removing the reverse gear 8 62 Disassembling the drive shaft housing 8 62 Disassembling the reverse gear 8 62 Disassembling the lower case 8 62 Checking the pinion 8 63 Checking the reverse gear 8 63 Checking the drive shaft 8 63 Checking the lower case 8 63 Assembling the reverse gear 8 63 Assembling the lowe...

Страница 307: ...before disassembly 8 69 Shimming procedure 8 72 Shim location 8 72 Selecting the pinion shim T3 8 73 Selecting the propeller shaft shim T4 8 73 Measuring the forward gear backlash 8 74 Adjusting the forward gear shim thickness T2 8 74 Measuring the reverse gear backlash 8 76 Adjusting the reverse gear shim thickness T1 8 76 ...

Страница 308: ...olt 1 M10 45 mm 8 Lower unit 1 9 Spacer 1 10 Propeller 1 11 Spacer 1 Except SDS propeller 12 Washer 1 13 Cotter pin 1 Not reusable 14 Propeller nut 1 15 Spacer 1 SDS propeller 16 Damper 1 SDS propeller 17 Trim tab 1 17 9 8 12 11 13 14 10 5 5 3 4 20 20 7 6 19 4 18 2 1 15 16 43 N m 4 3 kgf m 31 7 ft lb 48 N m 4 8 kgf m 35 4 ft lb 48 N m 4 8 kgf m 35 4 ft lb 55 N m 5 5 kgf m 40 6 ft lb 9 N m 0 9 kgf ...

Страница 309: ... Q ty Remarks 18 Bolt 1 M10 70 mm 19 Drain screw 1 20 Bolt 6 M10 45 mm 17 9 8 12 11 13 14 10 5 5 3 4 20 20 7 6 19 4 18 2 1 15 16 43 N m 4 3 kgf m 31 7 ft lb 48 N m 4 8 kgf m 35 4 ft lb 48 N m 4 8 kgf m 35 4 ft lb 55 N m 5 5 kgf m 40 6 ft lb 9 N m 0 9 kgf m 6 6 ft lb 9 N m 0 9 kgf m 6 6 ft lb ...

Страница 310: ... pre vent the propeller from turning and then remove the propeller nut and propeller 5 Remove the grommet 1 6 Mark the trim tab 2 and lower case with an identification mark a and then remove the trim tab 2 7 Remove the lower case mounting bolts 3 and 4 and then remove the lower unit 5 TIP When disassembling the lower unit measure the backlash before disassembly See Mea suring the forward gear back...

Страница 311: ...e direction TIP When installing the damper 1 make sure that the spacer 3 does not contact the pro peller boss 3 Check the installation depth a of the damper 1 TIP The damper 1 will be in the proper position the damper 1 is in contact with the spacer 2 after the propeller nut 3 has been tight ened to the specified torque Therefore when installing the propeller to the outboard motor make sure to tig...

Страница 312: ...rotation model L transom model A Before tightening the propeller nut 3 to the specified torque B After tightening the propeller nut 3 to the specified torque Installation depth a reference data 9 4 mm 0 37 in A B 1 1 2 2 3 3 ...

Страница 313: ...xtension 1 7 Dowel 4 8 Cover 2 9 Seal 2 10 Water pipe 1 11 Water pipe 1 12 Grommet 1 13 Bolt 1 M10 45 mm 14 Lower unit 1 15 Spacer 1 16 Propeller 1 17 Spacer 1 Except SDS propeller 23 15 14 18 17 19 20 16 7 7 3 4 5 5 13 12 7 10 11 8 9 9 8 5 5 7 25 4 24 6 1 2 2 1 21 22 43 N m 4 3 kgf m 31 7 ft lb 48 N m 4 8 kgf m 35 4 ft lb 48 N m 4 8 kgf m 35 4 ft lb 48 N m 4 8 kgf m 35 4 ft lb 55 N m 5 5 kgf m 40...

Страница 314: ...ller 22 Damper 1 SDS propeller 23 Trim tab 1 24 Bolt 1 M10 200 mm 25 Drain screw 1 23 15 14 18 17 19 20 16 7 7 3 4 5 5 13 12 7 10 11 8 9 9 8 5 5 7 25 4 24 6 1 2 2 1 21 22 43 N m 4 3 kgf m 31 7 ft lb 48 N m 4 8 kgf m 35 4 ft lb 48 N m 4 8 kgf m 35 4 ft lb 48 N m 4 8 kgf m 35 4 ft lb 55 N m 5 5 kgf m 40 6 ft lb 9 N m 0 9 kgf m 6 6 ft lb 9 N m 0 9 kgf m 6 6 ft lb ...

Страница 315: ...nds 1 Drain the gear oil 2 Remove the propeller and trim tab See steps 2 6 in Removing the lower unit 8 3 3 Remove the lower case mounting bolts 1 and 2 and then remove the lower unit 3 and extension 4 TIP When disassembling the lower unit measure the backlash before disassembly See Mea suring the forward gear backlash and reverse gear backlash before disassembly 8 35 Disassembling the propeller S...

Страница 316: ... 2 E clip 1 3 O ring 1 Not reusable 4 Plate 1 5 Bolt 3 M6 20 mm 6 Oil seal 1 Not reusable 7 Collar 1 8 Spacer 1 9 Washer 2 10 Wave washer 1 11 Impeller 1 12 Outer plate cartridge 1 13 Gasket 1 Not reusable 14 Woodruff key 1 15 Dowel 2 16 Plate 1 17 Rubber seal 1 2 15 14 15 3 4 5 5 6 5 7 8 9 10 9 11 22 22 22 12 13 16 17 21 24 23 20 19 18 1 ...

Страница 317: ... 3 4 5 6 7 8 9 10 A No Part name Q ty Remarks 18 O ring 1 Not reusable 19 Insert cartridge 1 20 O ring 1 Not reusable 21 Water pump housing 1 22 Bolt 4 M8 45 mm 23 Seal 1 24 Cover 1 2 15 14 15 3 4 5 5 6 5 7 8 9 10 9 11 22 22 22 12 13 16 17 21 24 23 20 19 18 1 ...

Страница 318: ...9 outer plate cartridge 10 and gasket 11 3 Remove the rubber seal 1 and plate 2 4 Set the gear shift to the N position 5 Remove the shift rod 1 Disassembling the water pump housing 1 Remove the insert cartridge 1 and O ring 2 2 Remove the cover 1 and seal 2 Checking the water pump and shift rod 1 Check the water pump housing Replace if deformed Shift rod socket 1 90890 06681 1 2 3 3 4 5 6 7 8 9 10...

Страница 319: ... the impeller insert cartridge and outer plate cartridge Replace if cracked or worn 3 Check the Woodruff key and the keyway in the drive shaft Replace if deformed or worn 4 Check the shift rod Replace if bent cracked or worn Assembling the water pump housing 1 Install the seal 1 and cover 2 2 Install a new O ring 1 and the insert cartridge 2 TIP Fit the protrusions a on the insert cartridge 2 into...

Страница 320: ...2 8 72 mm 0 34 in reference data 5 Spring 1 6 Dog clutch 1 F150A Six teeth 7 Dog clutch 1 F150B Ten teeth 8 Cross pin 1 9 Spring 1 10 Propeller shaft 1 11 Reverse gear shim T2 12 Washer 1 13 Reverse gear 1 14 Thrust washer 1 15 Ball bearing 1 Not reusable 16 O ring 1 Not reusable 17 Propeller shaft housing 1 1 2 2 3 5 3 4 6 8 9 10 11 13 14 15 16 17 20 21 22 1 2 2 5 4 3 8 10 3 9 4 18 12 19 7 145 N ...

Страница 321: ...3 4 5 6 7 8 9 10 A No Part name Q ty Remarks 18 Key 1 19 Needle bearing 1 Not reusable 20 Oil seal 2 Not reusable 21 Claw washer 1 22 Ring nut 1 1 2 2 3 5 3 4 6 8 9 10 11 13 14 15 16 17 20 21 22 1 2 2 5 4 3 8 10 3 9 4 18 12 19 7 145 N m 14 5 kgf m 106 9 ft lb ...

Страница 322: ...1 propeller shaft assembly 2 and reverse gear shims 3 Disassembling the propeller shaft assembly 1 Remove the spring 1 and then remove the cross pin 2 dog clutch 3 slider 4 balls 5 6 and 7 and spring 8 TIP When removing the slider 4 make sure that the balls do not fall out of position Ring nut wrench extension 1 90890 06513 Ring nut wrench 4 2 90890 06512 1 1 2 1 2 Bearing housing puller claw L 1 ...

Страница 323: ...ls and slider Replace if cracked or worn Checking the propeller shaft housing 1 Check the propeller shaft housing Replace if cracked or damaged Checking the reverse gear 1 Check the teeth and dogs of the reverse gear Replace if cracked or worn Bearing separator 3 90890 06534 Stopper guide plate 4 90890 06501 Stopper guide stand 5 90890 06538 Bearing puller assembly 6 90890 06535 Stopper guide plat...

Страница 324: ...the spring 2 Assembling the propeller shaft housing assembly 1 Install a new needle bearing 1 in the propeller shaft housing at the specified installation depth a TIP Face the bearing identification mark b on the needle bearing toward the propeller When using the driver rod do not strike the special service tool in a manner that will force the stopper 5 out of place 2 Install new oil seals 1 in th...

Страница 325: ...ing 2 onto the reverse gear 3 TIP Face the bearing identification mark a on the ball bearing toward the propeller 4 Install the reverse gear assembly 1 5 Check that the reverse gear turns smoothly 6 Install a new O ring 1 Bearing inner race attachment 2 90890 06640 Installation depth a 4 75 5 25 mm 0 187 0 207 in Needle bearing attachment 4 90890 06654 1 2 a 1 2 3 4 1 2 3 4 a Needle bearing attach...

Страница 326: ...ot reusable 5 Drive shaft housing 1 6 Bolt 4 M8 25 mm 7 Oil seal 2 Not reusable 8 Cover 1 9 Self locking nut 1 10 Water inlet cover STBD 1 11 Drive shaft 1 12 Sleeve 1 13 Lower case 1 14 Forward gear shim T1 15 Taper roller bearing 2 Not reusable 16 Needle bearing 2 Not reusable 17 Forward gear 1 9 10 18 19 1 N m 0 1 kgf m 0 7 ft lb 8 7 6 5 4 3 2 1 6 12 95 N m 9 5 kgf m 70 1 ft lb 11 13 14 15 17 1...

Страница 327: ... 5 6 7 8 9 10 A No Part name Q ty Remarks 18 Water inlet cover PORT 1 19 Screw 1 M5 45 mm 20 Needle bearing 1 Not reusable 21 Pinion 1 22 Pinion nut 1 9 10 18 19 1 N m 0 1 kgf m 0 7 ft lb 8 7 6 5 4 3 2 1 6 12 95 N m 9 5 kgf m 70 1 ft lb 11 13 14 15 17 16 16 20 21 22 ...

Страница 328: ...ft 2 and sleeve 3 Remove the forward gear assembly 1 Disassembling the drive shaft housing 1 Remove the O ring 1 2 Remove the oil seals 1 3 Remove the needle bearing 1 Disassembling the forward gear 1 Remove the taper roller bearing inner race 1 Drive shaft holder 6 3 90890 06520 Pinion nut holder 4 90890 06715 1 2 3 4 1 2 3 4 1 Needle bearing attachment 2 90890 06610 Driver rod L3 3 90890 06652 1...

Страница 329: ...g a gas torch and then remove the taper roller bearing outer race 1 and forward gear shims 2 When heating the lower case heat the entire installation area evenly Otherwise the paint on the lower case could be burned 3 Remove the needle bearing 1 Checking the pinion 1 Check the teeth of the pinion Replace if cracked or worn Checking the forward gear 1 Check the teeth and dogs of the forward gear Re...

Страница 330: ...l lation depth a TIP When using the driver rod do not strike the special service tool in a manner that will force the stopper 5 out of place 2 Install new oil seals 1 in the drive shaft housing at the specified installation depth a TIP Install an oil seal halfway into the drive shaft housing and then install the other oil seal Drive shaft runout 1 0 mm 0 039 in Needle bearing attachment 3 90890 06...

Страница 331: ...talled using a gas torch and then install a new taper roller bearing outer race 2 When heating the lower case heat the entire installation area evenly Otherwise the paint on the lower case could be burned TIP Do not reuse a shim if deformed or scratched 3 While holding the special service tool 1 strike the tool to check that the taper roller bearing outer race is installed prop erly TIP If a high ...

Страница 332: ...stall the sleeve 1 drive shaft 2 thrust bearing 3 and original pinion shims 4 TIP Make sure that the protrusion a on the sleeve 1 is aligned with the slot b in the lower case 3 Install the pinion and pinion nut tempo rarily TIP When installing the pinion lift up the drive shaft slightly and align the splines on the drive shaft with the splines on the pinion 4 Install the drive shaft housing 1 and ...

Страница 333: ...the original reverse gear shims 1 propeller shaft housing assembly 2 and key 3 3 Install the claw washer 1 TIP Make sure to fit the protrusion a on the pro peller shaft housing into the slot b in the claw washer 1 4 Install the ring nut 1 and then tighten it to the specified torque Drive shaft holder 6 2 90890 06520 Pinion nut holder 3 90890 06715 Pinion nut 1 95 N m 9 5 kgf m 70 1 ft lb 2 1 a 1 2...

Страница 334: ...rod 3 3 Install the shift rod 1 TIP Make sure to install the shift rod 1 in the proper orientation Installation orientation is different between the counter rotation model and the regular rotation model 4 Check that the shift rod operates smoothly Installing the water pump 1 Install the plate 1 and rubber seal 2 2 Install the dowels 1 a new gasket 2 and the outer plate cartridge 3 3 Install the Wo...

Страница 335: ...aft counterclock wise Otherwise the water pump impeller could be damaged TIP While turning the drive shaft clockwise push the water pump housing down to install it Checking the lower unit for air leakage 1 Remove the check screw 1 and then install the special service tool 2 2 Apply the specified pressure Check that the pressure is maintained in the lower unit for 10 seconds or more Do not overpres...

Страница 336: ...h the mark b on the plate 2 2 Set the gear shift to the N position 3 Install a new O ring 1 to the hose nipple 2 and then install the hose nipple 2 to the lower unit 3 4 Install the dowels 4 5 Install the lower unit 3 and then tighten the lower case mounting bolts 5 and 6 to the specified torque 6 Install the trim tab 7 to its original posi tion a and then tighten the trim tab bolt 8 to the specif...

Страница 337: ... off switch When installing the lower unit with the power unit installed make sure to sus pend the outboard motor Otherwise the outboard motor could fall suddenly and result in severe injuries When loosening or tightening the pro peller nut do not hold the propeller using your hands 1 Check that the shift rod is in the N posi tion See steps 1 and 2 in Installing the lower unit L transom model 8 29...

Страница 338: ... propeller See steps 6 9 in Installing the lower unit L transom model 8 29 8 Fill the lower unit with gear oil up to the proper level See steps 5 9 in Changing the gear oil 10 11 Lower case mounting bolts 10 and 11 48 N m 4 8 kgf m 35 4 ft lb 10 11 3 4 6 1 9 8 7 7 8 5 5 10 1 2 2 5 5 ...

Страница 339: ...gear oil before measuring the backlash If the backlash is within specification shimming is not required When assembling the original inner parts and a new lower case shimming is required When replacing the pinion forward gear reverse gear bearings drive shaft or propeller shaft housing shimming is required 1 Remove the water pump assembly 2 Measure the backlash before disassembly 3 Within specific...

Страница 340: ...ring point 1 Measuring point 2 Measuring point 3 Measuring point 4 Average Round down average M Measurements Before disassembly After disassembly Measuring point 1 Measuring point 2 Measuring point 3 Measuring point 4 Average Round down average Measurements Before disassembly After disassembly Measuring point 1 Measuring point 2 Measuring point 3 Measuring point 4 Average Round down average ...

Страница 341: ... 9 10 A Forward gear shim T1 thickness adjustment in 2 places mm Reverse gear shim T2 thickness adjustment in 2 places mm Number of shim s Subtotal 0 10 0 12 0 15 0 18 0 30 0 40 0 50 Total Number of shim s Subtotal 0 10 0 12 0 15 0 18 0 30 0 40 0 50 Total ...

Страница 342: ...rns or more to seat the taper roller bearing 7 While holding the drive shaft to prevent it from turning tighten the center bolt 1 to the specified torque 8 Place the lower unit in an upright position 9 Remove the cover 1 and then install the outer plate cartridge 2 10 Set the spring 1 on the outer plate cartridge and then install the handle holder 2 so that the spring is compressed to the specifie...

Страница 343: ...t There fore to obtain correct measurements con sider the spring resistance force when turning the drive shaft Do not turn the drive shaft using too much force Otherwise the forward gear will turn leading to incorrect measurements When turning the drive shaft hold it using a little force A knocking sound may be heard when the drive shaft is rotated but this is the sound of the pinion contacting th...

Страница 344: ... SDS propeller 19 Repeat steps 12 14 to measure the reverse gear backlash 20 Check that the reverse gear backlash average is within specification TIP Adjust the shim thicknesses if the reverse gear backlash is out of specification 21 Remove the special service tools and then install the water pump assembly mm Measurement point a 0 30 Measurement point b 0 36 Measurement point d 0 34 Measurement po...

Страница 345: ...s T2 make sure to select the pinion shims T3 When assembling the lower unit to measure the backlash after selecting the pinion shims T3 do not apply gear oil grease or sealant to the parts When assembling the lower unit after shimming is completed make sure to apply gear oil grease and sealant to the specified areas Shim location P F R T2 T1 T3 ...

Страница 346: ...aring outer race Make sure to install the thrust bearing outer race so that it is facing the same direction as when it was removed Make sure that the cutout a in the drive shaft housing assembly is facing the oppo site direction of the plate 4 of the special service tool 2 Tighten the drive shaft housing bolts 1 3 Install the pinion 1 and pinion nut 2 and then tighten the pinion nut 2 temporarily ...

Страница 347: ...nion 1 so that it does not lift up and then measure the distance between the pinion 1 and the special service tool 2 TIP When measuring the distance insert the end of the thickness gauge straight into the gap at the measurement point Do not insert the thickness gauge at an angle Measure the distance at 4 points a b c and d Write down the measurement data in the shimming check sheet 10 Determine th...

Страница 348: ...taper roller bearing outer race TIP If the original forward gear shims T1 are missing install new shims with a combined thickness of 0 55 mm Do not reuse a shim if deformed or scratched 2 Install the forward gear assembly drive shaft and pinion See Installing the drive shaft 8 25 3 Check that the drive shaft turns smoothly 4 Install the propeller shaft housing assembly See Installing the propeller...

Страница 349: ...ection chart shows the shim thickness adjustments for the points marked on the chart Example Backlash measurement BL1 0 10 mm a Forward gear shim T1 thickness adjustment 0 19 mm b The current shim thickness must be decreased by 0 19 mm A Backlash measurement BL1 B Shim thickness adjustment 4 Calculate the new forward gear shim T1 thickness TIP Use the lowest number of shims to obtain the required ...

Страница 350: ...f deformed or scratched 3 Determine the reverse gear shim T2 thickness adjustment using the Reverse gear shim T2 selection chart according to the backlash measurement BL2 from Measuring the reverse gear backlash See Forward gear shim T1 selection chart F150A A 13 or Reverse gear shim T2 selection chart F150B A 14 TIP If the shim thickness adjustment value is positive increase the current shim thic...

Страница 351: ...se the following formula when the shim thickness adjustment value is positive Current reverse gear shim thickness 0 62 mm Shim thickness adjustment 0 14 mm New reverse gear shim T2 thickness 0 62 mm 0 14 mm 0 76 mm Use the following formula when the shim thickness adjustment value is negative Current reverse gear shim thickness 0 62 mm Shim thickness adjustment 0 21 mm New reverse gear shim T2 thi...

Страница 352: ...olt 1 M10 45 mm 8 Lower unit 1 9 Spacer 1 10 Propeller 1 11 Spacer 1 Except SDS propeller 12 Washer 1 13 Cotter pin 1 Not reusable 14 Propeller nut 1 15 Spacer 1 SDS propeller 16 Damper 1 SDS propeller 17 Trim tab 1 12 11 13 14 55 N m 5 5 kgf m 40 6 ft lb 17 9 8 10 5 5 3 4 20 20 7 6 19 4 18 2 1 15 16 43 N m 4 3 kgf m 31 7 ft lb 48 N m 4 8 kgf m 35 4 ft lb 48 N m 4 8 kgf m 35 4 ft lb 9 N m 0 9 kgf ...

Страница 353: ...e Q ty Remarks 18 Bolt 1 M10 70 mm 19 Drain screw 1 20 Bolt 6 M10 45 mm 12 11 13 14 55 N m 5 5 kgf m 40 6 ft lb 17 9 8 10 5 5 3 4 20 20 7 6 19 4 18 2 1 15 16 43 N m 4 3 kgf m 31 7 ft lb 48 N m 4 8 kgf m 35 4 ft lb 48 N m 4 8 kgf m 35 4 ft lb 9 N m 0 9 kgf m 6 6 ft lb 9 N m 0 9 kgf m 6 6 ft lb ...

Страница 354: ... measure the backlash before disassembly See Mea suring the forward gear backlash and reverse gear backlash before disassembly 8 69 Disassembling the propeller SDS propeller See Assembling the propeller SDS propel ler 8 4 Checking the propeller See Checking the propeller 8 3 Checking the lower unit anode See Checking the lower unit anode 8 3 Assembling the propeller SDS propeller See Assembling th...

Страница 355: ...xtension 1 7 Dowel 4 8 Cover 2 9 Seal 2 10 Water pipe 1 11 Water pipe 1 12 Grommet 1 13 Bolt 1 M10 45 mm 14 Lower unit 1 15 Spacer 1 16 Propeller 1 17 Spacer 1 Except SDS propeller 16 23 15 14 18 17 19 20 7 7 3 4 5 5 13 12 7 10 11 8 9 9 8 5 5 7 25 4 24 6 1 2 2 1 21 22 43 N m 4 3 kgf m 31 7 ft lb 48 N m 4 8 kgf m 35 4 ft lb 48 N m 4 8 kgf m 35 4 ft lb 48 N m 4 8 kgf m 35 4 ft lb 55 N m 5 5 kgf m 40...

Страница 356: ...eller 22 Damper 1 SDS propeller 23 Trim tab 1 24 Bolt 1 M10 200 mm 25 Drain screw 1 16 23 15 14 18 17 19 20 7 7 3 4 5 5 13 12 7 10 11 8 9 9 8 5 5 7 25 4 24 6 1 2 2 1 21 22 43 N m 4 3 kgf m 31 7 ft lb 48 N m 4 8 kgf m 35 4 ft lb 48 N m 4 8 kgf m 35 4 ft lb 48 N m 4 8 kgf m 35 4 ft lb 55 N m 5 5 kgf m 40 6 ft lb 9 N m 0 9 kgf m 6 6 ft lb 9 N m 0 9 kgf m 6 6 ft lb ...

Страница 357: ...unit 8 8 TIP When disassembling the lower unit measure the backlash before disassembly See Mea suring the forward gear backlash and reverse gear backlash before disassembly 8 69 Disassembling the propeller SDS propeller See Disassembling the propeller SDS pro peller 8 3 Checking the propeller See Checking the propeller 8 3 Checking the lower unit anode See Checking the lower unit anode 8 3 Assembl...

Страница 358: ...1 2 E clip 1 3 O ring 1 Not reusable 4 Plate 1 5 Bolt 3 M6 20 mm 6 Oil seal 1 Not reusable 7 Collar 1 8 Spacer 1 9 Washer 2 10 Wave washer 1 11 Impeller 1 12 Outer plate cartridge 1 13 Gasket 1 Not reusable 14 Woodruff key 1 15 Dowel 2 16 Plate 1 17 Rubber seal 1 2 15 14 15 3 4 5 5 6 5 7 8 9 10 9 11 22 22 22 12 13 16 17 21 24 23 20 19 18 1 ...

Страница 359: ... 3 4 5 6 7 8 9 10 A No Part name Q ty Remarks 18 O ring 1 Not reusable 19 Insert cartridge 1 20 O ring 1 Not reusable 21 Water pump housing 1 22 Bolt 4 M8 45 mm 23 Seal 1 24 Cover 1 2 15 14 15 3 4 5 5 6 5 7 8 9 10 9 11 22 22 22 12 13 16 17 21 24 23 20 19 18 1 ...

Страница 360: ...s 1 4 in Removing the water pump and shift rod 8 11 2 Remove the shift rod 1 Disassembling the water pump housing See Disassembling the water pump hous ing 8 11 Checking the water pump and shift rod See Checking the water pump and shift rod 8 11 Assembling the water pump housing See Assembling the water pump housing 8 12 1 ...

Страница 361: ...all 2 8 72 mm 0 34 in reference data 5 Spring 1 6 Dog clutch 1 FL150A Six teeth 7 Dog clutch 1 FL150B Ten teeth 8 Cross pin 1 9 Spring 1 10 Forward gear shim T2 11 Forward gear 1 12 Thrust washer 1 13 Taper roller bearing 1 Not reusable 14 O ring 1 Not reusable 15 Propeller shaft 1 16 Thrust bearing 1 17 Propeller shaft shim T4 9 15 11 12 13 14 18 16 17 21 22 23 1 2 2 5 4 3 8 15 3 9 19 10 20 1 2 2...

Страница 362: ...name Q ty Remarks 18 Propeller shaft housing 1 19 Key 1 20 Needle bearing 1 Not reusable 21 Oil seal 2 Not reusable 22 Claw washer 1 23 Ring nut 1 9 15 11 12 13 14 18 16 17 21 22 23 1 2 2 5 4 3 8 15 3 9 19 10 20 1 2 2 3 5 3 4 6 8 7 145 N m 14 5 kgf m 106 9 ft lb ...

Страница 363: ...e the dog clutch See Disassem bling the propeller shaft assembly 8 15 2 Remove the O ring 1 3 Heat the area of the propeller shaft housing 1 where the taper roller bearing outer race is to be installed using a gas torch and then remove the forward gear assembly 2 When heating the propeller shaft housing heat the entire installation area evenly Otherwise the propeller shaft housing could be damaged...

Страница 364: ... could result To prevent fires remove any flammable substances such as gasoline and oil around the working area Keep good ventilation while working 1 Install the needle bearing and oil seals See steps 1 and 2 in Assembling the propeller shaft housing assembly 8 17 2 Install the original propeller shaft shims 1 and thrust bearing 2 3 Install the propeller shaft 1 and taper roller bearing inner race...

Страница 365: ...l is struck the taper roller bearing outer race is installed properly 6 Install the thrust washer 1 and forward gear 2 using the dog clutch 3 and special service tool 4 TIP Face the F mark a on the dog clutch 3 toward the forward gear 7 Install the spring 1 balls 2 3 and 4 and slider 5 8 Install the dog clutch 1 so that the hole a in the dog clutch 1 and the hole b in the propeller shaft are align...

Страница 366: ...8 59 Propeller shaft housing counter rotation model 9 Install the cross pin 1 and then install the spring 2 10 Install a new O ring 1 1 1 a a b b c 2 d 1 2 1 2 1 ...

Страница 367: ...e bearing 1 Not reusable 5 Drive shaft housing 1 6 Bolt 4 M8 25 mm 7 Oil seal 2 Not reusable 8 Cover 1 9 Self locking nut 1 10 Water inlet cover STBD 1 11 Drive shaft 1 12 Sleeve 1 13 Lower case 1 14 Reverse gear shim T1 15 Roller bearing 1 Not reusable 16 Thrust bearing 1 17 Needle bearing 2 Not reusable 14 16 15 9 10 19 20 1 N m 0 1 kgf m 0 7 ft lb 8 7 6 5 4 3 2 1 6 12 11 13 18 21 22 23 17 17 95...

Страница 368: ... name Q ty Remarks 18 Reverse gear 1 19 Water inlet cover PORT 1 20 Screw 1 M5 45 mm 21 Needle bearing 1 Not reusable 22 Pinion 1 23 Pinion nut 1 14 16 15 9 10 19 20 1 N m 0 1 kgf m 0 7 ft lb 8 7 6 5 4 3 2 1 6 12 11 13 18 21 22 23 17 17 95 N m 9 5 kgf m 70 1 ft lb ...

Страница 369: ...bling the lower case Use heat resistant gloves Otherwise burns could result To prevent fires remove any flammable substances such as gasoline and oil around the working area Keep good ventilation while working 1 Remove the water inlet covers 1 and 2 2 Heat the area of the lower case where the roller bearing outer race is to be installed using a gas torch and then remove the roller bearing outer ra...

Страница 370: ...ng the lower case Use heat resistant gloves Otherwise burns could result To prevent fires remove any flammable substances such as gasoline and oil around the working area Keep good ventilation while working 1 Install the original forward gear shims 1 TIP Do not reuse a shim if deformed or scratched 2 Heat the area of the lower case where the roller bearing outer race is to be installed using a gas...

Страница 371: ...ps 3 5 in Installing the propeller shaft housing assembly 8 26 Installing the shift rod 1 Install the plate to the shift rod See steps 1 and 2 in Installing the shift rod 8 27 2 Install the shift rod 1 TIP Make sure to install the shift rod 1 in the proper orientation Installation orientation is different between the counter rotation model and the regular rotation model Installing the water pump S...

Страница 372: ...d 2 in Installing the lower unit L transom model 8 29 2 Install the extension and lower unit See steps 2 6 in Installing the lower unit X transom model 8 30 3 Install the trim tab and propeller See steps 6 9 in Installing the lower unit L transom model 8 29 4 Fill the lower unit with gear oil up to the proper level See steps 5 9 in Changing the gear oil 10 11 ...

Страница 373: ... gear oil before measuring the backlash If the backlash is within specification shimming is not required When assembling the original inner parts and a new lower case shimming is required When replacing the pinion forward gear reverse gear bearings drive shaft or propeller shaft housing shimming is required 1 Remove the water pump assembly 2 Measure the backlash before disassembly 3 Within specifi...

Страница 374: ...ring point 1 Measuring point 2 Measuring point 3 Measuring point 4 Average Round down average M Measurements Before disassembly After disassembly Measuring point 1 Measuring point 2 Measuring point 3 Measuring point 4 Average Round down average Measurements Before disassembly After disassembly Measuring point 1 Measuring point 2 Measuring point 3 Measuring point 4 Average Round down average ...

Страница 375: ... 9 10 A Forward gear shim T2 thickness adjustment in 2 places mm Reverse gear shim T1 thickness adjustment in 2 places mm Number of shim s Subtotal 0 10 0 12 0 15 0 18 0 30 0 40 0 50 Total Number of shim s Subtotal 0 10 0 12 0 15 0 18 0 30 0 40 0 50 Total ...

Страница 376: ... tighten the center bolt 3 temporarily 5 Turn the drive shaft 10 turns or more 6 While holding the drive shaft to prevent it from turning tighten the center bolt 1 to the specified torque 7 Place the lower unit in an upright position 8 Remove the cover 1 and then install the outer plate cartridge 2 9 Set the spring 1 on the outer plate cartridge and then install the handle holder 2 so that the spr...

Страница 377: ...t There fore to obtain correct measurements con sider the spring resistance force when turning the drive shaft Do not turn the drive shaft using too much force Otherwise the forward gear will turn leading to incorrect measurements When turning the drive shaft hold it using a little force A knocking sound may be heard when the drive shaft is rotated but this is the sound of the pinion contacting th...

Страница 378: ...ied torque 19 Repeat steps 11 13 to measure the reverse gear backlash 20 Check that the reverse gear backlash average is within specification TIP Adjust the shim thicknesses if the reverse gear backlash is out of specification 21 Remove the special service tools and washers and then install the propeller shaft housing assembly shift rod and water pump assembly mm Measurement point a 0 30 Measureme...

Страница 379: ... T1 make sure to select the pinion shims T3 When assembling the lower unit to measure the backlash after selecting the pinion shims T3 do not apply gear oil grease or sealant to the parts When assembling the lower unit after shimming is completed make sure to apply gear oil grease and sealant to the specified areas Shim location T1 P F R T3 T2 T4 ...

Страница 380: ... Propeller shaft shim T4 selection table according to the free play measurement See Propeller shaft shim T4 selection table A 15 TIP If the shim thickness adjustment value is positive the current shim thickness must be increased by that amount and if the value is negative the current shim thickness must be decreased by that amount The gray colored cell on the selection table indicates the specifie...

Страница 381: ...ngs before installation Do not apply gear oil to the parts Otherwise correct measurements cannot be obtained Keep the parts free of foreign material such as dirt and lint When measuring the forward gear or reverse gear backlash use the original bearings and shims 1 Install the original forward gear shims T2 and propeller shaft housing assem bly See Installing the propeller shaft housing assembly 8...

Страница 382: ...shim T2 thickness adjustment 0 12 mm b The current shim thickness must be increased by 0 12 mm A Backlash measurement BL2 B Shim thickness adjustment 4 Calculate new forward gear shim T2 thickness TIP Use the lowest number of shims to obtain the required shim thickness If the calculated shim thickness cannot be obtained with a combination of the available shims increase or decrease the shim thick ...

Страница 383: ...r bearing outer race and reverse gear shims T1 2 Measure the thickness of original reverse gear shim T1 in 2 places TIP Do not reuse a shim if deformed or scratched 3 Determine the reverse gear shim T1 thickness adjustment using the Reverse gear shim T1 selection chart according to the backlash measurement BL1 from Measuring the reverse gear backlash See Forward gear shim T2 selection chart FL150A...

Страница 384: ...owing formula when the shim thickness adjustment value is positive Current reverse gear shim thickness 1 00 mm Shim thickness adjustment 0 22 mm New reverse gear shim T1 thickness 1 00 mm 0 22 mm 1 22 mm Use the following formula when the shim thickness adjustment value is negative Current reverse gear shim thickness 1 00 mm Shim thickness adjustment 0 14 mm New reverse gear shim T1 thickness 1 00...

Страница 385: ...8 78 Shimming counter rotation model 0 1 2 3 4 5 6 7 8 9 10 A MEMO ...

Страница 386: ...ase and mounts 9 13 Removing the upper case 9 15 Installing the upper case 9 15 Upper case 9 17 Disassembling the upper case 9 18 Checking the drive shaft bushing 9 18 Assembling the upper case 9 18 Oil pan and exhaust manifold 9 20 Disassembling the oil pan and exhaust manifold 9 22 Checking the oil pan and exhaust manifold 9 22 Checking the oil strainer 9 22 Assembling the oil pan and exhaust ma...

Страница 387: ...Installing the tilt ram 9 46 PTT motor 9 48 Removing the reservoir 9 50 Removing the PTT motor 9 50 Disassembling the PTT motor 9 50 Checking the armature PTT motor 9 51 Checking the brush 9 51 Checking the reservoir 9 52 Assembling the PTT motor 9 52 Installing the PTT motor 9 53 Installing the reservoir 9 53 PTT gear pump 9 54 Removing the gear pump assembly 9 57 Disassembling the gear pump hous...

Страница 388: ... Shift lever 1 9 Shift cut off switch 1 10 Spring 1 11 Bushing 2 12 Bolt 2 M6 50 mm 13 Bracket 1 14 Grease nipple 1 15 Bolt 1 16 Grommet 1 17 Circlip 1 2 1 2 2 3 3 9 2 4 4 5 6 7 8 10 11 11 12 13 14 15 16 17 18 18 19 20 21 22 23 24 25 26 27 28 29 1 N m 0 1 kgf m 0 7 ft lb 2 5 N m 0 25 kgf m 1 84 ft lb 2 5 N m 0 25 kgf m 1 84 ft lb 19 N m 1 9 kgf m 14 0 ft lb 18 N m 1 8 kgf m 13 3 ft lb ...

Страница 389: ...t rod detent bolt 1 23 Dowel 1 24 Grease nipple 1 25 Bushing 1 26 O ring 1 Not reusable 27 Bolt 1 M6 35 mm 28 Shift rod 1 29 Bushing 1 2 1 2 2 3 3 9 2 4 4 5 6 7 8 10 11 11 12 13 14 15 16 17 18 18 19 20 21 22 23 24 25 26 27 28 29 1 N m 0 1 kgf m 0 7 ft lb 2 5 N m 0 25 kgf m 1 84 ft lb 2 5 N m 0 25 kgf m 1 84 ft lb 19 N m 1 9 kgf m 14 0 ft lb 18 N m 1 8 kgf m 13 3 ft lb ...

Страница 390: ...irclip 4 and bushing 5 Disassembling the shift bracket 1 Remove the bolt 1 and then disassem ble the shift bracket assembly 2 Remove the shift position switch 1 3 Remove the shift cut off switch 1 Assembling the shift bracket 1 Install the shift cut off switch 1 and plate 2 and then tighten the shift cut off switch screws 3 to the specified torque 1 1 2 1 2 3 4 5 Shift cut off switch screw 3 2 5 N...

Страница 391: ...may be damaged 6 Tighten the shift bracket bolt 3 to the specified torque 7 Install the grease nipple 1 and then tighten it to the specified torque TIP Make sure that the installation angle of the grease nipple 1 is within the range a 8 Inject grease into the grease nipple until grease comes out of the bushings b Installing the shift rod and shift bracket 1 Install the bushing 1 and washers 2 and ...

Страница 392: ...n a of the shift rod assembly 2 6 Install the dowel 5 and shift rod assem bly 2 and then align the center of the set pin a with the mark b on the bot tom cowling 7 Install the washer 1 and shift bracket assembly 2 and then install the bush ing 3 and clip 4 to the shift lever 5 Shift rod detent bolt 6 18 N m 1 8 kgf m 13 3 ft lb 1 3 4 5 6 2 2 4 2 a a b 5 1 3 5 2 3 4 1 ...

Страница 393: ...mm 4 Holder 2 5 Cover 1 Regular rotation model 6 Cowling lock lever rear 1 7 Cowling lock lever front 1 8 Bushing 4 9 Bolt 4 M6 30 mm 10 Housing 1 11 Housing 1 12 Wave washer 2 13 Lever 2 14 Washer 2 15 Bolt 2 M6 20 mm 16 Spring 2 17 Bolt 2 M6 20 mm 8 13 12 18 18 16 16 1 2 1 30 3 3 4 4 5 29 21 21 21 26 19 20 22 23 24 25 27 30 28 6 8 8 9 10 11 9 9 13 12 14 14 15 15 17 17 17 7 18 8 16 5 N m 0 5 kgf ...

Страница 394: ... joint 1 23 Hose joint 1 24 Gasket 1 25 Adapter 1 26 Screw 2 ø6 19 mm 27 Clamp 1 28 PTT switch 1 Counter rotation model 29 Cover 1 Counter rotation model 30 Gasket 2 Counter rotation model 8 13 12 18 18 16 16 1 2 1 30 3 3 4 4 5 29 21 21 21 26 19 20 22 23 24 25 27 30 28 6 8 8 9 10 11 9 9 13 12 14 14 15 15 17 17 17 7 18 8 16 5 N m 0 5 kgf m 3 7 ft lb ...

Страница 395: ...tion model Removing the cowling lock lever 1 Remove the spring 1 2 Remove the lever 1 and cowling lock lever 2 Removing the flushing hose 1 Remove the adapter 1 and hose joints 2 and 3 2 Remove the flushing hose 1 PTT motor leads a trim sensor lead b and grom met 2 Installing the flushing hose 1 Install the grommet 1 to the bottom cowling STBD 1 2 A PORT 1 2 B 1 1 2 1 2 3 2 a b 1 ...

Страница 396: ...d torque 4 Route the flushing hose through the hose joint 3 install it to the hose joint 4 and then fasten the flushing hose 5 using the plastic tie 6 5 Install the hose joint to the adapter 1 along with the gasket 7 Installing the cowling lock lever 1 Install the cowling lock lever 1 and lever 2 2 Install the spring 1 3 Inject grease into the housing 1 until grease comes out from the cowling lock...

Страница 397: ...9 10 PTT switch and cowling lock lever 0 1 2 3 4 5 6 7 8 9 10 A A Regular rotation model B Counter rotation model STBD 1 2 3 A PORT 1 2 3 B ...

Страница 398: ...er 2 4 Bracket 1 5 Bracket 1 6 Bracket 1 7 Clamp 1 8 Holder 1 9 Grommet 4 10 Collar 4 11 Rubber seal 1 12 Water outlet 1 13 Grommet 2 14 Bolt 4 M8 35 mm 15 Grommet 8 16 Collar 4 17 Rubber seal 1 6 4 1 3 3 2 2 5 1 1 1 8 10 9 14 15 15 16 13 11 13 7 12 17 18 19 14 15 14 15 15 16 14 15 15 16 15 16 ...

Страница 399: ... 12 Bottom cowling 0 1 2 3 4 5 6 7 8 9 10 A No Part name Q ty Remarks 18 Bottom cowling 1 19 Grommet 1 6 4 1 3 3 2 2 5 1 1 1 8 10 9 14 15 15 16 13 11 13 7 12 17 18 19 14 15 14 15 15 16 14 15 15 16 15 16 ...

Страница 400: ...r mount 2 9 Washer 2 10 Washer 2 11 Washer 2 12 Bolt 2 M14 225 mm 13 Cap 2 14 Collar 2 15 Washer 4 16 Upper mount 2 17 Bracket 1 1 2 3 3 3 3 4 4 5 6 7 7 7 8 8 8 9 9 9 10 10 10 11 11 11 12 12 12 13 13 13 14 14 14 15 15 15 15 15 15 16 16 16 17 18 19 19 19 20 20 20 21 21 22 23 23 24 25 26 26 55 N m 5 5 kgf m 40 6 ft lb 72 N m 7 2 kgf m 53 1 ft lb 72 N m 7 2 kgf m 53 1 ft lb ...

Страница 401: ...mm 22 Nipple 1 23 Plastic tie 2 24 Speedometer hose 1 Adapter to nipple 25 Adapter 1 26 Bolt 1 M6 20 mm 1 2 3 3 3 3 4 4 5 6 7 7 7 8 8 8 9 9 9 10 10 10 11 11 11 12 12 12 13 13 13 14 14 14 15 15 15 15 15 15 16 16 16 17 18 19 19 19 20 20 20 21 21 22 23 23 24 25 26 26 55 N m 5 5 kgf m 40 6 ft lb 72 N m 7 2 kgf m 53 1 ft lb 72 N m 7 2 kgf m 53 1 ft lb ...

Страница 402: ...1 Install the washers 1 and 2 upper mounts 3 washer 4 and collar 5 to the upper mount bolts 6 2 Install the upper mounts 3 and upper mount bracket 7 and then tighten the upper mount bracket bolts 8 tempo rarily 3 Install the caps 1 washers 2 3 and 4 lower mounts 5 and washers 6 to the lower mount bolts 7 4 Install the lower mounts 5 and lower mount covers 8 and then tighten the lower mount cover b...

Страница 403: ...nt bolts 1 to the specified torque in the order 1 2 and so on 8 Tighten the lower mount bolts PORT and STBD 2 9 Connect the ground lead 1 10 Pass the speedometer hose 2 through the steering arm 3 11 Connect the speedometer hose 2 to the adapter 4 and then fasten it using the plastic tie 5 12 Install the adapter 4 to the upper case Upper mounting nut 4 72 N m 7 2 kgf m 53 1 ft lb Lower mounting nut...

Страница 404: ...2 M6 15 mm 7 Baffle plate 1 8 Bolt 2 M8 30 mm 9 Bolt 4 M10 45 mm 10 Grommet 2 11 Gasket 1 Not reusable 12 Drain bolt 1 13 Damper 1 14 Rubber seal 1 15 Rubber seal 1 Not reusable 1 2 3 4 5 6 7 8 9 9 10 10 11 12 13 14 15 4 N m 0 4 kgf m 3 0 ft lb 42 N m 4 2 kgf m 31 0 ft lb 20 N m 2 0 kgf m 14 8 ft lb 28 N m 2 8 kgf m 20 7 ft lb ...

Страница 405: ...te 2 and then tighten the baffle plate screws 3 to the specified torque 4 Install the rubber seal 4 to the joint hole a in the upper case 5 Install a new rubber seal 5 the rubber seal 6 and the damper 7 and then install the oil pan assembly 8 TIP Make sure to fit the tip of the cooling water pipe 9 into the joint hole a in the upper case 6 Install the oil pan bolts 10 and 11 and then tighten them ...

Страница 406: ...en the drain bolt 2 to the specified torque Baffle plate screw 3 4 N m 0 4 kgf m 3 0 ft lb Oil pan assembly bolt M8 10 20 N m 2 0 kgf m 14 8 ft lb Oil pan assembly bolt M10 11 42 N m 4 2 kgf m 31 0 ft lb Drain bolt 2 28 N m 2 8 kgf m 20 7 ft lb 1 2 3 4 4 5 6 7 8 9 9 10 11 a 1 2 ...

Страница 407: ... Oil strainer 1 6 Bolt 3 M6 25 mm 7 Dowel 2 8 Oil pan 1 9 Bolt 10 M8 35 mm 10 Bolt 4 M8 60 mm 11 Gasket 1 Not reusable 12 Exhaust manifold 1 13 Rubber seal 1 14 Gasket 2 Not reusable 15 Plate 1 16 Water pipe 1 17 Rubber seal 1 1 2 3 4 5 6 7 7 8 9 10 11 12 13 14 14 15 16 17 18 19 20 12 N m 1 2 kgf m 8 9 ft lb 20 N m 2 0 kgf m 14 8 ft lb 20 N m 2 0 kgf m 14 8 ft lb 20 N m 2 0 kgf m 14 8 ft lb ...

Страница 408: ...No Part name Q ty Remarks 18 Dowel 2 19 Muffler 1 20 Bolt 8 M8 35 mm 1 2 3 4 5 6 7 7 8 9 10 11 12 13 14 14 15 16 17 18 19 20 12 N m 1 2 kgf m 8 9 ft lb 20 N m 2 0 kgf m 14 8 ft lb 20 N m 2 0 kgf m 14 8 ft lb 20 N m 2 0 kgf m 14 8 ft lb ...

Страница 409: ...ffler Replace if corroded or cracked 3 Check the oil pan Replace if corroded or cracked Checking the oil strainer 1 Check the oil strainer Clean if there is dirt or residue Assembling the oil pan and exhaust manifold 1 Install the collars 1 a new gasket 2 and the oil strainer 3 and then tighten the oil strainer bolts 4 to the specified torque 2 Install the dowels 1 a new gasket 2 and the oil pan 3...

Страница 410: ...d 4 Tighten the exhaust manifold bolts first and then tighten the oil pan bolts to the specified torques 5 Install the rubber seal 1 and water pipe 2 6 Install the dowels 3 new gaskets 4 the plate 5 and the muffler 6 7 Tighten the muffler bolts 7 to the speci fied torque 1 2 3 4 4 4 4 1 2 3 4 a 4 Exhaust manifold bolt 20 N m 2 0 kgf m 14 8 ft lb Oil pan bolt 20 N m 2 0 kgf m 14 8 ft lb Muffler bol...

Страница 411: ...ring arm 0 1 2 3 4 5 6 7 8 9 10 A Steering arm No Part name Q ty Remarks 1 Steering arm 1 2 Washer 2 3 Bushing 2 4 O ring 1 Not reusable 5 Bushing 1 6 Steering yoke 1 7 Circlip 1 8 Grommet 1 1 2 2 3 3 4 5 6 7 8 ...

Страница 412: ...ushing 4 3 Remove the steering arm from the swivel bracket Installing the steering arm 1 Install the washer 1 and bushing 2 onto the steering arm 3 and then install the steering arm 3 2 Install the bushing 1 a new O ring 2 the bushing 3 and the washer 4 3 Install the steering yoke 1 so that it faces the same direction as the steering arm 2 aligning a with b 1 1 2 4 3 2 1 1 2 3 1 2 3 4 ...

Страница 413: ...1 and then strike the steering yoke 2 using a copper hammer until the groove a for installing the circlip is visible 5 Install the circlip 3 6 Inject grease into the grease nipple 1 until grease comes out from both the upper and lower bushings a 2 1 a b 1 2 3 3 a 1 a a ...

Страница 414: ...r 1 8 Bushing 2 9 Tilt stop lever 1 10 Bushing 2 11 Washer 2 12 Clamp bracket PORT 1 13 Through tube 1 14 Bolt 1 M8 20 mm 15 Plastic tie 1 16 Swivel bracket 1 17 Trim stopper 2 1 2 3 3 3 3 3 3 4 5 6 8 7 8 9 10 10 11 11 12 13 14 15 16 17 18 19 20 21 21 22 22 23 24 25 26 27 27 28 26 26 26 27 27 28 29 30 31 32 33 34 35 36 3 N m 0 3 kgf m 2 2 ft lb 15 N m 1 5 kgf m 11 1 ft lb 4 N m 0 4 kgf m 3 0 ft lb...

Страница 415: ...lar 1 26 Pin 2 27 Distance collar 2 28 Pin 1 29 Spring 1 30 Hook 1 31 Bolt 1 M6 10 mm 32 Screw 1 M5 35 mm 33 Trim sensor cam 1 34 Clamp 1 1 2 3 3 3 3 3 3 4 5 6 8 7 8 9 10 10 11 11 12 13 14 15 16 17 18 19 20 21 21 22 22 23 24 25 26 27 27 28 26 26 26 27 27 28 29 30 31 32 33 34 35 36 3 N m 0 3 kgf m 2 2 ft lb 15 N m 1 5 kgf m 11 1 ft lb 4 N m 0 4 kgf m 3 0 ft lb 48 N m 4 8 kgf m 35 4 ft lb ...

Страница 416: ...M6 15 mm 36 Trim sensor 1 1 2 3 3 3 3 3 3 4 5 6 8 7 8 9 10 10 11 11 12 13 14 15 16 17 18 19 20 21 21 22 22 23 24 25 26 27 27 28 26 26 26 27 27 28 29 30 31 32 33 34 35 36 3 N m 0 3 kgf m 2 2 ft lb 15 N m 1 5 kgf m 11 1 ft lb 4 N m 0 4 kgf m 3 0 ft lb 48 N m 4 8 kgf m 35 4 ft lb ...

Страница 417: ...t 7 7 Remove the through tube 8 and then disassemble the clamp brackets 9 and 10 8 Remove the trim sensor 1 9 Remove the spring 1 hook 2 and pins 3 10 Remove the tilt stop levers 1 and 2 distance collar assembly 3 collar 4 and bushings 5 and 6 Checking the clamp bracket anode 1 Check the anode Replace if eroded Clean if there is grease oil or scales Do not apply grease oil or paint to the anode In...

Страница 418: ...ushing 1 through tube 2 and temporarily tighten the self locking nut 3 6 Install the anode 4 and ground lead 5 7 Tighten the self locking nut 3 to the specified torque 8 Install the ground leads 6 and 7 9 Install the trim sensor cam 8 10 Install the grease nipples 9 and then tighten them to the specified torque Distance a 30 3 30 6 mm 1 19 1 20 in Distance a 3 0 mm 0 12 in a 2 2 1 1 3 4 5 6 1 1 1 ...

Страница 419: ... the trim sensor setting resis tance Adjust if out of specification TIP To decrease the resistance turn the trim sensor cam in direction a To increase the resistance turn the trim sensor cam in direction b 4 Tighten the trim sensor cam screw 5 Check that the trim sensor setting resis tance is within specification Self locking nut 3 15 N m 1 5 kgf m 11 1 ft lb Grease nipple 9 3 N m 0 3 kgf m 2 2 ft...

Страница 420: ... ty Remarks 1 Upper mounting shaft 1 2 Circlip 1 3 Bushing 6 4 PTT unit 1 5 Ground lead 1 6 Bolt 1 M6 10 mm 7 Bolt 2 M10 30 mm 8 Washer 2 9 Lower mounting shaft 1 10 Plastic tie 3 1 2 3 3 3 3 4 5 6 7 8 9 10 7 8 39 N m 3 9 kgf m 28 8 ft lb ...

Страница 421: ...e tilt stop lever 1 2 Remove the plastic ties 1 and then pull out the PTT motor lead from the clamp bracket PORT 3 Disconnect the ground lead 1 4 Remove the circlip 1 and upper mount ing shaft 2 5 Connect the battery jumper leads to the PTT motor lead 1 to fully retract the PTT rams 6 Remove the lower mounting shaft 1 and then remove the PTT unit 2 1 1 1 1 1 Ram PTT motor lead Battery Retract Gree...

Страница 422: ...d is at the proper level a small amount of fluid should flow out of the filler hole 4 If the fluid is below the proper level add the recommended fluid 5 Install the reservoir cap and then tighten it to the specified torque 6 Remove the main valve 1 Be careful when removing the main valve Fluid could be expelled forcefully from the PTT unit due to internal pressure 7 Install the special service too...

Страница 423: ...pressure 11 Install the main valve 1 and then tighten it to the specified torque TIP Install the main valve 1 quickly before any fluid flows out of the hole 12 Remove the main valve 1 from the opposite side Be careful when removing the main valve Fluid could be expelled forcefully from the PTT unit due to internal pressure 13 Install the special service tools 1 and 2 TIP Install the special servic...

Страница 424: ...lly from the PTT unit due to internal pressure 18 Install the main valve 1 and then tighten it to the specified torque TIP Install the main valve 1 quickly before any fluid flows out of the hole 19 Repeat steps 2 4 to check the fluid level Bleeding the PTT unit 1 Place the PTT unit in an upright position 2 Turn the manual valve 1 clockwise to close it PTT hydraulic gauge adapter 1 90890 06863 Hydr...

Страница 425: ...ct the PTT rams 4 or 5 times 7 Fully extend the tilt ram 8 Remove the reservoir cap and then check the fluid level in the reservoir Before removing the reservoir cap make sure that the PTT rams are fully extended Otherwise fluid could be expelled force fully from the PTT unit due to internal pressure TIP If the fluid is below the proper level add the recommended PTT fluid Repeat steps 3 7 until th...

Страница 426: ...tall the bushings 1 PTT unit 2 and lower mounting shaft 3 and then tighten the lower mounting shaft bolts 4 to the specified torque 4 Pass the PTT motor lead 1 through the hole a in the clamp bracket PORT 5 Connect the battery jumper leads to the PTT motor lead 1 to extend the PTT rams until the end of the tilt ram is aligned with the mounting position hole 6 Install the upper mounting shaft 1 and...

Страница 427: ...9 40 PTT unit 0 1 2 3 4 5 6 7 8 9 10 A 7 Install the ground lead 1 8 Fasten the PTT motor lead and trim sen sor lead using the plastic ties 1 2 1 1 1 1 1 ...

Страница 428: ... reference data 9 Washer 1 10 O ring 1 Not reusable 11 Tilt piston assembly 1 12 Tilt ram assembly 1 13 Trim ram assembly 2 14 Backup ring 2 15 O ring 2 Not reusable 16 O ring 2 Not reusable 17 Trim cylinder end screw 2 65 N m 6 5 kgf m 47 9 ft lb 2 5 11 10 8 12 20 21 19 18 17 16 14 15 13 1 9 8 8 7 6 8 4 3 7 N m 0 7 kgf m 5 2 ft lb 160 N m 16 0 kgf m 118 0 ft lb 19 18 17 16 14 15 13 160 N m 16 0 k...

Страница 429: ...eusable 19 Circlip 2 20 Free piston 1 21 O ring 1 Not reusable 65 N m 6 5 kgf m 47 9 ft lb 2 5 11 10 8 12 20 21 19 18 17 16 14 15 13 1 9 8 8 7 6 8 4 3 7 N m 0 7 kgf m 5 2 ft lb 160 N m 16 0 kgf m 118 0 ft lb 19 18 17 16 14 15 13 160 N m 16 0 kgf m 118 0 ft lb 150 N m 15 0 kgf m 110 6 ft lb ...

Страница 430: ... the tilt ram assembly 4 Tighten the manual valve 1 to the spec ified torque 5 Connect the battery jumper leads to the PTT motor lead 1 and then remove the free piston 2 When removing the free piston never look into the tilt cylinder opening Other wise fluid could be expelled forcefully from the PTT unit due to internal pres sure 6 Loosen the trim cylinder end screws 1 and then remove the trim ram...

Страница 431: ...ce if scratched 4 Check the backup rings Replace if dam aged or worn 5 Check the trim rams and tilt ram Clean using 400 600 grit sandpaper if there is rust or replace if bent or corroded Checking the absorber valve 1 Check the tilt piston absorber valves Clean if there is dirt or residue Assembling the tilt ram When assembling the PTT unit do not use a rag Otherwise dust and particles could get on...

Страница 432: ...nit do not use a rag Otherwise dust and particles could get on the PTT unit components causing poor performance 1 Install the backup ring 1 and a new O ring 2 to the trim piston 3 2 Install a new dust seal 1 the circlip 2 and a new O ring 3 to the trim cylinder end screw 4 and then install the trim cylinder end screw 4 onto the trim ram 5 Power tilt wrench 2 90890 06560 PTT piston vice attachment ...

Страница 433: ...nder end screws 1 to the specified torque Installing the tilt ram 1 Place the tilt cylinder end screw 1 at the bottom of the tilt ram 2 Fill the tilt cylinder and PTT body with the recommended fluid up to the proper level a 3 Install the tilt ram assembly and then tighten the tilt cylinder end screw 1 to the specified torque Recommended PTT fluid ATF Dexron II 1 4 2 3 2 1 4 3 5 1 2 1 1 a Trim tilt...

Страница 434: ...9 47 PTT cylinder Cylinder end screw wrench 2 90890 06591 Tilt cylinder end screw 1 150 N m 15 0 kgf m 110 6 ft lb 1 2 ...

Страница 435: ... 6 Circuit breaker 1 7 Brush holder 1 8 Brush 1 9 Spring 2 10 O ring 1 Not reusable 11 Motor base assembly 1 12 Oil seal 1 Not reusable 13 O ring 1 Not reusable 14 Joint 1 15 O ring 1 Not reusable 16 Reservoir cap 1 17 O ring 1 Not reusable 4 5 5 6 7 8 9 10 3 2 3 4 15 4 4 16 17 14 1 12 11 18 19 20 7 N m 0 7 kgf m 5 2 ft lb 7 N m 0 7 kgf m 5 2 ft lb 4 4 13 ...

Страница 436: ...9 PTT motor No Part name Q ty Remarks 18 Circlip 1 19 Filter 1 20 O ring 1 Not reusable 4 5 5 6 7 8 9 10 3 2 3 4 15 4 4 16 17 14 1 12 11 18 19 20 7 N m 0 7 kgf m 5 2 ft lb 7 N m 0 7 kgf m 5 2 ft lb 4 4 13 ...

Страница 437: ...t 3 Disassembling the PTT motor 1 Remove the stator 1 Secure the end of the armature shaft using a pair of pliers and then remove the armature along with the motor base assembly Otherwise the armature could separate from the motor base assembly due to the magnetic force of the stator and damage the brushes 2 Remove the armature 2 3 Remove the screws 1 and then remove the brush 2 plate 3 circuit br...

Страница 438: ... Measure the length of each brush Replace if below specification 2 Check the brush and circuit breaker for continuity Replace if there is no continu ity Do not damage the bimetal 1 Other wise the operation of the circuit breaker could be affected Motor commutator standard diameter a 22 0 mm 0 8661 in Wear limit 21 0 mm 0 8268 in Motor commutator standard undercut ref erence data a 1 50 mm 0 0591 i...

Страница 439: ...2 Install a new O ring 1 the spring 2 and the circuit breaker 3 3 Install the plate 4 under the PTT motor lead 5 and then install the brush 6 4 Push the brushes 1 and 2 into the holders and then install the armature 3 5 Install the stator 1 Secure the end of the armature shaft using a pair of pliers and then install the armature along with the motor base assembly Otherwise the armature could separ...

Страница 440: ...cified torque TIP Align the protrusion a on the armature shaft with the slot b in the joint Installing the reservoir 1 Install a new O ring 1 the filter 2 and the circlip 3 2 Install a new O ring 1 and the reservoir 2 and then tighten the reservoir mount ing bolts 3 to the specified torque 3 Install a new O ring 4 to the reservoir cap 5 and then install the reservoir cap 5 4 Tighten the reservoir ...

Страница 441: ... 1 11 Valve seal 1 Not reusable 12 Pin 2 13 Filter 1 14 Backup ring 1 15 Ball 2 4 74 mm 0 19 in reference data 16 Valve seat 1 17 O ring 1 Not reusable 1 7 N m 0 7 kgf m 5 2 ft lb 2 3 4 5 6 4 9 10 11 12 13 14 1 1 15 15 18 20 19 16 17 21 22 23 24 7 8 19 25 7 N m 0 7 kgf m 5 2 ft lb 4 N m 0 4 kgf m 3 0 ft lb 22 28 28 21 21 30 29 33 34 35 36 35 34 33 37 38 39 36 40 41 42 43 26 27 3 N m 0 3 kgf m 2 2 ...

Страница 442: ... data 28 Port plug 2 29 Spacer 1 30 Spacer 1 31 O ring 1 Not reusable 32 Shuttle piston 1 33 O ring 2 Not reusable 34 O ring 2 Not reusable 1 7 N m 0 7 kgf m 5 2 ft lb 2 3 4 5 6 4 9 10 11 12 13 14 1 1 15 15 18 20 19 16 17 21 22 23 24 7 8 19 25 7 N m 0 7 kgf m 5 2 ft lb 4 N m 0 4 kgf m 3 0 ft lb 22 28 28 21 21 30 29 33 34 35 36 35 34 33 37 38 39 36 40 41 42 43 26 27 3 N m 0 3 kgf m 2 2 ft lb 32 31 ...

Страница 443: ... ring 1 Not reusable 42 Manual valve 1 43 Circlip 1 44 Main valve 2 1 7 N m 0 7 kgf m 5 2 ft lb 2 3 4 5 6 4 9 10 11 12 13 14 1 1 15 15 18 20 19 16 17 21 22 23 24 7 8 19 25 7 N m 0 7 kgf m 5 2 ft lb 4 N m 0 4 kgf m 3 0 ft lb 22 28 28 21 21 30 29 33 34 35 36 35 34 33 37 38 39 36 40 41 42 43 26 27 3 N m 0 3 kgf m 2 2 ft lb 32 31 11 N m 1 1 kgf m 8 1 ft lb 4 N m 0 4 kgf m 3 0 ft lb 44 44 ...

Страница 444: ...alve 2 O rings 3 and 4 manual valve seat 5 spring 6 adapter 7 spring 8 and manual valve seat 9 4 Remove the main valves 1 and shuttle piston 2 and then remove the O rings 3 4 5 and 6 Disassembling the gear pump 1 Remove the valve lock screws 1 and 2 and then remove the spring 3 valve support pin 4 ball 5 spring 6 valve pin 7 and valve seal 8 TIP Before removing the valve lock screws 1 and 2 measur...

Страница 445: ...ear Replace the gear pump assembly if dam aged or worn 2 Check the up relief valve and down relief valve Clean if there is dirt or residue Checking the gear pump housing 1 Check the PTT body Replace if corroded or cracked Checking the valve seal 1 Check the main valves and the shuttle piston Replace if damaged 2 Check the manual valve manual valve seat adapter and springs Replace if damaged Checki...

Страница 446: ...ighten the pump bracket bolts 4 and 5 to the specified torque 4 Install a new valve seal 1 the valve pin 2 and the spring 3 and then install the valve lock screw 4 5 Install a new O ring 5 to the valve sup port pin 6 6 Install the ball 7 valve support pin 6 and spring 8 and then install the valve lock screw 9 TIP Install the valve lock screw 4 and valve lock screw 9 to the height a and depth b tha...

Страница 447: ... then tighten the main valves 4 to the specified torque 4 Install the manual valve seat 1 spring 2 adapter 3 spring 4 and manual valve seat 5 5 Install a new O ring 6 to the manual valve 7 and then install a new O ring 8 manual valve 7 and circlip 9 6 Tighten the manual valve 7 to the spec ified torque 7 Install the ball 1 and plug 2 and then tighten the plug 2 to the specified torque Installation...

Страница 448: ...e PTT unit do not use a rag Otherwise dust and particles could get on the PTT unit components causing poor performance 1 Install the gear pump assembly 1 pro tection valves 2 and 3 wave washer 4 backup ring 5 filter 6 and plate 7 and then tighten the gear pump bolt 8 to the specified torque Plug 2 4 N m 0 4 kgf m 3 0 ft lb 1 2 4 4 5 2 1 3 Gear pump bolt 8 7 N m 0 7 kgf m 5 2 ft lb 7 8 8 6 5 4 2 3 ...

Страница 449: ...9 62 PTT gear pump 0 1 2 3 4 5 6 7 8 9 10 A MEMO ...

Страница 450: ...7 Test run 10 7 Break in 10 8 After test run 10 8 General periodic maintenance 10 8 Checking the anode 10 8 Checking the battery 10 8 Checking the cooling water inlet 10 8 Checking the cooling water pilot hole 10 9 Checking the engine idle speed noise 10 9 Changing the engine oil 10 9 Checking the engine oil level 10 10 Replacing the oil filter 10 10 Checking the exhaust guide exhaust manifold 10 ...

Страница 451: ...k plug 10 15 Checking the timing belt 10 15 Replacing the timing belt 10 15 Checking the thermostat 10 15 Adjusting the throttle link throttle cable throttle pick up timing 10 15 Checking the cowling lock lever 10 15 Checking the valve clearance 10 15 Checking the impeller water pump housing 10 15 ...

Страница 452: ...hese charts is based on usage of 100 hours per year and regular flushing of the cooling water passages Adjust the maintenance frequency when operating the engine under adverse conditions such as extended trolling Disassembly or repairs may be necessary depending on the outcome of maintenance checks Expendable or consumable parts and lubricants will lose their effectiveness over time and through no...

Страница 453: ...ent U Power trim and tilt unit Inspection F U F U Propeller propeller nut cotter pin Inspection or replacement as necessary F U F U PCV Pressure Control Valve Inspection or replacement as necessary U Shift link shift cable Inspection adjustment or replacement as necessary U U Spark plug s Inspection or replacement as necessary F U Spark plug caps spark plug wires Inspection or replacement as neces...

Страница 454: ...onnections wire coupler connections Inspection or replacement as necessary U U Yamaha Meter gauge Inspection U U Item Actions Every 1000 hours Exhaust guide exhaust manifold Inspection or replacement as necessary U Timing belt Replacement U Item Actions Initial Every 20 hours 3 months 100 hours 1 year 300 hours 3 years 500 hours 5 years ...

Страница 455: ...e explosive hydrogen gas Always follow these preventive mea sures Charge batteries in a well ventilated area Keep batteries away from fire sparks or open flames for example welding equipment and lighted cigarettes DO NOT SMOKE when charging or han dling batteries KEEP BATTERIES AND ELECTROLYTE OUT OF REACH OF CHILDREN 1 Check the battery electrolyte level If the level is at or below the minimum le...

Страница 456: ...1 and wipe it clean 6 Insert the dipstick 1 completely for a correct measurement and remove it again 7 Check that the oil level indicated on the dipstick 1 is between the upper mark a and the lower mark b If the engine oil is not at the proper level add or extract engine oil Checking the main switch stop switch choke switch 1 Check that the engine starts when the engine start switch is turned to S...

Страница 457: ...ble throttle pick up timing Do not overtighten the friction adjuster If there is too much resistance it could be difficult to operate the remote control lever which could result in an accident 1 Check that the gear shift operates smoothly when the remote control lever is moved from the N position to the F or R position 2 Check that the throttle operates smoothly when the remote control lever is mo...

Страница 458: ...tes smoothly 2 Check that there is no interference with cables hoses or lead when the outboard motor is steered Checking the throttle cable and shift cable 1 Move the remote control lever to the N position and turn the throttle lever to the fully closed position 2 Check that the mark a on the bushing 1 and the mark b on the plate 2 are aligned 3 Check that the throttle lever 2 1 con tacts the stop...

Страница 459: ...ing water passages using fresh water When flushing the cooling water pas sages do not start the engine Otherwise the water pump could be damaged and the engine could be severely damaged due to overheating TIP When using the flushing device flushing hose joint adapter flush the cooling water passages without starting the engine General periodic maintenance Checking the anode Do not apply grease oil...

Страница 460: ...e and warm it up for 5 10 minutes 2 Check the engine idle speed using the Yamaha genuine tachometer on board meter or the YDIS See the YDIS Ver 2 00 or later instruction manual Changing the engine oil The engine oil should be extracted using an oil changer Change the engine oil after the first 20 hours of operation or 3 months and every 100 hours or at 1 year intervals thereafter 1 Place the outbo...

Страница 461: ...etween the upper mark a and the lower mark b 11 Start the engine and check that the oil pressure alert indicator does not come on Also check that there is no oil leak age If the oil pressure alert indicator comes on or if there is oil leakage stop the engine and find the cause Continued operation with a problem could cause severe engine damage Checking the engine oil level 1 Check the oil level Se...

Страница 462: ...r assembly 6 8 Checking the fuel filter element 6 9 and Checking the fuel cup assembly 6 9 Checking the fuel pump 1 Check the fuel pump See Checking the fuel pump assembly 6 13 Checking for fuel leakage oil leakage 1 Check the fuel joint and fuel hose con nections See Fuel hose 6 1 2 Check for oil leakage Changing the gear oil Never get under the lower unit while it is tilted 1 Tilt the outboard m...

Страница 463: ...1 and the check screw 2 8 Remove the gear oil pump and then install a new gasket 1 and the drain screw 2 TIP Before installing the magnetic drain screw make sure to remove all metal particles 9 Tighten the check screw 3 and drain screw 2 to the specified torque Checking the gear oil level 1 Check the gear oil level See Checking the gear oil level 10 6 Greasing points 1 Apply water resistant grease...

Страница 464: ... the gear shift to the R posi tion before injecting grease into the grease nipple on the shift rod 2 Apply low temperature resistant grease to the specified lubrication point 3 Apply corrosion resistant grease to the specified lubrication point A A A A A A ...

Страница 465: ...ce fully from the unit due to internal pres sure TIP If the fluid is at the proper level a small amount of fluid should flow out of the filler hole when the reservoir cap is removed 3 If the fluid is below the proper level add the recommended fluid 4 Install a new O ring and the reservoir cap and then tighten the reservoir cap to the specified torque Checking the power trim and tilt unit operation...

Страница 466: ...ng 1 Adjust the throttle link rod See Adjusting the throttle link 6 27 2 Install the throttle cable See Installing the throttle cable 3 11 Checking the cowling lock lever 1 Check the fitting by pushing the top cowl ing Adjust if there is free play 2 Loosen the bolts 1 3 Move the hook 2 up or down slightly to adjust its position TIP To loosen the fitting move the hook in direction a To tighten the ...

Страница 467: ...separator 6 44 Assembling the water pump housing 8 12 Assembling the water pump housing 8 53 B Basic components 4 1 Battery installation 3 22 Battery wiring with house accessory battery 3 25 Battery wiring without house accessory battery 3 22 Bleeding the PTT unit 9 37 Blowby hose and cooling water hose 6 4 Bottom cowling 5 7 9 11 Bracket unit 1 19 Bracket unit technical data 1 16 Break in 10 8 C ...

Страница 468: ...28 8 64 Checking the main relay 5 13 Checking the main switch stop switch choke switch 10 5 10 11 Checking the oil pan and exhaust manifold 9 22 Checking the oil pressure 7 1 Checking the oil pressure sensor 5 16 Checking the oil pump 7 54 7 60 Checking the oil strainer 9 22 Checking the outboard motor mounting height 10 6 Checking the PCV 7 50 10 14 Checking the pinion 8 22 8 63 Checking the pist...

Страница 469: ...forward gear 8 21 8 56 Disassembling the fuel pump assembly 6 14 Disassembling the gear pump 9 57 Disassembling the gear pump housing 9 57 Disassembling the lower case 8 22 8 62 Disassembling the oil pan and exhaust manifold 9 22 Disassembling the oil pump 7 54 7 60 Disassembling the propeller SDS propeller 8 3 8 8 8 47 8 50 Disassembling the propeller shaft assembly 8 15 Disassembling the propell...

Страница 470: ... ignition coil 7 26 Installing the intake manifold 6 40 Installing the isolator lead 3 14 Installing the lower unit L transom model 8 29 8 64 Installing the lower unit X transom model 8 30 8 65 Installing the main wiring harness 3 13 Installing the oil filter bracket 7 56 7 60 Installing the oil pump assembly 7 55 7 60 Installing the outboard motor 3 7 Installing the power unit 7 9 Installing the ...

Страница 471: ... 14 Outboard motor mounting 3 7 Outboard motor mounting instructions 3 1 Outboard motor troubleshooting 4 6 Outline 10 1 Overview 2 10 P Part lubricant and sealant 0 2 Pinion shim T3 selection table A 12 Port 5 1 Power unit 1 18 Power unit check and adjustment 7 1 Power unit assembly 7 5 Power unit system 2 13 Power unit technical data 1 12 Predelivery check 10 4 Propeller 0 1 Propeller SDS 2 19 P...

Страница 472: ... Rigging grommet mounting 3 9 Rigging information 1 17 Rigging recommendation 3 37 Rotating part 0 1 S Safety while working 0 1 Selecting the crankpin bearing 7 68 Selecting the crankshaft journal bearing 7 72 Selecting the pinion shim T3 8 39 8 73 Selecting the propeller shaft shim T4 8 73 Selection 3 38 Self protection 0 2 Serial number 1 3 Setting the tilt limiter 3 18 Shift rod and shift brack...

Страница 473: ... Upper case and mounts 9 13 Using the digital tester 5 13 Using the YDIS 5 12 V Vapor gas diagram 2 15 Vapor separator and high pressure fuel pump 6 42 Ventilation 0 1 W Water pump and shift rod counter rotation model 8 51 Water pump and shift rod regular rotation model 8 9 Wiring diagram A 1 Wiring harness 7 28 Working with crane 0 2 Y Y COP standard for European market and optional for Oceanian ...

Страница 474: ...i 8 Index 0 1 2 3 5 6 7 8 9 10 10 A MEMO ...

Страница 475: ......

Страница 476: ...Oct 2011 2 ABE E ...

Страница 477: ...6 Reverse gear shim T1 selection chart FL150A A 16 Forward gear shim T2 selection chart FL150B A 17 Reverse gear shim T1 selection chart FL150B A 17 Wiring diagram How to use the wiring diagram Composition of the wiring diagrams The wiring diagram consists of four categories The engine control unit and fuel unit ignition unit charging unit and starting unit and control unit Legend symbols in the w...

Страница 478: ...int connector 1 11 Joint connector 2 12 Fuse box 13 Battery 14 Starter motor 15 PTT relay a Fuse 50A engine battery b Fuse 50A house accessory battery c Fuse 20A engine ECM ISC valve fuel injector high pressure fuel pump ignition coil d Fuse 20A engine start switch PTT switch e Fuse 30A starter relay f Main relay A To remote control 1 The connecting points for the same colored wiring within the co...

Страница 479: ... 21 29 30 32 42 41 43 40 39 G Pu G R Y R Y R Y R Y R Y R Y R Y 7 12 13 14 15 16 17 8 19 20 1 12 13 24 9 10 11 12 17 18 19 20 R Y R Y R Y R Y B B B B B B B R R R 1 5 11 12 13 14 15 22 23 24 O O O O 1 1 2 Oil pressure sensor 5 Water pressure sensor 4 Speed sensor 3 ISC valve 15 PTT relay 1 Engine ECM 9 Water detection switch 6 High pressure fuel pump 7 Fuel injector 8 Vapor shut off valve 13 Battery...

Страница 480: ...connector 1 12 Joint connector 2 13 Fuse box 14 Battery 15 Starter motor 16 PTT relay a Fuse 50A engine battery b Fuse 50A house accessory battery c Fuse 20A engine ECM ISC valve fuel injector high pressure fuel pump ignition coil d Fuse 20A engine start switch PTT switch e Fuse 30A starter relay f Main relay A To remote control 1 The connecting points for the same colored wiring within the couple...

Страница 481: ...31 32 33 34 35 37 42 44 1 R 8 6 7 19 18 20 19 21 22 1 12 13 24 1 12 13 24 1 2 3 4 5 6 7 8 9 10 13 22 23 24 B O O O B B B B B B B B B B R R R 1 1 5 Air pressure sensor 3 Thermoswitch 10 Air temperature sensor 7 Engine temperature sensor 16 PTT relay 14 Battery 4 Ignition coil 8 Shift position switch 9 Shift cut off switch 1 Engine ECM 2 Pulser coil 13 Fuse box 12 Joint connector 2 B B Y 11 Joint co...

Страница 482: ...gine battery b Fuse 50A house accessory battery c Fuse 20A engine ECM ISC valve fuel injector high pressure fuel pump ignition coil d Fuse 20A engine start switch PTT switch e Fuse 30A starter relay f Main relay A To remote control B To hub D To diagnostic flash indicator E To YDIS F To alert indicator G If the outboard motor is not fitted with a tilt limiter optional connect the coupler H If the ...

Страница 483: ... 8 7 19 21 20 1 1 2 2 1 R R R 11 8 7 6 4 3 2 1 15 14 13 1 12 13 24 1 12 13 24 1 5 13 16 17 18 19 20 21 22 23 24 Lg Sb P B W B L Lg Lg Lg Lg Lg L L L R Y Sb Sb Sb B B B P P P R R R Lg P B P B P B 1 1 11 Fuse box 6 PTT switch 12 Stator assembly 15 House accessory battery 4 Starter relay 2 PTT relay 5 Starter motor 3 PTT motor 7 Trim sensor 8 Tilt limiter 13 Rectifier Regulator 10 Joint connector 2 9...

Страница 484: ...ery 14 House accessory battery a Fuse 50A engine battery b Fuse 50A house accessory battery c Fuse 20A engine ECM ISC valve fuel injector high pressure fuel pump ignition coil d Fuse 20A engine start switch PTT switch e Fuse 30A starter relay f Main relay g Diode A To remote control B To hub D To diagnostic flash indicator E To YDIS F To alert indicator G If the 6Y8 Multifunction Meter is selected...

Страница 485: ...Br 8 7 19 21 20 1 1 2 R R R Sb 11 8 7 6 4 3 5 2 1 1 12 13 24 1 12 13 24 1 5 13 16 17 18 19 20 21 22 23 24 Lg Sb Sb Sb Sb Lg Lg Lg B B B P P P R R R R Y Sb Lg Lg Lg Sb Sb R 1 1 9 Joint connector 2 10 Fuse box 6 PTT switch 11 Stator assembly 12 Rectifier Regulator 4 Starter relay 2 PTT relay 5 Starter motor 3 PTT motor 7 Trim sensor 13 Battery 14 House accessory battery 1 Engine ECM 8 Joint connecto...

Страница 486: ...ing harness 17 Twin switch panel 61B 82570 03 18 Engine start switch PORT 19 Engine start switch STBD 20 Control unit 21 704 remote control twin 22 PTT switch twin 23 PTT switch PORT 24 PTT switch STBD 25 Relay Left 26 Relay Right 27 Neutral switch PORT 28 Neutral switch STBD A To power unit B To gauge D To power unit PORT E To power unit STBD F To switch panel PORT G To switch panel STBD H To mai...

Страница 487: ...F H G J R B Lg Lg Lg Lg R B Sb Sb Sb Br Br B R Lg Sb Br Br Br Br Br Br R B Sb Sb R B Lg Lg Lg R Y B G L Br P W R Y B G L P W R Y B G L Br P W Br Br Br Br Br Lg Sb Sb Br R R B Lg Br Br Sb R B Lg Br Br Sb R B Lg Br P Gy Y Y Gy Gy Gy L Y P BZ Y L B B B P Y L Br Br Y B L P B G A 1 703 remote control 14 Switch panel 6R5 82570 05 15 704 remote control 4 PTT switch 4 PTT switch 2 Engine start switch 2 En...

Страница 488: ...85 0 82 0 82 0 82 0 80 0 80 13 1 08 1 05 1 05 1 05 1 02 1 02 1 02 1 00 1 00 0 98 0 98 0 95 0 95 0 95 0 92 0 92 0 92 0 90 0 90 0 88 0 88 0 85 0 85 0 85 0 82 0 82 0 82 0 80 0 80 0 78 A 0 31 0 32 0 33 0 34 0 35 0 36 0 37 0 38 0 39 0 40 0 41 0 42 0 43 0 44 0 45 0 46 0 47 0 48 0 49 0 50 0 51 0 52 0 53 0 54 0 55 0 56 0 57 0 58 0 59 0 60 B 13 1 02 1 02 1 02 1 00 1 00 0 98 0 98 0 95 0 95 0 95 0 92 0 92 0 ...

Страница 489: ...0 0 50 0 40 0 30 0 20 0 10 0 0 10 0 20 0 30 0 5 10 15 20 25 30 35 40 45 50 55 60 65 70 75 80 85 90 95 100 105 110 115 120 125 130 135 140 145 150 155 160 165 170 175 180 185 190 195 200 B mm A 1 100 mm 0 5 10 15 20 25 30 35 40 45 50 55 60 65 70 75 80 85 90 95 100 105 110 115 120 125 130 135 140 145 150 155 160 165 170 175 180 185 190 195 200 A 0 34 0 30 0 27 0 24 0 20 0 17 0 14 0 10 0 07 0 03 0 00...

Страница 490: ...0 0 50 0 40 0 30 0 20 0 10 0 0 10 0 20 0 30 0 5 10 15 20 25 30 35 40 45 50 55 60 65 70 75 80 85 90 95 100 105 110 115 120 125 130 135 140 145 150 155 160 165 170 175 180 185 190 195 200 B mm A 1 100 mm 0 5 10 15 20 25 30 35 40 45 50 55 60 65 70 75 80 85 90 95 100 105 110 115 120 125 130 135 140 145 150 155 160 165 170 175 180 185 190 195 200 A 0 36 0 33 0 29 0 26 0 23 0 19 0 16 0 12 0 09 0 06 0 02...

Страница 491: ...e The shim thickness does not have to be adjusted for the gray colored cell mm A Free play measurement B Shim thickness adjustment A 0 0 0 1 0 2 0 3 0 4 0 5 0 6 0 7 0 8 0 9 1 0 1 1 1 2 1 3 1 4 1 5 1 6 1 7 1 8 1 9 2 0 2 1 2 2 2 3 2 4 2 5 2 6 2 7 2 8 2 9 B 0 3 0 2 0 1 0 1 0 2 0 3 0 4 0 5 0 6 0 7 0 8 0 9 1 0 1 1 1 2 1 3 1 4 1 5 1 6 1 7 1 8 1 9 2 0 2 1 2 2 2 3 2 4 2 5 2 6 ...

Страница 492: ...0 40 0 50 0 60 0 70 0 80 0 90 1 00 1 10 1 20 0 5 10 15 20 25 30 35 40 45 50 55 60 65 70 75 80 85 90 95 100 105 110 115 120 125 130 135 140 145 150 155 160 165 170 175 180 185 190 195 200 B mm A 1 100 mm 0 5 10 15 20 25 30 35 40 45 50 55 60 65 70 75 80 85 90 95 100 105 110 115 120 125 130 135 140 145 150 155 160 165 170 175 180 185 190 195 200 A 0 28 0 24 0 21 0 18 0 14 0 11 0 08 0 04 0 01 0 03 0 0...

Страница 493: ...0 40 0 50 0 60 0 70 0 80 0 90 1 00 1 10 1 20 0 5 10 15 20 25 30 35 40 45 50 55 60 65 70 75 80 85 90 95 100 105 110 115 120 125 130 135 140 145 150 155 160 165 170 175 180 185 190 195 200 B mm A 1 100 mm 0 5 10 15 20 25 30 35 40 45 50 55 60 65 70 75 80 85 90 95 100 105 110 115 120 125 130 135 140 145 150 155 160 165 170 175 180 185 190 195 200 A 0 30 0 27 0 23 0 20 0 17 0 13 0 10 0 06 0 03 0 00 0 0...

Отзывы: