Print-Quality Problems
Phaser® 6250 Color Laser Printer
4-18
Calibrate Margins
Use the
Calibrate Margins
menu to adjust the printed area to fit within the edges of the
paper. The imaging area appears as a dashed rectangle; the printer does not print outside this
rectangle.
Adjusting Side 1 Margins
1.
At the printer’s front panel, select
Troubleshooting
, then press the OK button.
2.
Select
Print Quality Problems
, then press the OK button.
3.
Select
Calibrate Margins
, then press the OK button to print the page.
4.
To move Side 1 “A” margin:
a.
Select
Adjust
Side 1 “A” Margin
, then press the OK button.
b.
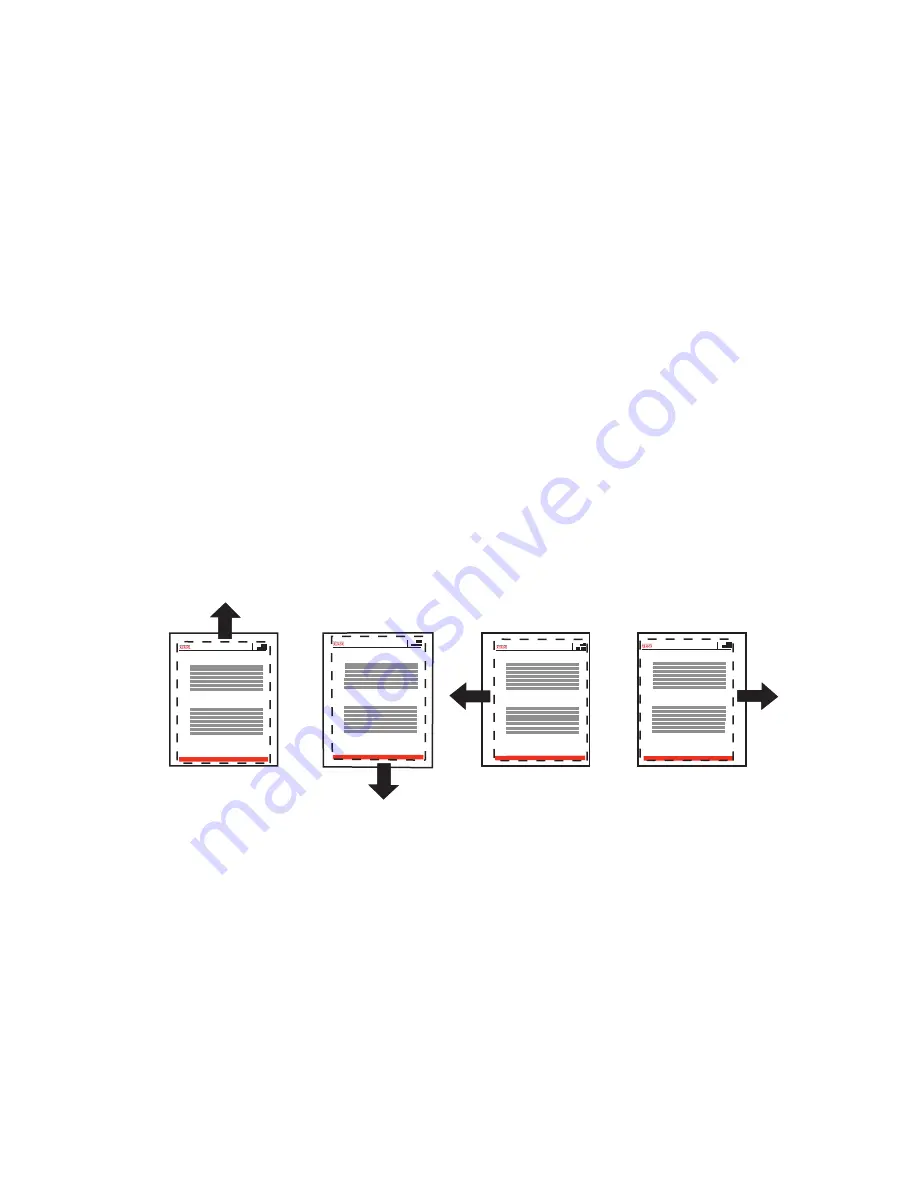
Press the Up arrow to move the margin as illustrated.
5.
To move Side 1 “B” margin:
a.
Select
Adjust Side 1 “B” Margin
, then press the OK button.
b.
Press the Up arrow to move the margin as illustrated.
You can adjust the settings from -40 to +40 units. The thickness of the rectangle’s dashed line
is 1 unit. 12 units move the rectangle 1 mm. The maximum distance the rectangle can be
moved (-40 to +40) is 6.7 mm.
To move up: increase
the Adjust Side 1 “A”
margin setting.
To move down:
decrease Adjust Side 1
“A” margin setting.
To move left: decrease
Adjust Side 1 “B” margin
setting.
To move right: increase
Adjust Side 1 “B” margin
setting.
Calibrate Margins
B-
B+
A+
A-
Calibrate Margins
Calibrate Margins
Calibrate Margins
Phaser
Phaser
Phaser
Phaser


