


22 •
Chapter 2
2-2-3
Installing software in Windows 95 (Floppy Disk)
In Windows 95, the Xerox DocuPrint P12 supports the following
installation paths. Choose any one of them to install the printer driver.
During installation, you may have to copy files to your hard disk. The size
specified in Required Space may be insufficient. Therefore, when you are
installing the software, it is recommended that you follow the disk space
requirements specified below.
Windows 95
Driver only
917K
Status Monitor only
1,333K
DOS Utilities only
490K
A.
Activate setup program in setup disk
1
Insert the Windows 95 Setup Disk into the floppy disk drive.
Click the
Start
button, then trace up and click the
Run
command. Type
a:\setup
in the Run dialog box and hit
Enter
.
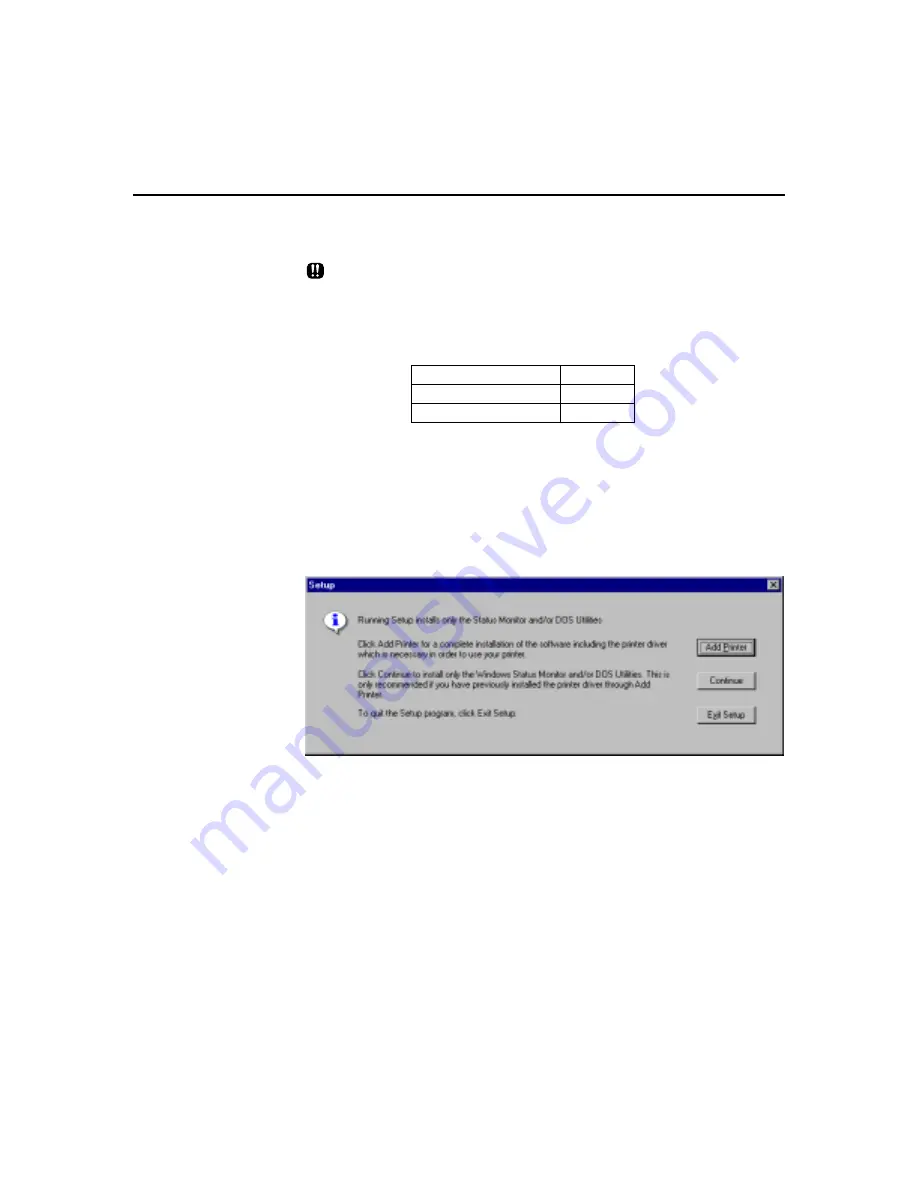
A dialog box as shown below appears.
2
Click on
Add Printer
button and the
Add Printer Wizard
dialog
box in Windows 95 appears. Follow the onscreen instructions
to install the printer driver. After installation of printer driver is
completed, the component selection dialog box appears.
Содержание DocuPrint P12
Страница 1: ...DocuPrint P12 User Guide 602E20580 11 97 ...
Страница 14: ...Knowing Your Printer 1 ...
Страница 23: ...Setting Up 2 ...
Страница 42: ...Print Media 3 ...
Страница 57: ...46 Chapter 3 7 Gently push the envelope cassette into the printer until it stops ...
Страница 63: ...Control Panel 4 ...
Страница 73: ...Xerox DocuPrint P12 Printer Driver 5 ...
Страница 98: ...Xerox DocuPrint P12 Status Monitor 6 ...
Страница 110: ...DOS Utilities 7 ...
Страница 122: ...Printer Options 8 ...
Страница 132: ...Printer Options 123 7 Slide the side cover off 8 Remove the interface cover ...
Страница 142: ...Maintenance 9 ...
Страница 155: ...Troubleshooting 10 ...
Страница 168: ...Appendices Appendices ...
Страница 172: ...Warranty Warranty ...
Страница 175: ...169 Index Index Index ...


