


!
32
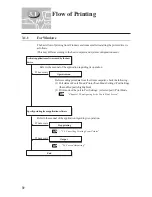
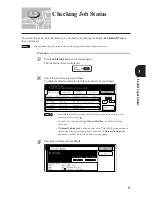
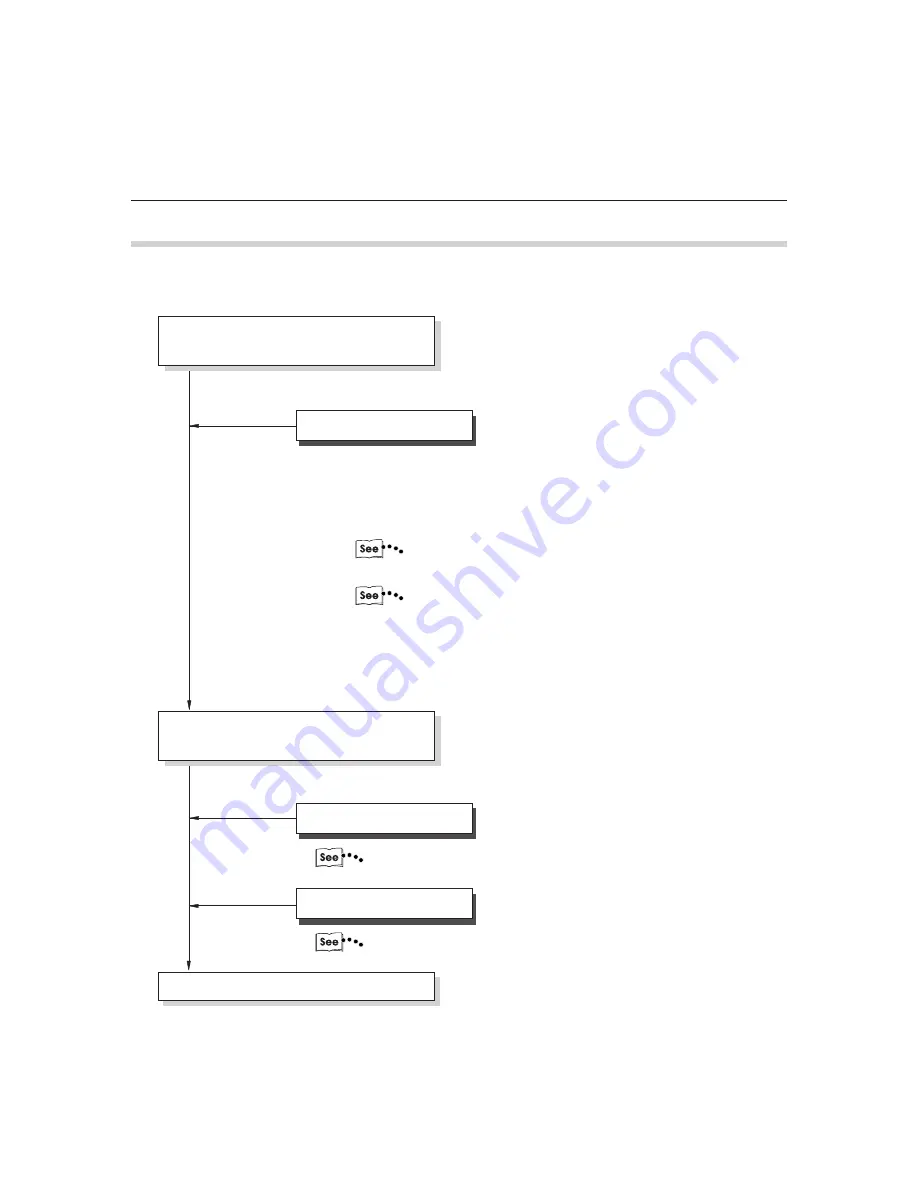
3.1 Flow of Printing
Activate application software used in the host
computer
Specify printing from application software
End
If necessary
If necessary
If necessary
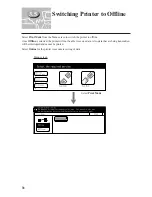
Operate menu
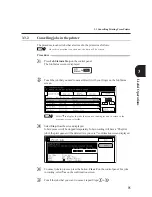
Stop printing
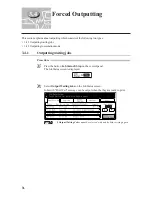
Output
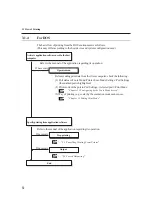
3.1.4
For DOS
The basic flow of printing from the DOS environment is as follows:
(This may differ according to the host device and system configuration used.)
Refer to the manual of the application regarding its operation.
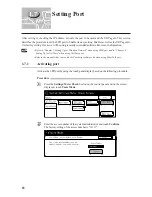
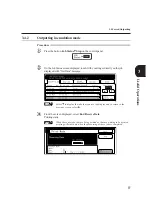
Before sending print data from the client computer, check the following:
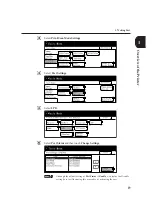
(1) Port status in Tools Mode>Printer/Scan Mode Settings>Port Settings
(the enabled port is highlighted)
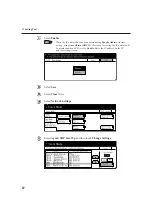
(2) Print mode of the port in Port Settings>(selected port)>Print Mode
"Chapter 13 Configuring by the Tools Mode Screen"
(3) Way of printing (e.g. scale) by the emulation mode menu in use
"Chapter 11 Setting Print Mode"
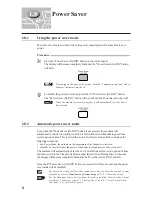
Refer to the manual of the application regarding its operation.
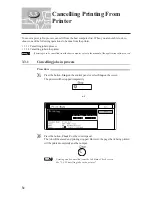
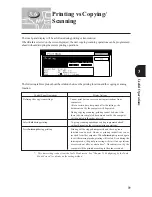
"3.3 Cancelling Printing From Printer"
"3.4 Forced Outputting"
Содержание Document Centre 505 Series
Страница 16: ......
Страница 41: ...Setting Up 2 1 Connecting Interface Cable 26 2 2 Memory Allocation 28...
Страница 56: ...40 Chapter 2 Loading Paper of the User Guide Copier 3 7 Loading Paper...
Страница 57: ...Useful Operations 41 3 8 Replacing Drum Cartridge Toner Cartridge Chapter 8 Daily Care of the User Guide Copier...
Страница 58: ...42 3 9 Paper Jams Chapter 7 Troubleshooting of the User Guide Copier...
Страница 90: ......
Страница 108: ......
Страница 131: ...115 Setting Up for Windows Network Example of config txt 7 4 Changing Printer and Workgroup Name...
Страница 146: ......
Страница 147: ...Using Internet Printing Protocol 9 1 Introduction 132 9 2 Setting Printer and Installing Printer Driver 135...
Страница 165: ...Setting Print Mode 11 1 Print Mode Operation 150 11 2 PCL 6 Settings 151...
Страница 173: ...157 Setting Print Mode Select A3 and then touch Save Select Close until the menu screen appears 11 2 PCL 6 Settings...
Страница 174: ......
Страница 175: ...Printing Reports Lists 12 1 Types of Reports Lists 160 12 2 How to Print Report List 180...
Страница 178: ...162 12 1 Types of Report List...
Страница 181: ...Printing Reports Lists 165 12 1 Types of Report List...
Страница 183: ...Printing Reports Lists 167 12 1 Types of Report List...
Страница 185: ...Printing Reports Lists 169 12 1 Types of Report List...
Страница 189: ...Printing Reports Lists 173 12 1 Types of Report List...
Страница 191: ...Printing Reports Lists 175 12 1 Types of Report List...
Страница 193: ...Printing Reports Lists 177 12 1 Types of Report List...
Страница 195: ...Printing Reports Lists 179 12 1 Types of Report List...
Страница 197: ...Configuring by the Tools Mode Screen 13 1 Tools Mode 182 13 2 System Meter Settings 184...
Страница 266: ......
Страница 268: ......


