


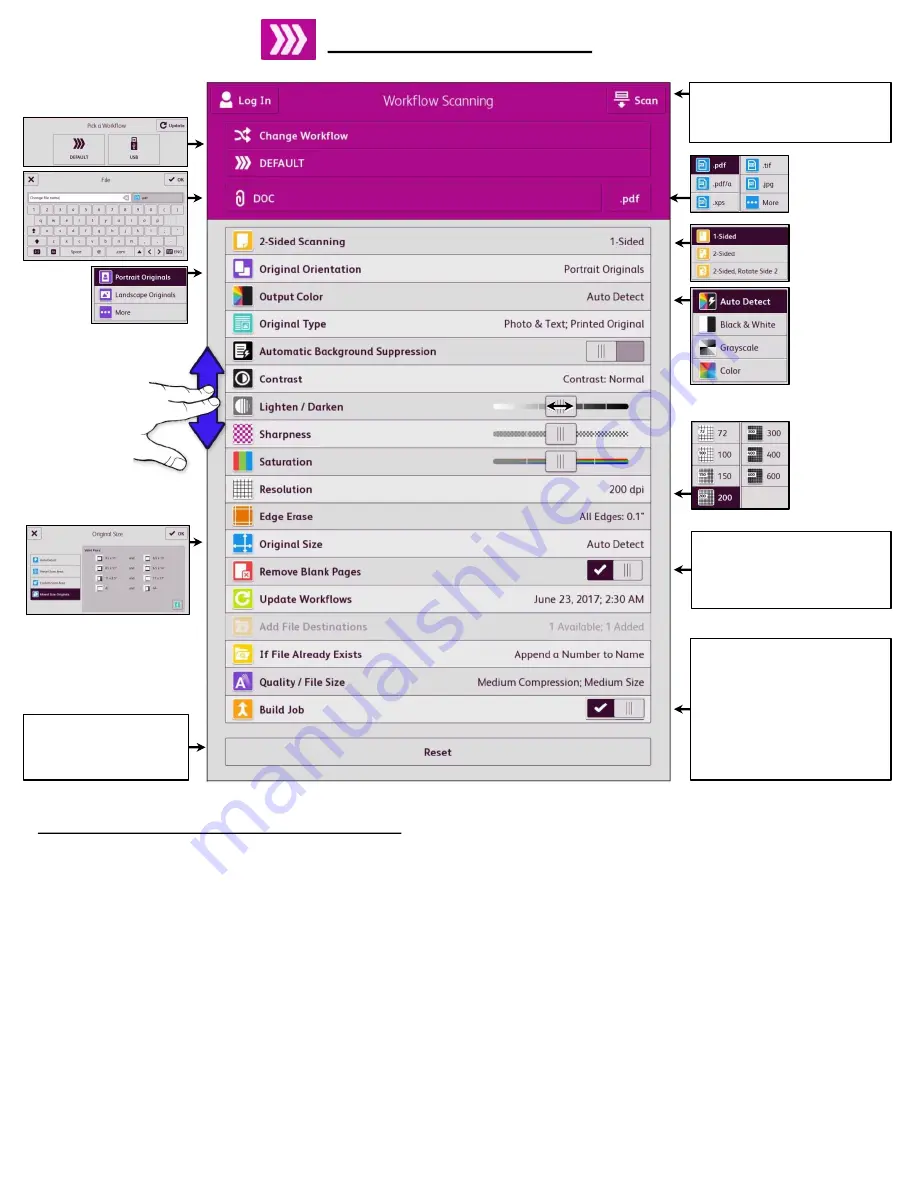
Workflow Scanning
Swipe the Build Job button for
jobs that include a variety of
originals, or for scanning
multiple-page jobs from the
document glass. The job is
scanned in segments. After all
the segments are scanned, the
job is processed and scanned.
Swipe Blank Page Removal to
configure the printer to ignore
blank pages throughout the
document.
Touch Reset to clear all
settings back to
default.
Change the file name
here.
Scanning to a network folder via Workflow Scanning:
1. Load originals in the document feeder, Face-up. Or Face-down using the glass then touch the Home button.
2. Touch the
Workflow Scanning
Button.
3. Select a workflow from the Pick a Workflow screen.
4. Adjust the workflow scanning settings as needed.
− To save the scanned document as a specific file name, touch the attachment file name, enter a new name, then touch
OK
.
− To save the scanned document as a specific file format, touch the attachment file format, then select the required format.
− If you are using the document glass, to combine pages into a single scan file, enable
Build Job
.
− If you are scanning from 2-sided original documents, touch
2-Sided Scanning
, then select an option.
For details about available features, refer to Apps Features on page 359.
5. To start the scan, touch
Scan
.
6. If Build Job is enabled, when prompted, do these steps.
− To change settings, touch
Program Next Segment
.
− To scan another page, touch
Scan Next Segment
.
− To finish, touch
Submit
.
7. To return to the Home screen, press the
Home
button.
Swipe up or down
anywhere on the
touchscreen to
navigate the
Scan to Email
options.
Press Scan after all required
settings have been selected and
your ready to send the scan.
Page 15


