WiOS
- 14 -
1)
Unpack the Wireless Base Unit
a.
To provide the best possible signal the unit should be located at
an optimum height and location for the coverage area. Like all
wireless systems, the wireless handset works best when it is in the
line-of-sight of the base unit. Obstacles such as concrete or metal
walls can substantially limit the range. Although rare, other
equipment in the same frequency range may cause interference.
When using more than one base unit, be sure to place them at
least 20 feet apart.
b.
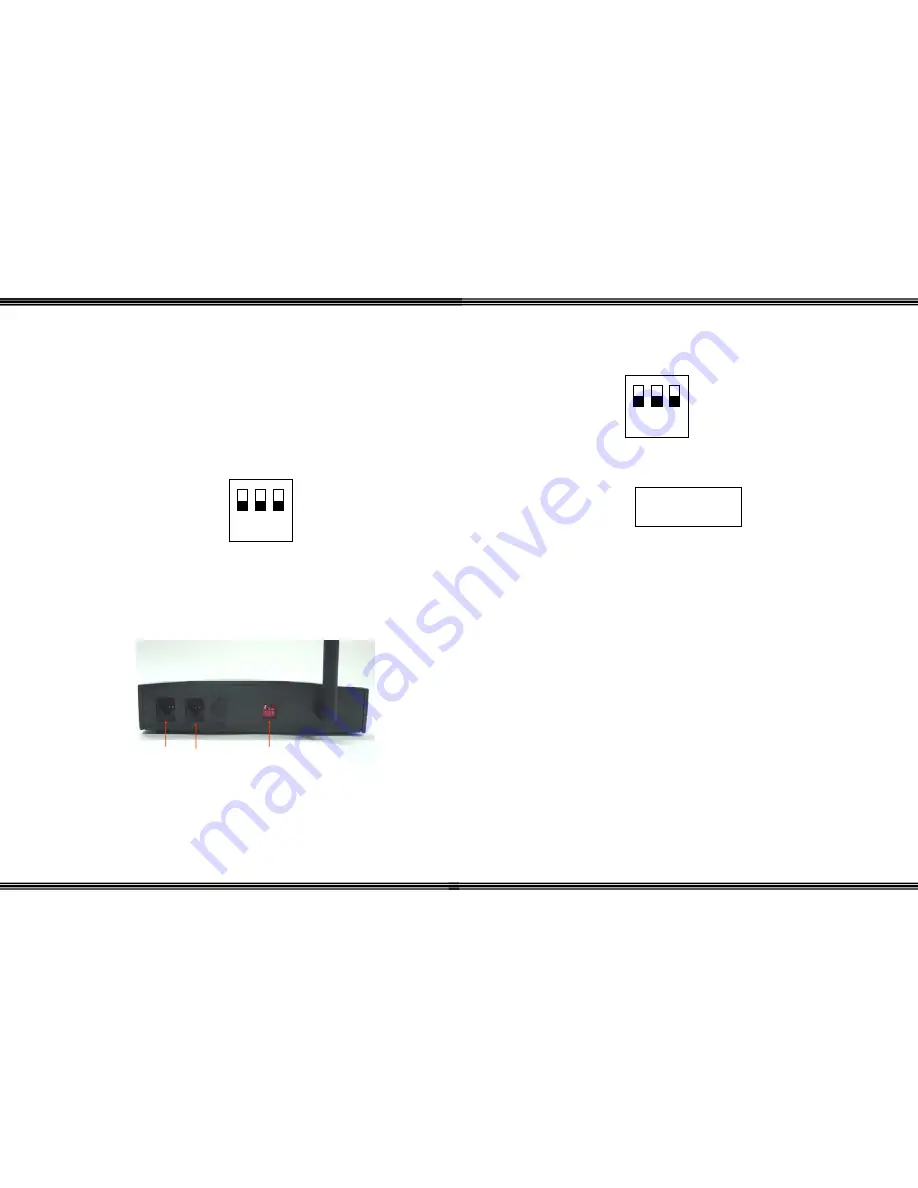
For proper operation, the dipswitches on the back of the base unit
should all be set to the “Off” position. (All switches follow the
white squares and are in the up position.)
c.
Connect the base unit to the telephone system using one digital
port for each wireless key telephone handset.
i.
If both extensions will be used, plug port 2 in first
ii.
Plug in port 1 to power up the base unit
Note: The base station is completely powered by the telephone system so there is no need for an
external power supply or AC outlet.
d.
To ensure proper operation, locate the red LED on the front of the
base unit. There are three (3) different cadences and they are:
1 2 3
ON
Line 1
Line Power
Line 2
Dip Switch
Antenna
WiOS
-
31 -
Before proceeding remember to place the dipswitches in the “Normal” position (All
switches up, in the off position) as seen below.
However, if the registration process is unsuccessful the following will be seen, go to
Base Unit, deregister handset individually:
((
))
FAILED!
TRY AGAIN!
1 2 3
ON


