Installation and Setup
Exhaust Module Installation
Installation and Setup
WMDKdoc020322
3-18
3
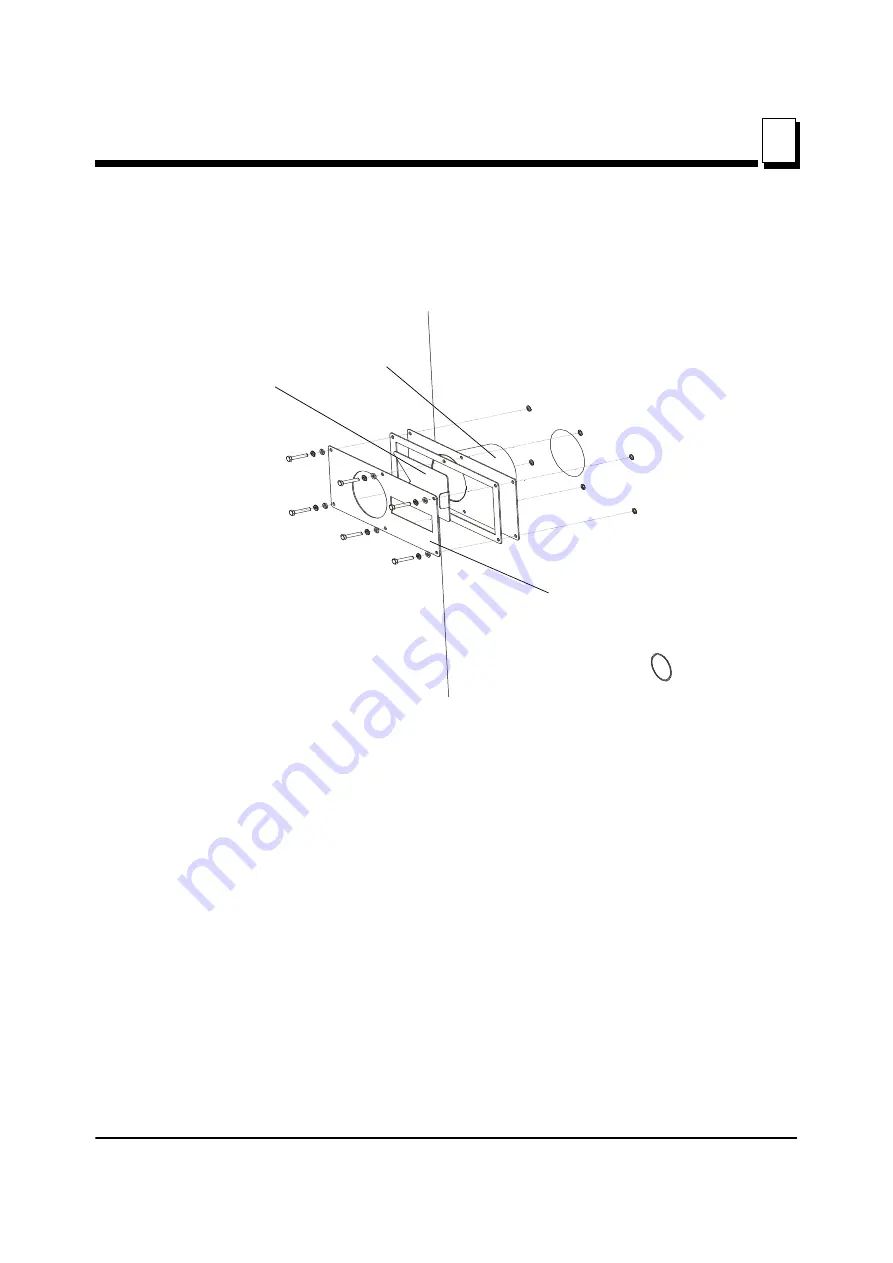
Create a sandwich of the vent back plate, the sliding plate and the front plate and screw
the completed assembly to the outside of the kiln. Tighten enough to allow the sliding
plate to move freely.
This type of mounting is for 20ft container, but for different types might be differen
t
Mount the exhaust fan to the chamber wall. To do that, position the fan on the inside
chamber wall, mark and pre-drill the mounting holes. Drill only through the inner
skin of the kiln using a 11 mm drill bit. Next, install the rivet nuts (the squeeze size
on the riveter indicator should be set at 1 mm). Bolt the fan to the rivet nuts. Be sure
FIG. 3-17
Exhaust Vent Back
Plate
Exhaust Vent Front
Plate
Sliding Plate
Содержание MK20-2
Страница 50: ...Operation Loading The Kiln 4 4 5 WMDKdoc020322 Operation See Figure 4 2 FIG 4 2 Blanking Sheet Material ...
Страница 54: ...Operation Temperature Controller 4 4 9 WMDKdoc020322 Operation Set the value to 95 Press the S key again ...
Страница 68: ...SECTION 9 WMUK MODULAR KILN RECORD SHEET 0 1 2 0 1 2 0 1 2 ...
Страница 69: ... 0 1 2 0 1 2 0 1 2 ...
Страница 71: ...Replacement Parts Fan Module Assembly Replacement Parts CESHdoc020322 10 2 10 10 2 Fan Module Assembly ...


