


Version 1.0 Rev B - 08/00
9
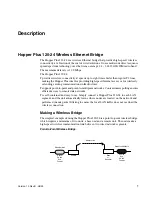
Installation
Basic Installation Steps
The following basic steps are required to successfully install your Hopper Plus 120-24
wireless bridge. For detailed information about performing the steps, see the references
provided.
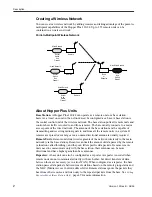
1.
Plan your network. Before you install any equipment, you need to determine the phys-
ical layout of your wireless link, plan antenna and fade margin requirements, and opti-
mize the wireless link. For help, refer to
Appendix A: Planning Your Wireless Link
or
contact Wi-LAN customer support. You will require a minimum of two Hopper Plus
units (one configured as a base, and one configured as a remote) to create a wireless
link between two wired network segments.
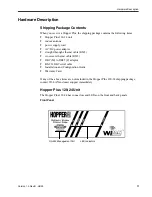
2.
Check the contents of each shipping carton to ensure all the required parts are
present. See
Hardware Description
, page 3
for a list of parts.
3.
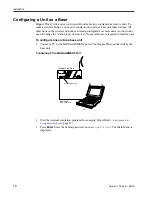
Configure one Hopper Plus unit as a base station. See
Configuring a Unit as a Base
,
page 10. (Units come from the factory configured as remotes).
4.
Test the basic operation of the bridge. See
Testing Basic Operation
, page 11
for more
information.
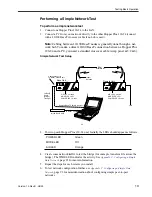
5.
Place the units in their field locations and connect them to antennas, the wired net-
work, and power.
Warning:
External antennas must be professionally installed and follow accepted safety,
grounding, electrical, and civil engineering standards.
Always connect an antenna to the ANTENNA port
before
you power up a unit or you
can damage a unit.
6.
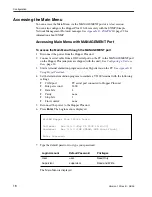
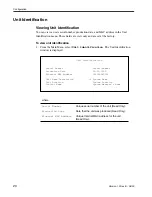
Configure each unit as follows:
l
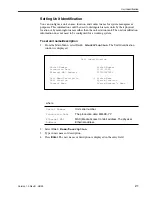
View and set the Unit Identification. See
Viewing Unit Identification
, page 20
and
Setting Unit Identification
, page 21.
l
Set the Station Rank. See
Setting the Station Rank
, page 43.
l
Set the Center Frequency. See
Setting the Center Frequency
, page 44.
l
Set the Security Passwords. See
Setting Security Passwords
, page 45.
l
Set the Acquisition Code. See
Setting the Acquisition Code
, page 47.
l
Set the Remote Unit RF Group. See
Setting Remote Unit RF Group
, page 52
.
l
Change the default passwords. See
Setting Login Passwords
, page 59.
7.
Test the installed wireless network using ping, ftp, or file transfers.
If you have problems, contact Wi-LAN customer support.


