56
To adjust the Compressor (Figure 4-13 shows the compressor screens),
set the Compressor RATIO to 1.0:1 (no compression) and the Compressor
MAKEUP level to 0.0 dB (no added gain). The Threshold (THRESH) point
sets where the compressor begins to act upon the audio (which can be
from -40 dB up to +10 dB). A good place to start is 0 dB.
As the audio level goes past the Threshold point the compressor begins
controlling the ratio of the outgoing audio compared to the incoming
audio. A RATIO of 1.0:1 (no compression) means the output level tracks
the input level. As the RATIO control is adjusted from 1.0:1 up to the
6.0:1 range you increase the amount of level control over the
compressor’s
output. With a 2.0:1 setting, when the input rises 10 dB over
the threshold level, the compressor
’s
output only increases by 5 dB. With a
6.0:1 ration a 10 dB increase in the input audio (past threshold) means
the audio output is only increased by 1.7 dB.
Setting a higher RATIO, like 10:1 up to 20:1, sets the compressor to
function as a limiter. Typically, with high RATIO settings you
’
ll set the
THRESH higher since you only want to
“squash”
the very hottest input
signals so you can maintain the
compressor’s output
to be as loud as
possible without overdriving and causing distortion further on in the signal
chain. If needed, the MAKEUP gain can be adjusted to compensate for
highly compressed output levels.
The ATTACK control sets how fast the compressor reacts (from 0.10 mS
up to 330 mS) as the audio raises above the THRESH level. Usually you
want to use the fastest setting possible, but it really depends upon the
audio program since faster settings will be more audible. Using very slow
settings can allow the audio to go way past the threshold point before the
compressor kicks in, either allowing distortion or causing audio “pumping”
when the compressor kicks in and noticeable lowers the output level.
The RELEASE control sets how fast
the compressor “un
-
compresses” the
audio signal after the audio drops below the THRESH level. It can be set
from 50 mS up to 3.00 seconds. Again, using settings in the middle of the
ranges allows for the most transparent compression. Using extremely fast
settings will result in audio “pumping” as the compressor i
s opened and
closed in response to quick audio changes. Again, the type of audio
program being compressed, whether voice, music, phone caller, remote,
etc., must be taken into account when setting the Release.
Expander
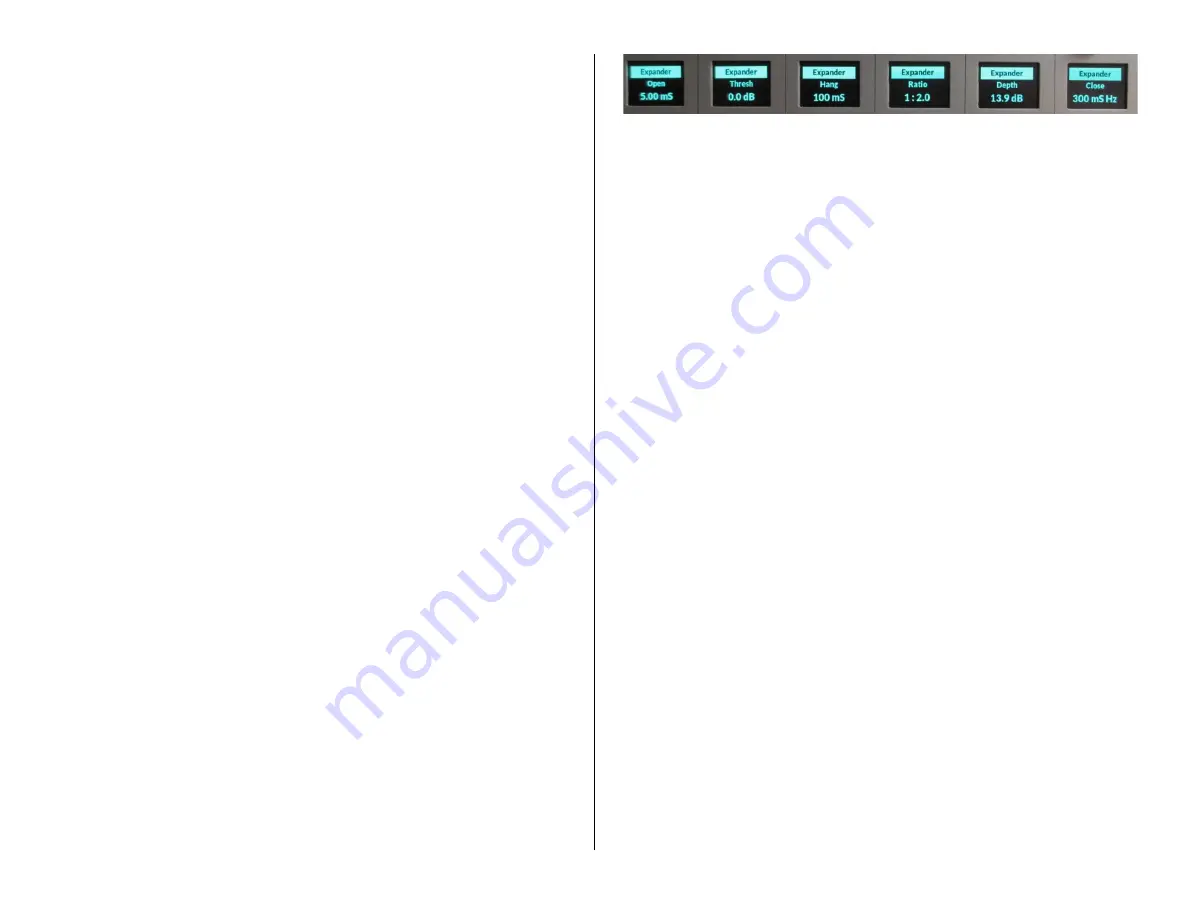
The Expander screens are shown in Figure 4-14. The Expander is an
automatic attenuator controlled by settings of the RATIO and DEPTH
controls. These allow one to slightly duck or dim the audio to virtually
muting (gating) the input audio once its level falls below the THRESH
(threshold) setting. The Expander is often used to automatically mute
inactive mics in a talk studio by gating their audio or decrease background
noise on phone calls or remotes by ducking the audio as it falls below the
THRESH setting.
Figure 4-14 Expander Screens
How quickly this ducking/gating occurs and releases, and thus how
noticeable it is, is set by the OPEN (1.00 mS up to 100 mS), HANG (0.00
mS up to 1.00 S), and CLOSE (50 ms up to 3.00 S) settings. HANG sets
how long the expander waits, as the audio level passes the THRESH
setting, before either opening or closing. CLOSE sets how fast the ducking
or gating occurs and OPEN sets how fast the audio gets un-ducked or un-
gated as the audio level goes past the THESH setting.
The DEPTH control sets whether the audio is ducked or gated as the
audio level drops past the THRESH setting. At 0.0 dB no ducking or gating
of the audio occurs. Settings from 10
–
25 dB cause the signal level to
duck. Higher settings, 25 - 40 dB, create a virtual audio gate to silence the
audio once its level drops below the THRESH setting.
As with the Compressor, setting the controls toward the end of their
ranges will make the ducking and gating more audible. For gating of
unused mics in a talk studio,
you’ll want to adjust the
THRESH so that the
mics don’t open when other active mics are being used in the studio, but
will still quickly un-gate when someone handles the mic or begins talking
into it. Typically, slower HANG and CLOSE times are used so the gating
does not occur, during a breath or a normal speech pause, while a faster
OPEN setting ensures
the audio is not “upcut” when the mic is
first used.
DMX APPLICATIONS
The DMX console is most often used in an air studio to control the audio
going to a transmitter and/or streaming to the Internet. In almost all
cases, the PGM 1 bus is used to feed the air chain and hence has the air
signal. PGM 2 can simultaneously be used to create a different console mix
for a syndication feed, to feed a recorder or a mic skimmer, or to go to a
line output for a temporary video camera or personal recorder.
When the console is used in an air studio, and there is no talk studio
associated with the console, the Studio monitor controls can be
“repurposed” for other uses. One typical use is to control the monitor
source feeding the guest headphones in the control room to allow the
board operator to change their own monitoring source without affecting
the guest
s’
headphone feed. In this case the studio monitor output would
feed the guest headphones either through Talent Stations (Figure 4-15) or
a headphone amp system. The studio monitor output would be set to a
fixed level (the Studio Monitor level control would be inactive) but the
studio monitor controls would still be used to select the monitor source for
the guest headphones. This allows the board operator to freely switch
between control room monitor sources without affecting the audio going to
Содержание AUDIOARTS ENGINEERING DMX Series
Страница 1: ...1 Networked AoIP Broadcast Console Manufactured by Wheatstone Corporation ...
Страница 4: ...4 ...


