


WHEATON
®
OmniSpense
®
ELITE Peristaltic Pump
WHEATON | 800.225.1437 (U.S. & Canada Only) | 856.825.1100 |
www.wheaton.com
| P/N 50099067 Rev. 5/15/12 WMAN_001
19
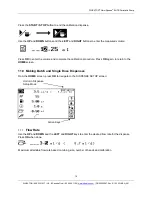
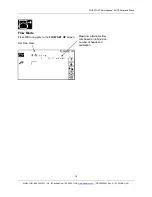
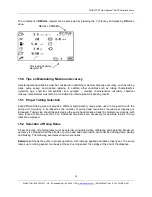
Flow Mode
Press
OK
to navigate to the
FLOW SET UP
screen.
Set Flow Rate
Maximum attainable flow
rate based on tubing size,
number of heads and
calibration.