


B
B
A
A
15
Inserting a sensor and s
tarting a session
/
English
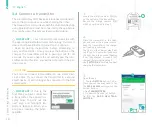
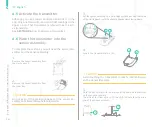
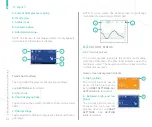
2.
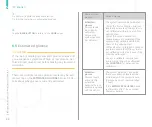
Locate the tab (B) on the sensor insertion tool at the end with
the lever (1 bump).
4.7
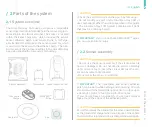
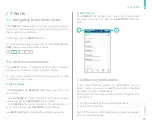
Prepare the sensor insertion tool
Now that you have inserted the transmitter into the sen-
sor assembly, you can prepare the sensor insertion tool.
To complete these steps, you will need the sensor inser-
tion tool.
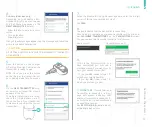
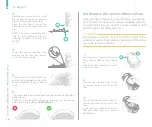
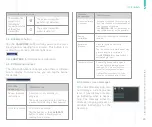
1.
Place the sensor insertion tool on a
hard, clean surface.
Locate the plastic lever (with 1
bump) (A) on the sensor insertion
tool.
2.
Lift this lever up until you hear a
click, then lower to its starting po-
sition. An orange tab indicates that
the sensor insertion tool is ready
to use.
4.8
Attach the sensor insertion tool
to the sensor assembly
Next, attach the sensor insertion tool to the sensor as-
sembly.
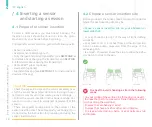
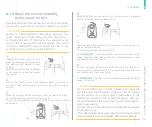
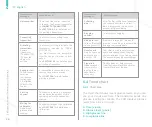
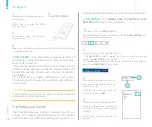
1.
Set the sensor assembly on a hard,
clean surface (such as the inside of
the sterile pouch) with the sensor
adhesive patch facing down.
Locate the opening (A) at the wide
end of the sensor assembly.
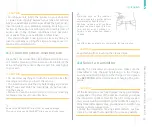
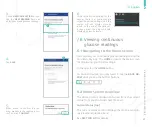
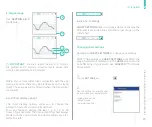
6.
Lower the transmitter and steer the arms into the guide slots of
the sensor assembly.
Guide slots:
7.
Tilt the curved end of the transmit-
ter downward to meet the sensor
assembly.
8.
Press the transmitter down firmly
until it snaps into place and you
hear a click.


