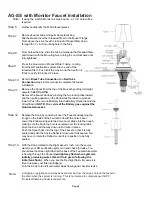
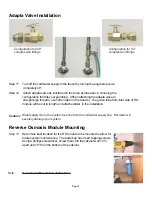
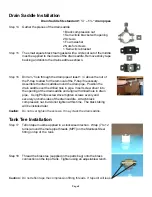
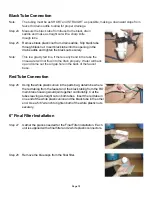
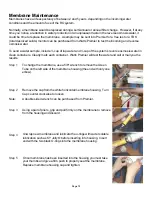
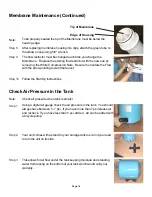
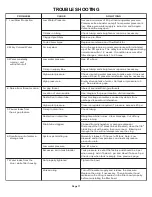
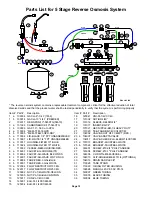
background image

Page 12

Start up Instructions

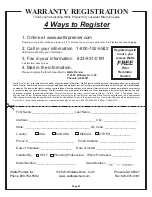
Fill out postage paid warranty card (phone no. is necessary for registration) and drop it in the
mail.  Premier uses this information to provide a free filter change reminder service.  Pre-filters
should be changed every six months.  You may also register your warranty via our website at
www.wattspremier.com or call 1-800-752-5582 (within USA only).

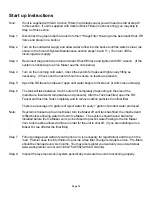
Step 7

If system is hooked up to an Ice Maker, turn Ice Maker off until tank has filled, then flushed and
refilled before allowing water to flow to Ice Maker.   The system should have a ball valve
installed before the Ice Maker so it can be closed to prevent water flowing to the Ice Maker.
Your  tank must be allowed to fill up in order for the unit to shut off.  (If you are installing an Ice
Maker Kit, tee off after the final filter).

Note:

The tank will take between 4 to 6 hours to fill completely (depending on the size of the
membrane, local water temperature and pressure). After the Tank has filled, open the RO
Faucet and flush the Tank completely and to remove carbon particles from final filter.

There is an average of 4 gallons of reject water for every 1 gallon of product water produced.

Step 6

Open the RO faucet and leave it open until water begins to trickle out. (it will come out slowly)

Step 5

Turn on the incoming cold water.  Check the system for leaks and tighten any fitting as
necessary.   (Check over the next 24 hours to ensure no leaks are present).

Step 4

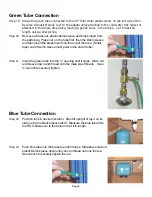
Reconnect the green tube to the Automatic Shut-Off Valve and tighten with 5/8" wrench.   (If the
system is hooked up to an Ice Maker see the note below.)

Step 3

Turn on the cold water supply and allow water to flow into the bucket until the water is clear  (as
shown in the 6 month System Maintenance section steps 10 and 11.)  Then turn off the
incoming water supply.

Step 2

Disconnect the green tube that runs from the 3

rd

 Stage Filter Housing to the Automatic Shut- Off

Valve and place it in a bucket.

Step 1

If unit is supplied with GAC Carbon Filters (hard plastic case) you will need to start at step # 1
in this section.  If unit is supplied with Carbon Block Filters (mesh covering) you may skip to
Step 4 of this section.

Note:

Inspect the reverse osmosis system periodically to ensure the unit is functioning properly.

Step 8

Содержание 5 SV DELUXE

Страница 1: ...C 20 Phoenix AZ 85027 Phone 800 752 5582 www wattspremier com Fax 623 931 0191 Save manual for future reference MODELS Warning Please read carefully before proceeding with installation Your failure t...

Страница 2: ...erse Osmosis System 4 Tools Recommended For Installation 4 Drill a Hole for the Faucet in a Porcelain Sink 5 Punch a Hole for the Faucet in a Stainless Steel Sink 5 Faucet Installation 6 Adapta Valve...

Страница 3: ...8 Open End Wrenches Phillips Screw Driver Needle Nose Pliers Adjustable Pliers Electric Drill 1 8 1 4 3 8 Drill Bits Contents of Reverse Osmosis System s e r u t a r e p m e T g n i t a r e p O C 8 7...

Страница 4: ...rface material is extremely hard and can crack or chip quite easily Use extreme caution when drilling Premier Manufactured Systems accepts no responsibility for consequential damage resulting from the...

Страница 5: ...r as shown A slotted washer is used if it is a non air gap faucet Thread the black stem nut back onto the white threaded stem and thighten within of plastic spacer Check the orientation of the faucet...

Страница 6: ...EE DRAWING Remove the Faucet Knob by pinching the two locking tabs inward and then pulling upward on the Knob while the tabs are pinched inward Push the coin cell Battery into the Battery Holder behin...

Страница 7: ...ttom of the cabinet Step 11 Step 12 Attach adapta valve as illustrated in the three photos above choosing the configuration that fits your plumbing When attaching the adapta valve to straight pipe thr...

Страница 8: ...n pipe Insert screw driver into the opening of the drain saddle and align with drilled hole in drain pipe Using Philips screw driver tighten screws evenly and securely on both sides of the drain saddl...

Страница 9: ...ten Step 19 Step 21 Blue Tube Connection Position tank in desired location Stand it upright or lay it on its side using the black plastic stand Measure the blue tube from the RO module over to the tan...

Страница 10: ...possible making a downward slope from faucet to drain saddle to allowfor proper drainage Step 25 Note Step 26 Step 27 Red Tube Connection Using the white plastic union in the parts bag determine where...

Страница 11: ...ilter Installation If the system has a 6 final filter refer to the 6 inch final filter installation If the 6 final filter has already been installed skip this section Remove the 2 blue caps from the 1...

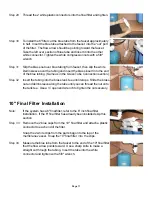
Страница 12: ...remove carbon particles from final filter There is an average of 4 gallons of reject water for every 1 gallon of product water produced Step 6 Open the RO faucet and leave it open until water begins t...

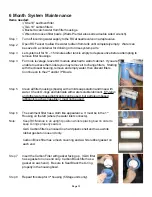
Страница 13: ...e water inlet connects 6 Month System Maintenance Turn off incoming water supply to the RO at needle valve on adapta valve Step 1 Step 3 Step 4 Step 5 Step 6 Let system sit for 10 15 minutes after tan...

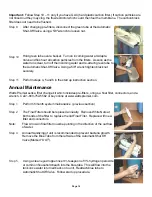
Страница 14: ...11 Annual Maintenance Watts Premier sells a filter change kit which includes pre filters orings a final filter connectors and a wrench Call 1 800 752 5582 or buy online at www wattspremier com Perform...

Страница 15: ...an containers Clearly mark each container Watts Premier will test the water and call or mail you the results To change the membrane use a 5 8 wrench to remove the Green Tube on the left side of the me...

Страница 16: ...of Housing Note Step 10 Follow the Start Up Instructions Check air pressure when tank is empty Check Air Pressure in the Tank Using a digital air gauge check the air pressure in the tank You should a...

Страница 17: ...c o l r e p o r p r o f m a r g a i d e e S e b u t n i a r d n i n o i t c i r t s e R m o r f s i r b e d y b d e s u a c s e m i t e m o s e g a k c o l b r a e l C r e h s a w h s i d r o l a s o...

Страница 18: ...10005 MEM TFM 25 GPD DRY 5 a 113004 LID BLACK 1 4 FPT UNASSEMBLED 5 b 113007 LID WHITE 1 4 FPT UNASSEMBLED 6 a 113017 HOUSING FILTER 10 BLUE 6 b 113024 HOUSING FILTER 10 WHITE 7 113032 VESSEL MEM HOUS...

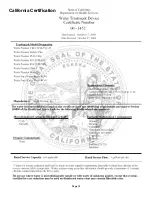
Страница 19: ...Page 19 California Certification...

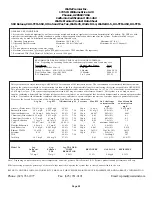
Страница 20: ...0 1 Copper Reduction 3 1 mg L 0 03 mg L 99 0 7 64 50psi 0 04 3 0 10 1 3 Cysts 222 077 ml 10 ml 99 99 58 minimum 50 000 mL Fluoride Reduction 8 0 mg L 0 5 mg L 93 9 7 49 50psi 0 7 8 0 10 1 5 Lead Reduc...

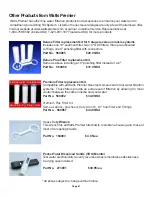
Страница 21: ...e including a 10 polishing filter instead of a 6 Part No 560066 31 95 Kit Premium Filter replacement kit Compatible with all Watts Premier Reverse Osmosis and other water filtration systems These filt...

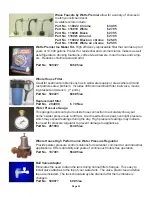
Страница 22: ...ontinuous trouble free operation Part No 107001 64 95 ea Water Pressure Gauge This gauge mounts onto your outside hose connection to accurately show your home s water pressure up to 300 psi A red need...

Страница 23: ...t No 107091 CHROME 44 95 Part No 107075 14 95 pk Part No 107092 GOLD 48 95 Shower Falls Deluxe Shower Handle with Built in Filter Curved Ergonomic Shower Handle Filter Handle Extension Replacement fil...

Страница 24: ...Page 24...
Страница 25: ...ter your information XX XXXXXX Watts Premier Inc is concerned for the saftey of your personal information Watts Premeir collects personal information when you register with Watts Premier This informat...

Страница 26: ...State _______________________________________ Zip Code ___________________ Country USA CANADA MEXICO OTHER ____________ Phone ______ __________ __________ Email Address ______________________ Date of...

Страница 27: ..._ _ _ _ _ _ _ _ _ _ _ _ _ _ _ _ _ _ _ _ _ _ _ _ _ _ _ _ _ _ _ _ _ _ _ _ _ _ _ _ _ _ _ _ _ _ _ _ _ _ _ _ _ _ _ _ _ _ _ _ _ _ _ _ _ _ _ _ _ _ _ _ _ _ _ _ _ _ _ _ _ _ _ _ _ _ _ _ _ _ _ _ _ _ _ _ _ _ _ _...

Страница 28: ...inch 6 Incoming water to the RO cannot exceed 105 degrees F 40 degrees C 7 Incoming TDS Total Dissolved Solids not to exceed 1800 ppm 8 Do not use with water that is micro biologically unsafe or of un...

Отзывы: