


Page 48 of 102
Page 49 of 102
Doc: DRX Installation
Version: 7.1 January 2021
Doc: DRX Installation
Version: 7.1 January 2021
DRX INSTALLATION MANUAL
DRX INSTALLATION MANUAL
Figure 25. PPS Status
With PPS operating correctly status indicator will remain on green.
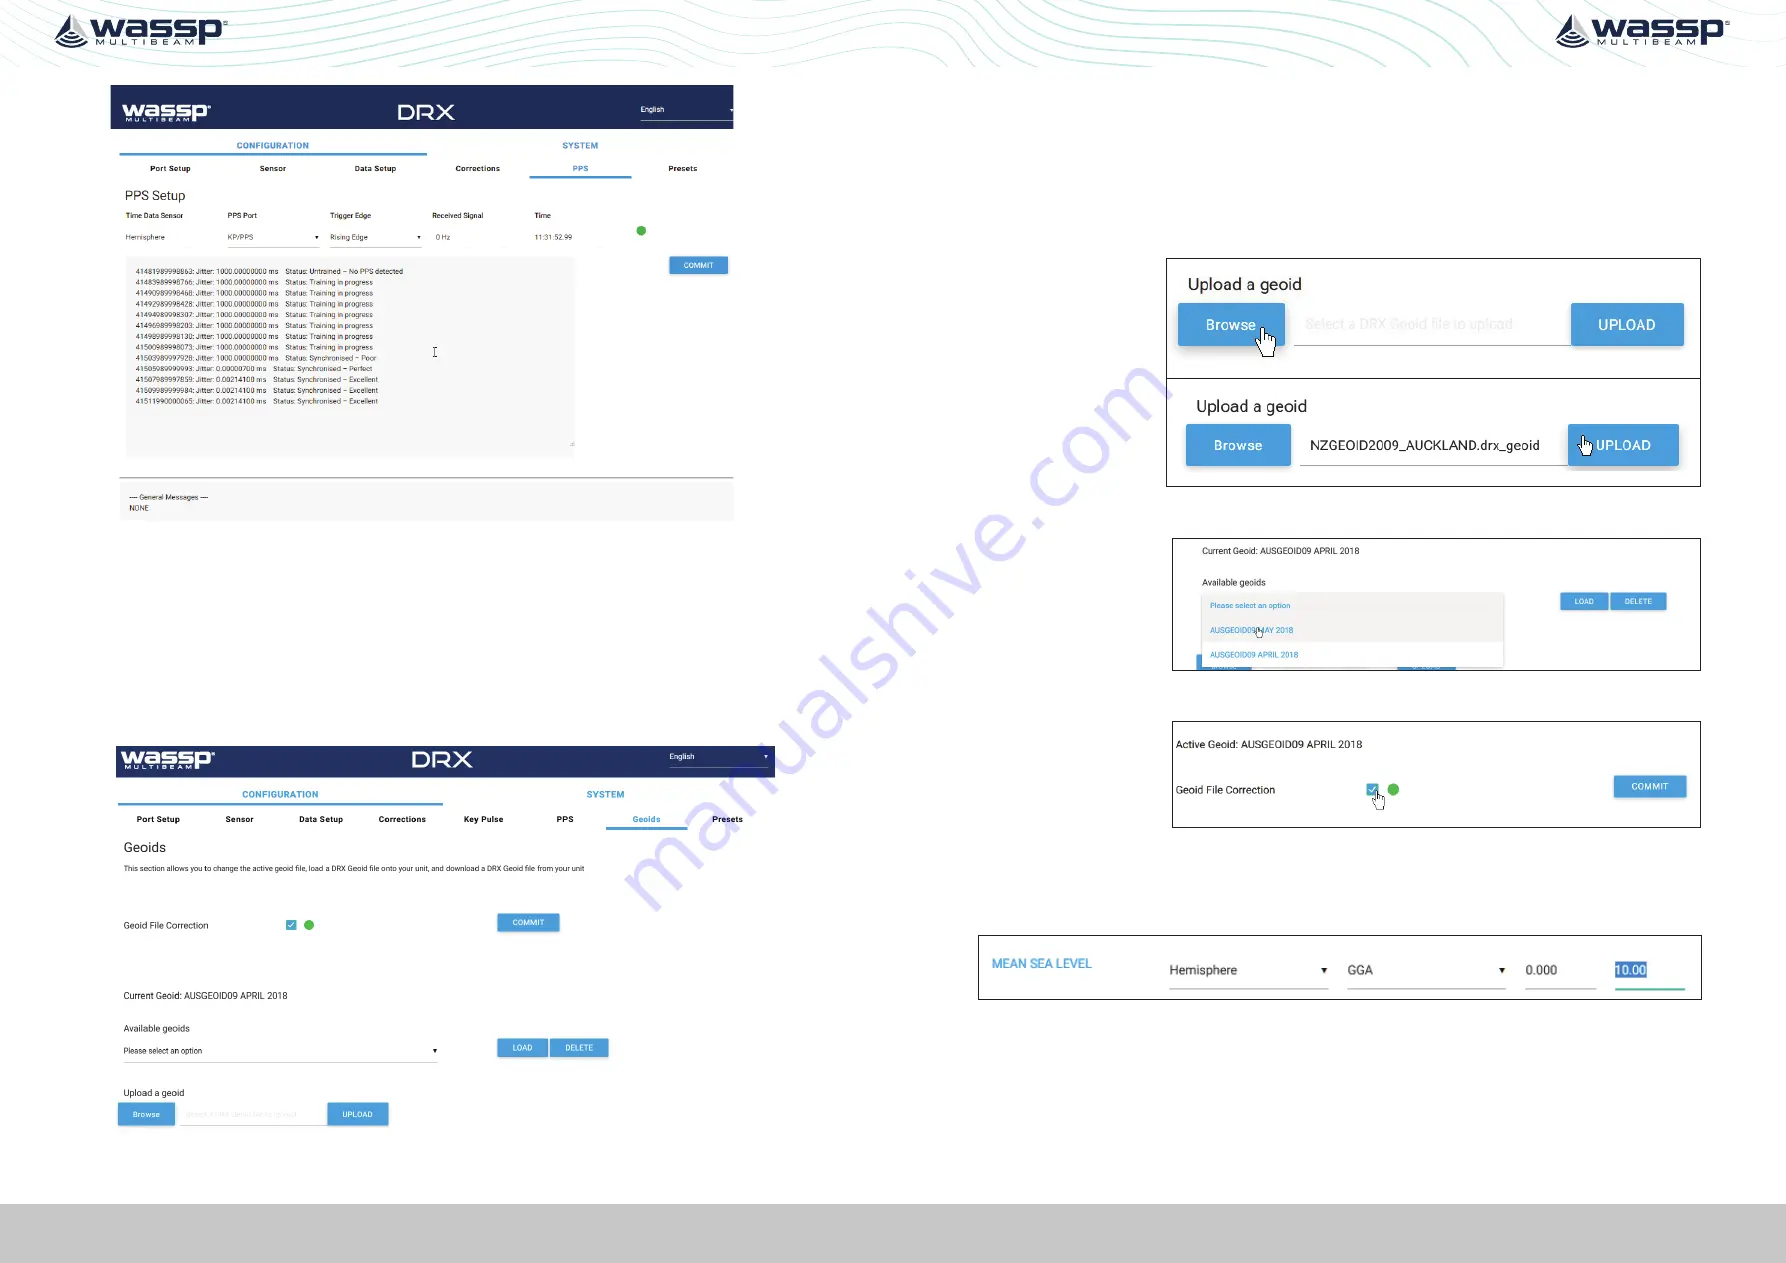
5.2.8. Geoids Tab
To use GPS height for calculating sea level in the DRX the GPS should be configured to
supply an accurate height fix using Differential or RTK. GGA field 6, GPS Quality Indicator
needs to be at 2 or above.
Sea level height can be configured to be relative to the internal GPS Geoid or relative to
the Geoid file loaded into the DRX.
5.2.8.1. Configuring Height Relative to the DRX Geoid File
The DRX Geoid file for the appropriate region needs to be uploaded to the DRX. DRX
Geoid files are available on request from WASSP Support through the WASSP Support
Portal,
see “Appendix I - Product Registration, Support and Resources” on page 101.
If the required Geoid file is not available a request can be made through the WASSP
Support Portal.
To upload a DRX Geoid file:
1.
BROWSE
and select an
appropriate DRX
Geoid File.
2.
Select
UPLOAD
to upload the
DRX Geiod File
to the DRX.
3.
Uploaded Geoid files will be available in the
AVAILABLE GEOIDS
section.
4.
Select the
applicable
Geoid file
and select
LOAD
. This will
become the
current Geoid
used by DRX.
5.
Select
GEOID FILE
CORRECTION
and hit
COMMIT
.
The
CURRENT GEOID
will now be used for compensating for sea level change or tidal
height when correcting the Bathymetry level.
If required an offset can be applied to the Geoid file. This can be applied under the
DATA
SETUP
tab in the
DRX SETUP WEBPAGES
.
See “Appendix D - Ship’s Measurement Points” on page 94
, section Sea Level Height
using DRX Geoid File for details on the calculated sea height using DRX Geoid File.


