44
a) Switching on the Multimeter
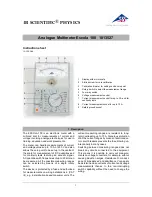
The multimeter can be turned on and off using the rotary control. Turn the rotary control (4) to the corresponding mea-
surement function. To switch off, turn the rotary control to “OFF”. Always turn the meter off when it is not in use.
Before working with the meter, you have to insert the enclosed battery. Insertion and changing of the
battery is described in the “Cleaning and Maintenance” chapter.
b) Voltage Measuring “V”
Proceed as follows to measure direct voltages “DC“ (V
):
-
Switch on the DMM and select measuring range “V”.
For lower voltages up to 400 mV, select “mV”.
-
Plug the red measuring line into the V measuring jack (7) and the
black measuring line into the COM measuring jack (8).
-
Now connect the two measuring prods to the object to be mea-
sured (battery, circuit, etc.). The red measuring prod indicates the
positive pole, the black measuring prod the negative pole.
-
The polarity of the respective measured value is indicated on the
display together with the current measured value.
If a minus “-” appears in front of the measured value for direct
voltage, the measured voltage is negative (or the measuring
prods are swapped). The voltage range “V DC/AC” shows an
input impedance of >10 MOhm.
-
After measuring, remove the measuring lines from the measured
object and turn off the DMM.
Proceed as follows to measure alternating voltages “AC” (V
):
-
Switch on the DMM and select measuring range “V”. Press the “SHIFT/SETUP” (3) button to switch to the AC
measuring range. “AC” and “TrueRMS” appears on the display.
-
Plug the red measuring line into the V measuring jack (7) and the black measuring line into the COM measuring
jack (8).
-
Now connect the two measuring prods to the object to be measured (generator, circuit, etc.).
-
The measured value is indicated on the display
-
After measuring, remove the measuring lines from the measured object and turn the DMM off.


