16
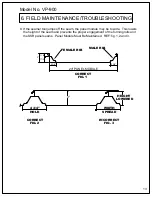
Check the seam width often with the provided seam gage. If the seam gage will not fit on the
seam, stop immediately and adjust the seamer tool. Under normal circumstances, the seamer tool
should require only adjustment of Station #3. If the seam is significantly wider than the seam gage
or the seam is not properly formed, all stations may require attention. Both adjustments will be
described below.
Model No. VP-900
9. SEAMER ADJUSTMENT
CHECKING THE SEAM WIDTH
STATION #3 ONLY ADJUSTMENT
ALL STATION ADJUSTMENT
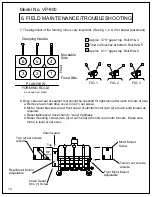
Set the feeler gage up for a gap setting of 0.075".
Place the feeler gage between rollers #1 and #4. These are the first two rollers from the front
of the machine.
Clamp the handle down. The gage should be snug between the two rollers. If it is not follow
the procedure previously listed to adjust the gap.
Repeat using the same 0.075" gap for station two. This is the station with the fiber roller.
Finally adjust the feeler gage to 0.110" and perform the same operation with the third station.
This should place the machine back into the proper setup for seaming.
Run a small length of test seam and check with the seam gage. If the seam is wide, adjust
only station #3. This is the station at the rear of the machine.
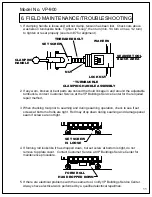
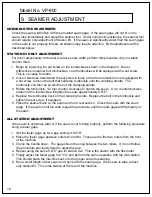
Begin by loosening the set screw on the turnbuckle as shown in the diagram. Due to
differences in seamer tool turnbuckles, no all turnbuckles will be equipped with a set screw.
This is no cause for alarm.
Once it has been determined the set screw is loose or that the turnbuckle is not equipped with
a set screw, remove the bolt that holds the turnbuckle onto the clamping handle. The
turnbuckle can then be pivoted free of the clamping handle.
Rotate the turnbuckle, 1/2 turn counter clockwise to tighten the seam. A 1/2 counterclockwise
rotation of the turnbuckle will tighten the seam approximately 0.015".
Replace the turnbuckle back on the clamping handle. Replace the bolt in the turnbuckle and
tighten the set screw, if equipped.
Place the seamer back on the seam and run a test section. Check the seam with the seam
gage. If the seam is still too wide repeat the procedure until the seam gage will fit properly on
the seam.
For minor adjustments to the tool to reduce seam width, perform this procedure only on station
number three.
If the seam is extremely wide or if the seam is not forming properly, perform the following procedure
using a feeler gage.
1.
2.
3.
4.
5.
1.
3.
4.
2.
5.
6.
Содержание SSR 900
Страница 2: ......
Страница 20: ...Model No VPHC 17 17 1 VP SSR HAND CRIMPING TOOL...

