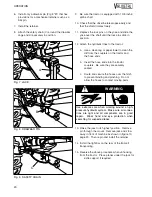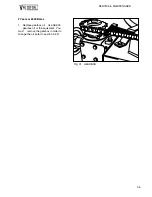
6. Install only a drawbar pin (Fig 8 "B") that has
provisions for a mechanical retainer such as a
Klik pin.
7. Install the retainer.
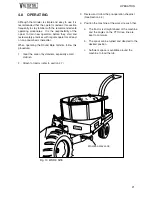
8. Attach the safety chain (C) around the drawbar
cage and clip securely in position.
9. Be sure the tractor is equipped with 1 3/8 inch 6
spline shaft.
10. Check that the driveline telescopes easily and
that the shield rotates freely.
11. Depress the lock pins on the yoke and slide the
yoke over the shaft until the lock pins click in
position.
12. Attach the hydraulic lines to the tractor:
a. Use a clean rag or paper towel to clean the
dirt from the couplers on the tractor and
the hose ends.
b. Insert the hose ends into the tractor
couplers. Be sure they are securely
seated.
c. Route and secure the hoses over the hitch
to prevent binding and pinching. Do not
allow the hoses to contact moving parts.
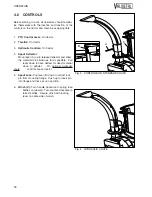
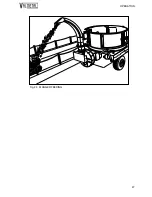
13. Raise the jack to its highest position. Remove
pin through the mount. Remove jack and stow
away in front of machine as shown in figure 10,
page 20. Then repin and install the retainer.
14. Install the light bar on the rear of the frame if
transporting.
15. Reverse the above procedure when unhooking
from the tractor. Place planks under the jack for
extra support if required.
OPERATION
20
A
Fig. 7 JACK
Fig. 8 DRAWBAR PIN
B
Fig. 9 SAFETY CHAIN
C
WARNING
Use extreme care when working around a high-
pressure hydraulic system. Make sure all connec-
tions are tight and all components are in good
repair. Wear hand and eye protection when
searching for suspected leaks.
Содержание H Series
Страница 1: ...ROUND BALE GRINDER MODEL H OPERATOR S MANUAL AND PARTS BOOK INC FARM EQUIPMENT MANUFACTURER...
Страница 6: ...2...
Страница 31: ...Fig 23 MANGER FEEDING OPERATION 27...
Страница 34: ...OPERATION 30...
Страница 46: ...SERVICE MAINTENANCE 42...
Страница 52: ...7 4 HYDRAULIC CIRCUIT SPECIFICATIONS 48 GRATE CYLINDERS TO TRACTOR...
Страница 53: ......
Страница 66: ...H C R PPE PPER CH 16 8 7 10 9 11 4 15 14 1 13 12 2 6 5 3 17 CUVE TUB D 9 10 17 18 19...
Страница 69: ...1 5 9 2 3 4 6 8 17 CHUTE MANUELLE MANUAL CHUTE E 7 7 6 2...
Страница 75: ...1 3 5 2 4 17 CHUTE MANUELLE D FLECTEUR MANUAL CHUTE DEFLECTOR H 6 6 4 2 8 10 12 9 7 9 11...
Страница 78: ......
Страница 79: ......
Страница 80: ......
Страница 81: ......
Страница 82: ......
Страница 83: ......
Страница 84: ......
Страница 85: ......


