20
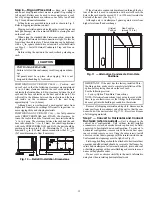
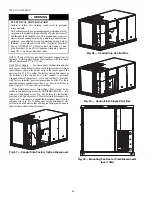
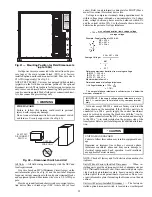
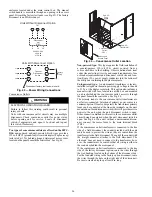
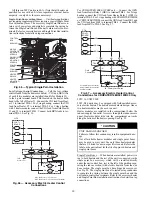
Fig. 26 — Disconnect Switch and Unit
Units with Factory-Installed Non-Fused Disconnect — The
factory-installed option non-fused disconnect (NFD) switch is
located in a weatherproof enclosure located under the main
control box. The manual switch handle and shaft are shipped in
the disconnect enclosure. Assemble the shaft and handle to the
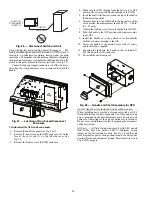
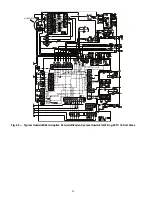
switch at this point. Discard the factory test leads (see Fig. 29).
Connect field power supply conductors to LINE side termi-
nals when the switch enclosure cover is removed to attach the
handle.
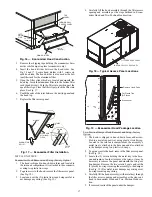
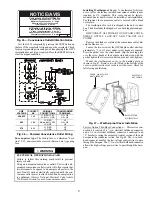
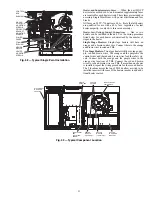
Fig. 27 — Location of Non-Fused Disconnect
Enclosure
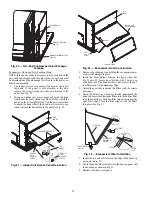
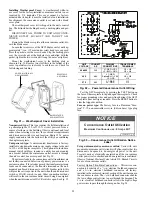
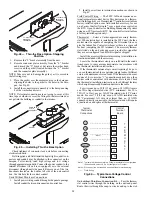
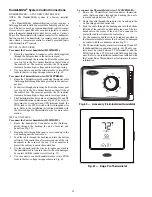
To field install the NFD shaft and handle:
1. Remove the unit front panel (see Fig. 2 or 3).
2. Remove (3) hex screws on the NFD enclosure - (2) on the
face of the cover and (1) on the left side cover. See
Fig. 28.
3. Remove the front cover of the NFD enclosure.
4. Make sure the NFD shipped from the factory is at OFF
position (the arrow on the black handle knob is at OFF).
5. Insert the shaft with the cross pin on the top of the shaft in
the horizontal position.
6. Measure from the tip of the shaft to the top surface of the
black pointer; the measurement should be 3.75 - 3.88 in.
(95 - 99 mm).
7. Tighten the locking screw to secure the shaft to the NFD.
8. Turn the handle to the OFF position with red arrow point-
ing at OFF.
9. Install the handle on to the painted cover horizontally
with the red arrow pointing to the left.
10. Secure the handle to the painted cover with (2) screws
and lock washers supplied.
11. Engaging the shaft into the handle socket, re-install (3)
hex screws on the NFD enclosure.
12. Re-install the unit front panel.
Fig. 28 — Handle and Shaft Assembly for NFD
Units Without Factory-Installed Non-Fused Disconnect —
When installing units, provide a disconnect switch per NEC
(National Electrical Code) of adequate size. Disconnect sizing
data is provided on the unit informative plate. Locate on unit
cabinet or within sight of the unit per national or local codes.
Do not cover unit informative plate if mounting the disconnect
on the unit cabinet.
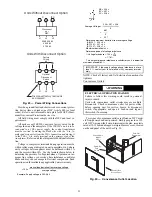
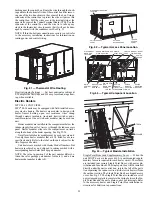
All Units — All field wiring must comply with NEC and all
local codes. Size wire based on MCA (Minimum Circuit
Amps) on the unit informative plate. See Fig. 29 and the unit
label diagram for power wiring connections to the unit power
terminal blocks and equipment ground. Maximum wire size is
#4 ga AWG per pole.
COPPER
WIRE ONLY
ELECTRIC
DI
S
CONNECT
S
WITCH
ALUMINUM
WIRE
Содержание Carrier WeatherMaker 50TC A08 Series
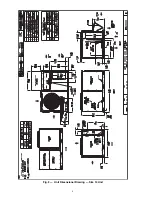
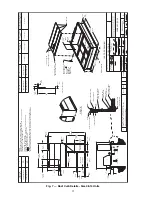
Страница 4: ...4 Fig 2 Unit Dimensional Drawing Size 08 09 12 Units...
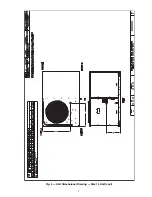
Страница 5: ...5 Fig 2 Unit Dimensional Drawing Size 08 09 12 Units cont...
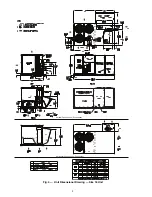
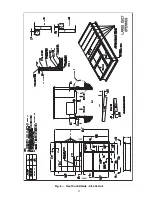
Страница 6: ...6 Fig 3 Unit Dimensional Drawing Size 14 Unit...
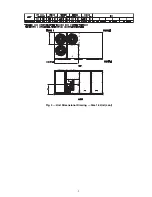
Страница 7: ...7 Fig 3 Unit Dimensional Drawing Size 14 Unit cont...
Страница 9: ...9 Fig 4 Unit Dimensional Drawing Size 16 Unit cont...
Страница 13: ...13 Fig 8 Roof Curb Details Size 16 Unit...
Страница 33: ...33 Fig 62 Typical Humidi MiZer Adaptive Dehumidification System Humidistat Wiring 50TC 08 14 Unit Sizes...
Страница 34: ...34 Fig 63 Typical Humidi MiZer Adaptive Dehumidification System Humidistat Wiring 50TC 16 Unit Sizes HUMIDISTAT...
Страница 50: ...50 Fig 73 50TC 16 Control Box Component PremierLink Locations...
Страница 51: ...51 Fig 74 Typical PremierLink Control Wiring Diagram...
Страница 52: ...52 Fig 75 Typical PremierLink Control Wiring Diagram with Humidi MiZer System Option...
Страница 64: ...64 Fig 106 Typical RTU Open Controller Wiring Diagram 50TC 08 14 Size Units...
Страница 65: ...65 Fig 107 Typical RTU Open Controller Wiring Diagram 50TC 16 Size Unit...
Страница 66: ...66 Fig 108 Typical RTU Open Controller Wiring Diagram with Humidi MiZer System Option 50TC 08 14 Size Units...
Страница 67: ...67 Fig 109 Typical RTU Open Controller Wiring Diagram with Humidi MiZer System Option 50TC 16 Size Units...

