


6.4.2.2
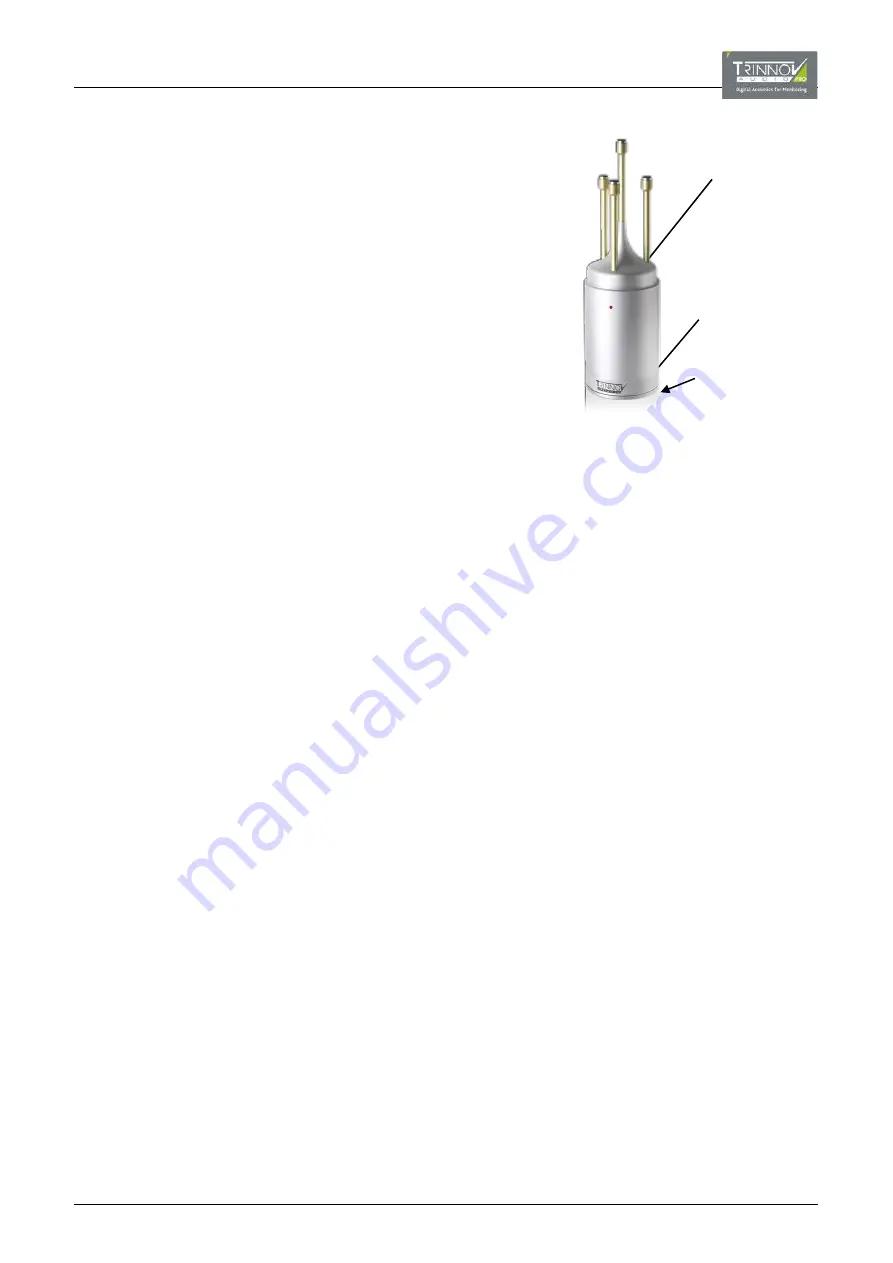
THE TRINNOV 3D-MICROPHONE
The Trinnov 3D-Microphone has been designed specifically for Optimizer room
correction. It is equipped with measurement transducers and is not designed for
any other application (such as sound recording).
The design has been conceived alongside the Optimizer algorithms to sample the
characteristics of the monitoring loudspeakers and their layout in the control room.
For each loudspeaker, the Optimizer gathers the following information:
•
Full 3D position
•
Amplitude response
•
Phase response
Checking the Power Supply
The Trinnov 3D-Microphone is equipped with an internal battery that any user can
change. The 9V PP3 LR61 battery is located within the body of the microphone and
is accessible from the bottom of the unit.
To check and replace the battery:
Power on the microphone, using the button on the bottom of the unit, and check the status of the On/Off LED. If the LED
does not illuminate, then you will need to change the battery.
Using an appropriate driver, remove the screw on the bottom of the unit, and slowly pull down the lower section of the
housing to reveal the battery block.
Unplug the battery from its connector and replace with a brand new 9V PP3 LR61.
Power on and check the status of the On/Off LED.
Carefully replace the housing by sliding it back onto the battery block, and tighten the screw to fix in place.
Checking the 3D-Microphone Compensation File
All Trinnov 3D-Microphones are verified and calibrated before leaving the factory. At this stage, a specific compensation file (for
the microphone) is created. This allows any 3D-Microphone to be used with any Trinnov processor which supports the Optimizer
as, by installing the correct compensation file, the overall measurement path can be flattened.
To check that your processor is using the correct microphone compensation file:
Take note of the serial number of the 3D-Microphone (printed along the bottom of the microphone body). The serial
number is usually written as “V9 N 268”, where 9 is the lot number and 268 is the serial number.
From the OPCP GUI, select “Optimizer Settings -> Calibration”, and click on the
Configure
button beside the
measurement name – from here you can select any pre-installed microphone compensation file (see below).
Then select
Default Microphone
to select the file applied to every new preset created from the “built-in” preset.
In both cases, the compensation filename must match the 3D-Microphone serial number you are using. If not, then any
Calibration made will provide absolutely the wrong room correction!
If the file for your 3D-Microphone is not available, then you must either upload or install a new file (as described below).
Alternatively, you can select the filename “Vx-mean” where x = the lot number.
Only an appointed Trinnov reseller or the Trinnov Support Department can upload or provide a new compensation file:
If possible, connect your processor to the internet and contact the Trinnov Support Department with the serial number
of both the 3D-Microphone (printed on the microphone body) and D-Mon processor (displayed in the OPCP GUI “About”
page). The support team will then upload the required file at the earliest opportunity.
If an internet connection to the processor is not possible, then a USB Key can be provided. Plug the Key into one of the
processor’s USB ports – the Key File Manager automatically opens. Select the
Load microphone files from USB Key
option and follow the on-screen instructions.
The refresh the microphone compensation file list, the unit needs to be rebooted.
Once the upload/install is complete, the compensation file can be selected as described above.
On/Off LED
On/Off Button
(on underside)
Mic number
(printed beside logo)


