38
Chapter 4
Configure the Router as a Standard Wireless Router
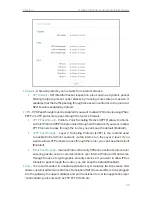
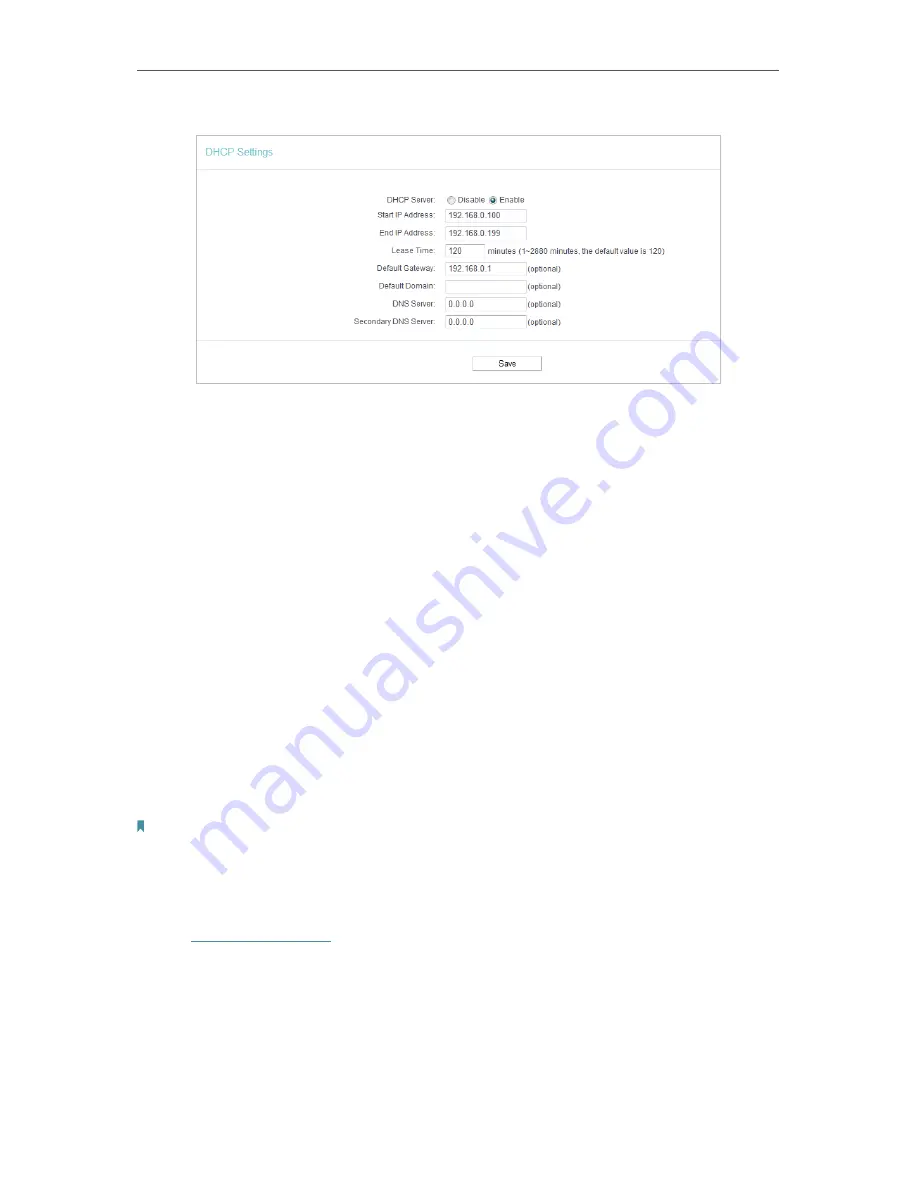
3. Specify DHCP server settings and click
Save
.
•
DHCP Server
- Enable or disable the DHCP server. If disabled, you must have another
DHCP server within your network or else you must configure the computer manually.
•
Start IP Address
- Specify an IP address for the DHCP Server to start with when
assigning IP addresses. 192.168.0.100 is the default start address.
•
End IP Address
- Specify an IP address for the DHCP Server to end with when assigning
IP addresses. 192.168.0.199 is the default end address.
•
Address Lease Time
- The Address Lease Time is the amount of time a network user
will be allowed to connect to the router with the current dynamic IP Address. When
time is up, the user will be automatically assigned a new dynamic IP address. The
range of the time is 1 ~ 2880 minutes. The default value is 120.
•
Default Gateway (Optional)
- It is suggested to input the IP address of the LAN port of
the router. The default value is 192.168.0.1.
•
Default Domain (Optional)
- Input the domain name of your network.
•
DNS Server (Optional)
- Input the DNS IP address provided by your ISP.
•
Secondary DNS Server (Optional)
- Input the IP address of another DNS server if your
ISP provides two DNS servers.
Note:
To use the DHCP server function of the router, you must configure all computers on the LAN as
Obtain an IP Address automatically
.
4. 6. 2. DHCP Clients List
1. Visit
http://tplinkwifi.net
, and log in with the username and password you set for the
router.
2. Go to
DHCP
>
DHCP Clients List
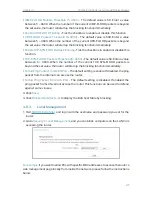
to view the information of the clients connected to
the router.

