– 10 –
Air to Air Heat Exchanger with DX Coil Unit
Installation Manual
EN
Air to Air Heat Exchanger with DX Coil Unit
Installation Manual
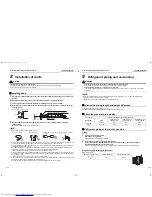
Flaring dia. meter size: A (Unit: mm)
• The pressure of gas in the unit is the same as the atmospheric pressure. Therefore, no air leaking sound comes
out when the flare nut is loosened. This is not anything unusual.
• Use 2 wrenches to perform piping of indoor units.
• Refer to the table below for tightening torque.
•
Tightening torque of flare pipe connections
Pressure of R410A is higher than that of R22.
(Approx. 1.6 times) Therefore, using a torque wrench, tighten the flare pipe connecting sections which connect
the indoor and outdoor units of the specified tightening torque.
Incorrect connections may cause not only a gas leak, but also a trouble of the refrigeration cycle.
REQUIREMENT
Tightening with an excessive torque may crack the nut depending on installation conditions.
Tighten the nut within the specified tightening torque.
Leak check test and vacuuming
Refer to the Installation Manual of the outdoor unit for leak check test, vacuuming, adding a refrigerant, or checking
gas leakage.
REQUIREMENT
Do not turn on the indoor unit before leak check test and vacuuming are finished; otherwise, the electric expansion valve
is closed fully and vacuuming from the liquid or gas side is not performed properly. If the indoor unit should be turned
on, perform vacuuming from both the liquid side and the gas side.
Opening the valve fully
Open the valves of the designated outdoor unit fully.
Outer dia. of copper
pipe
A
+0
–0.4
* In case of flaring for R410A with the
conventional flare tool, pull it out approx.
0.5 mm more than that for R22 to adjust to
the specified flare size.
The copper pipe gauge is useful for
adjusting projection margin size.
R410A
6.4
9.1
9.5
13.2
12.7
16.6
Outer diameter of
connecting pipe (mm)
Tightening torque
(N•m)
Ø6.4
14 to 18 (1.4 to 1.8 kgf•m)
Ø9.5
33 to 42 (3.3 to 4.2 kgf•m)
Ø12.7
50 to 62 (5.0 to 6.2 kgf•m)
A
Using 2 wrenches
Heat insulation
Apply heat insulation for the pipes separately at liquid side and gas side.
• For the heat insulation to the pipes at gas side, be sure to use the material with heat-resisting temperature120
°C or higher.
• Using the attached heat insulation material, apply the thermal insulation to the pipe connecting section of the
indoor unit securely without gap.
REQUIREMENT
• Apply the heat insulation to the pipe connecting section of the indoor unit securely up to the root without exposure of
the pipe. (The pipe exposed to the outside causes water leak.)
• Wrap heat insulator with its slits facing up (ceiling side).
Indoor unit
Heat insulation
pipe
(Accessory)
Heat insulator
of the pipe
Wrap the pipe with the attached heat insulator
without any gap between the indoor unit.
Union
Flare nut
The seam must be faced upward
(ceiling side).
Banding band
(Accessory)
19-EN
20-EN
+00ET99805001-2.book Page 10 Tuesday, July 26, 2011 1:39 PM


