225
7
6
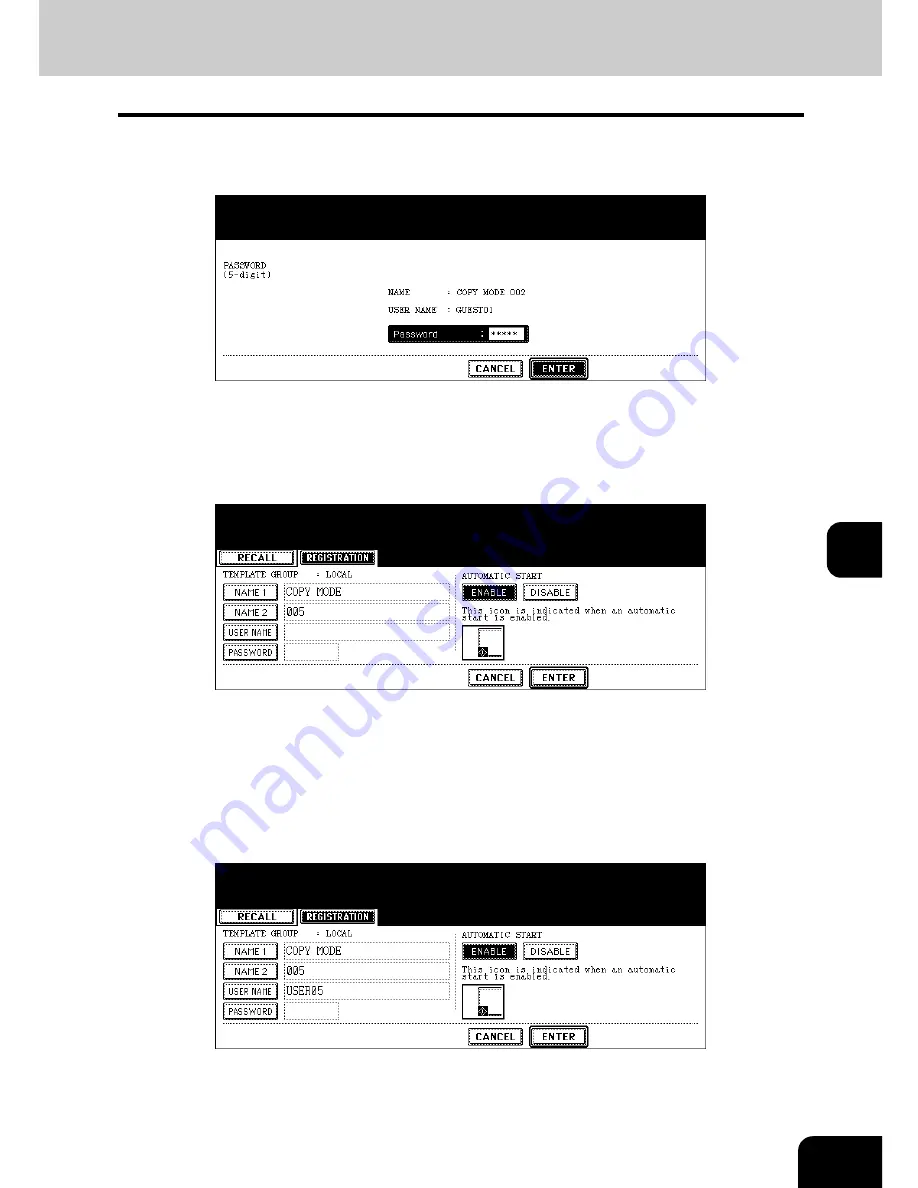
Key in the password (5 digits) for the selected template, and then
press the [ENTER] button.
• If no password was set when the template was registered, skip to step 7.
7
Press the [NAME1] button and the [NAME2] button, and then enter the
new name of the template.
• When the [NAME 1] or [NAME 2] button is pressed, the letter entry menu (
P.35) is displayed. Up to 11 char-
acters can be entered.
• The following symbols cannot be used for [NAME 1] and [NAME 2].
["], [=], [|], [*], [<], [>], [?], [+], [[], []], [;], [:], [/], [\], [,], [.]
8
Press the [USER NAME] button, and then enter the new user name of
the template.
• When the [USER NAME] button is pressed, the letter entry menu (
P.35) is displayed. Up to 30 characters
can be entered.
Содержание E-STUDIO 232
Страница 1: ...MULTIFUNCTIONAL DIGITAL SYSTEMS Operator s Manual for Basic Function ...
Страница 2: ......
Страница 6: ...4 CONTENTS Cont ...
Страница 10: ...8 Toshiba Quality is Second to None Cont For e STUDIO233 283 ...
Страница 24: ...22 Environmental Information Cont ...
Страница 92: ...90 2 HOW TO MAKE COPIES 4 Proof Copy Cont 2 ...
Страница 107: ...105 3 Names of each Inner Finisher optional 1 Trays 2 Paper stopper MJ 5004 MJ 5005 1 2 1 ...
Страница 109: ...107 3 4 Press the SORT or GROUP button Set other copy modes as required 5 Press the START button ...
Страница 130: ...128 3 SETTING OF BASIC COPY MODES 6 Copy Density Adjustment Cont 3 ...
Страница 131: ...129 4 4 IMAGE ADJUSTMENT 1 Background Adjustment 130 2 Sharpness 131 ...
Страница 134: ...132 4 IMAGE ADJUSTMENT 2 Sharpness Cont 4 ...
Страница 139: ...137 5 6 Press the ENTER button Select other copy modes as required 7 Press the START button ...
Страница 141: ...139 5 4 Press the ENTER button Set Book type original 2 sided copy P 121 in duplex copying as well ...
Страница 175: ...173 5 5 Press the ENTER button Select other copy modes as required 6 Press the START button ...
Страница 180: ...178 5 USING THE EDITING FUNCTIONS 16 ADF SADF Cont 5 ...
Страница 188: ...186 6 e FILING 3 Changing Data of User Boxes Cont 6 7 Press the ENTER button The box settings are updated ...
Страница 206: ...204 6 e FILING 8 Appendix Cont 6 ...
Страница 276: ...274 8 JOB STATUS 6 Error Code Cont 8 ...
Страница 285: ...283 9 13Close the front cover ...
Страница 304: ...302 9 BLINKING GRAPHIC SYMBOLS 5 Call Service Symbol Cont 9 ...
Страница 328: ...326 10 WHEN THIS MESSAGE APPEARS 8 Reboot the machine Cont 10 ...
Страница 329: ...327 11 11 MAINTENANCE 1 Daily Inspection 328 2 Simple Troubleshooting 330 ...
Страница 336: ...334 11 MAINTENANCE 2 Simple Troubleshooting Cont 11 ...
Страница 352: ...350 INDEX Cont W Warning 12 Windows Domain Authentication 38 39 X XY ZOOM 156 Z Zoom buttons 101 ...
Страница 353: ...DP 2340 2840 OME050120E0 ...


