Steering
and Brakes
Reelmaster 5500-D
Steering and Brakes
Page 7 - 11
Axle Pivot Bushings
The rear axle must be held in place snugly by the axle
pin. Excessive movement of the axle, which is charac-
terized by erratic steering, usually indicates worn bush-
ings. To correct the problem, replace the bushings.
1. Disconnect the hydraulic hoses from the steering
cylinder. Put caps or plugs on all the fittings and hoses
to prevent contamination.
Note:
To ease reassembly, tag each of the hoses to
show their correct position on the steering cylinder.
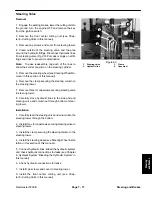
2. Remove the jamnut and thrust washer securing the
end of the axle pivot pin to the chassis (Fig. 14).
3. Jack up the frame (just ahead of the rear wheels) un-
til pressure is taken off the axle pivot pin. Support the
machine with jack stands to prevent it from falling.
4. Pull the axle pivot pin out. This will release the rear
axle and washer(s) from the frame. Carefully pull the en-
tire axle and wheel assembly out from under the ma-
chine.
Note:
Several washers may have been installed be-
tween the axle pivot tube and frame during manufac-
ture. Make sure the same number of washers are
installed during reassembly.
5. Use a drift punch and hammer to drive both bushings
out of the axle. Clean the inside of the axle pivot tube to
remove dirt and foreign material.
6. Apply grease to the inside and outside of the new
bushing. Use an arbor press to install the bushings into
the top and bottom of the axle pivot tube. Bushings must
be flush with the axle tube.
7. Wipe the rear axle pivot pin with a rag to remove dirt
and grease. Inspect the pin for wear or damage and re-
place as necessary.
8. Mount the axle to the frame with the axle pin. Install
washer(s) and axle pivot pin. Secure the axle pivot pin
in place with the thrust washer and jamnut.
9. Remove the jackstands and lower the machine to the
floor.
10.Lubricate the rear axle pivot bushings through the
grease fitting on the pivot pin.
11. Install the hydraulic hoses to the steering cylinder.
12.Check steering cylinder hydraulic connections for
leaks.
Steering Pivot Bushings
The steering pivot must fit snugly onto the mounting pin.
Excessive movement of the steering pivot may indicate
worn bushings or tie rod ball joints.
1. Remove the lock nut, cap screw, and thrust washer
securing the steering cylinder rod end to the steering
pivot plate (Fig. 14).
2. Remove four (4) jamnuts to disconnect both tie rod
ends from the pivot plate. Inspect all tie rod end ball
joints for wear or damage and replace as necessary.
3. Remove the retaining ring and thrust washer. Slide
the steering pivot plate off of the mounting pin on the bot-
tom of the axle.
4. Use a drift punch and hammer to drive both bushings
out of the steering pivot. Clean the inside of the steering
pivot to remove dirt and foreign material. Also clean the
mounting pin on the bottom of the rear axle.
5. Apply grease to the inside and outside of the new
bushings. Use an arbor press to install the bushings into
the top and bottom of the steering pivot tube. Bushings
must be flush with the end of the tube.
6. Slide the steering pivot onto the mounting pin. Se-
cure the plate in place with the thrust washer and retain-
ing ring.
7. Connect each tie rod end to the pivot plate with two
(2) jamnuts. For each tie rod, tighten the first nut to a
torque of 25 to33 ft-lbs. (34 to 45 Nm). Install the second
jamnut and tighten against the other nut to secure tie rod
end.
8. Install the thrust washer, cap screw, and locknut to
secure the steering cylinder rod end to the steering pivot
plate. Tighten the nut to 130 to 150 ft-lbs. (176 to
203 Nm).
9. Lubricate the bushings through the grease fitting on
the pivot plate.
Содержание 00075SL
Страница 2: ...Reelmaster 5500 D ...
Страница 4: ...Reelmaster 5500 D ...
Страница 6: ...Reelmaster 5500 D ...
Страница 12: ...0 09375 Rev D Reelmaster 5500 D Page 2 2 Product Records and Maintenance Equivalents and Conversions ...
Страница 49: ...Hydraulic System Reelmaster 5500 D Hydraulic System Rev C Page 4 11 This page is intentionally blank ...
Страница 64: ...Reelmaster 5500 D Hydraulic System Rev C Page 4 26 This page is intentionally blank ...
Страница 89: ...Hydraulic System Reelmaster 5500 D Hydraulic System Rev C Page 4 51 This page is intentionally blank ...
Страница 109: ...Hydraulic System Reelmaster 5500 D Hydraulic System Rev C Page 4 71 This page is intentionally blank ...
Страница 115: ...Hydraulic System Reelmaster 5500 D Hydraulic System Rev C Page 4 77 This page is intentionally blank ...
Страница 170: ...Reelmaster 5500 D Page 5 40 Electrical System Rev C ...
Страница 192: ...Reelmaster 5500 D Differential Axle Page 6 22 ...
Страница 254: ...Reelmaster 5500 D Groomer Rev C Page 8 1 14 ...
Страница 278: ...Reelmaster 5500 D Page 10 2 Electrical Diagrams Rev C ...
Страница 284: ...Rev C Page 10 8 Harness Drawing Reelmaster 5500 D Serial Number 210000401 to 210999999 ...
Страница 285: ...Rev C Page 10 9 Harness Diagram Reelmaster 5500 D Serial Number 210000401 to 210999999 ...
Страница 286: ...Rev C Page 10 10 Harness Drawing Reelmaster 5500 D Serial Number 220000001 to 220999999 ...
Страница 287: ...Rev C Page 10 11 Harness Diagram Reelmaster 5500 D Serial Number 220000001 to 220999999 ...
Страница 288: ...Rev C Page 10 12 Harness Drawing Reelmaster 5500 D Serial Number Above 230000000 ...
Страница 289: ...Rev C Page 10 13 Harness Diagram Reelmaster 5500 D Serial Number Above 230000000 ...
Страница 290: ...Reelmaster 5500 D ...

