Brewing and Programming Outline
14
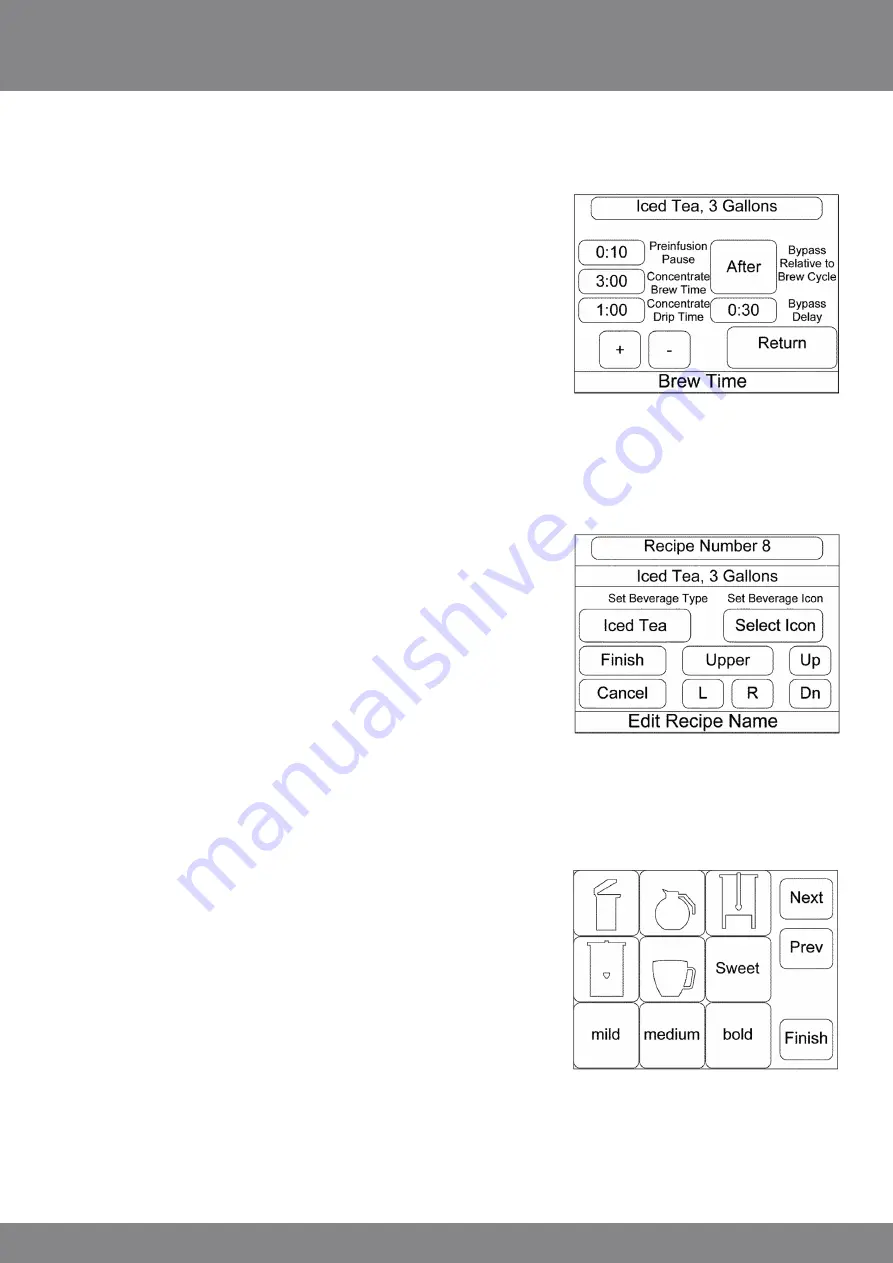
Press the “Brew Time” button to display the ‘brew time’ detail screen. Note the multiple times associated with
the brew cycle are all simultaneously displayed for convenience. Various math checks are done and
enable or disable other programming selections based on input. The pre-infusion pause is the time delay
between the completion of the delivery of the pre-infusion volume
and the continuation of the hot water delivery through the
sprayhead. The concentrate brew time is the total time allowed
for hot water to be delivered through the sprayhead. The time may
be increased above the calculated minimum time to create a pulse
brewing effect. When time is set above the minimum required, the
water delivery will cycle on and off throughout the programmed
time. The bypass delay is the time delay between completion of the
concentrate water delivery and the starting of any bypass water
delivery. The delay is only applicable if “After” is displayed as the
bypass type for bypass relative to the brew cycle. Before or during
are other types of bypass delivery. For a selection of during, the
bypass water will be delivered during any concentrate off time available during the concentrate delivery. Note:
A recipe made up of entirely cold water dilution (such as for making lemonade from concentrate) would cause
all values on this screen to be greyed out as none of the items would be applicable. Press return to return to the
‘recipe settings’ screen.
To edit a recipe name, press the recipe name bar near the top of
the ‘recipe settings’ screen. This will take you to the ‘edit recipe
name’ screen. This screen will allow the user to edit the recipe
name, set the beverage type, and select an icon to be displayed on
the ‘recipe selection’ screen. To edit the recipe name, select that
key/field if it is not already selected. The selected character will
begin to blink. Use the L and R button to move the cursor left or
right to the letter to be changed. The button above the L and R
determines whether an upper case, lower case, or symbol character
set will be used. See Appendix A at the end of the document for a
listing of the characters and the corresponding group and location
within the group. Use the up and down keys to scroll through the various choices available.
Use set beverage type key to select the type of beverage for the recipe. This will determine which category the re-
cipe will be put in on the beverage selection screen. This will ensure all coffee recipes are grouped together as are
all iced tea recipes, etc. Each press of the key will display the next choice. Stop when the correct type is displayed
for the recipe.
Next use the “Select Icon” key to access icons available to associate
with the recipe. The recipes are identified on a ‘recipe selection’
screen by the icon, along with the beverage volume, so that the
user knows which recipe they will be preparing. Icons available will
be displayed. Next and Prev Keys are provided to move between the
various screens to select an appropriate icon. Select an icon by
pressing it. The icon will be highlighted. Once satisfied with the
selection, pick finish to return to the ‘edit recipe name’ screen.
Select return to go back to the ‘recipe settings’ screen then press
return again to return to the ‘recipe select’ screen.
Press return again and the system will exit to the
‘programming/service’ screen.
Содержание TOUCH 02
Страница 1: ...02 T O U C H 0 2 ORIGINAL INSTRUCTIONS ...
Страница 3: ...Dimensions 03 ...
Страница 28: ...TOUCH 02 Wiring 28 WIRING DIAGRAM ...


