


DeviceLink Connect
Getting Started | 11
3. Using a web browser navigate to
http://dlc.local:9292
.
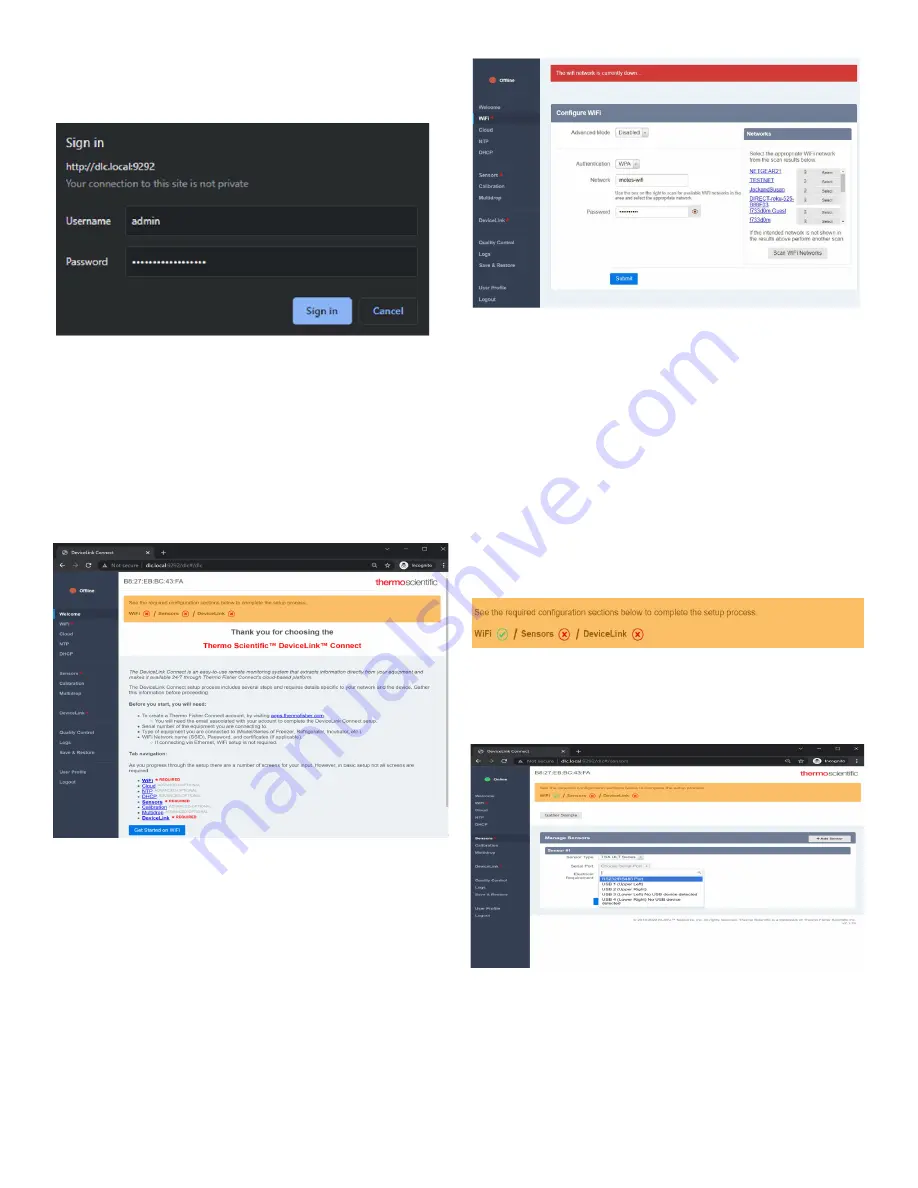
You will be prompted to enter credentials:
a. Username:
admin
b. Password:
changeThisPassword
Note:
After you login the first time, you will be prompted to
change the generic password. Enter your own password and
you will be prompted to re-login with that new password.
Record your password for future use.
Once logged in, you will see the DeviceLink Connect
commissioning welcome screen. You will note there are 3x
mandatory steps for basic setup:
Wi-Fi
,
Sensors
, and
DeviceLink Connect
.
Figure 8. DeviceLink Connect commissioning
welcome screen
Note:
If you have connected your device via LAN (ethernet
cable), the WiFi section will appear as “-” in the status bar at
the top of the commissioner screen. You can proceed directly
to the Sensors setup.
4. Navigate to the WiFi screen using the left navigation bar
or links on the welcome screen.
a. Click the “Scan WiFi. Networks” button to scan for
available networks.
Figure 9. Configuring Wi-Fi
Note:
If the intended network is not shown, us “Scan WiFi
Networks” to perform another scan.
b. Select your Authentication type.
c. Select your desired network from the network list.
Click on either the network name or the Select
button.
d. Enter you network password in the Password field.
e. Submit.
Once the network is established, you will see a
appear in
the commissioner status bar.
Note:
For Advanced network setup, See
5. Navigate to the
Sensors
screen using the left navigation
bar or
Sensors
link on the commissioner status bar.
Figure 10. Configuring Sensors
a. Click the “Add sensor” button to add a sensor.
b. From the “Sensor Type” drop down menu, select the
type of sensor or asset which you are connecting to.


