Thermo Fisher Scientific CryoExtra CE8100 Series
Operation | 25
3.
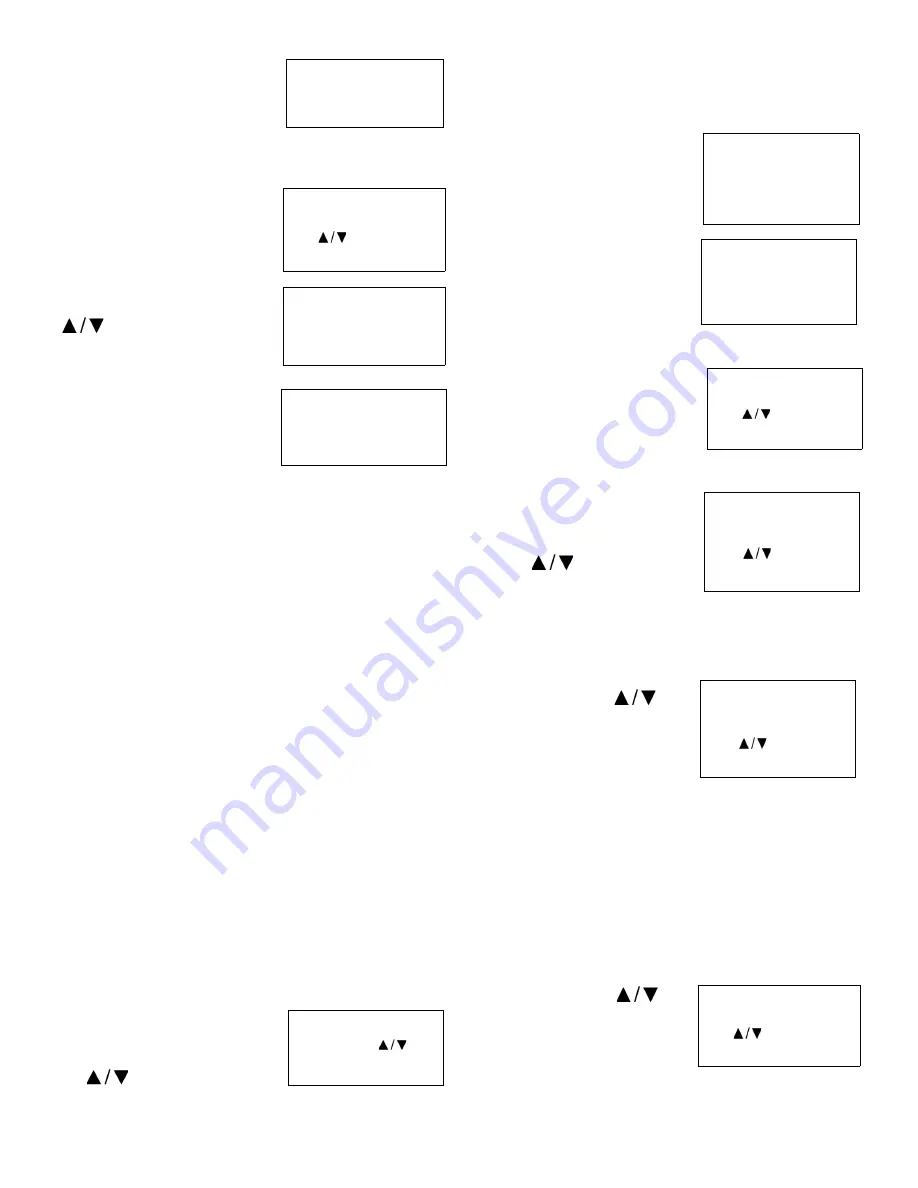
Press “ENTER”
The display will read “Temp A
Menu”.
Note:
To access Temp B Menu,
press “SETUP” instead of “ENTER”.
4.
Press “ENTER”
The display will read “Temp A
Enabled”.
5.
Press “SETUP”
The display will read “Initiate High
Temp A Alarm Test”. Use the
“
” keys to change NO to
YES and press “ENTER” to
initiate the alarm test.
If High Temp Alarm Test is
initiated, the display will read
“Testing” and show the temp
change throughout the test.
Note:
: If the temperature probe
is open or no probe is connected the Controller will not go into
the high temperature alarm test mode.
Temperature Alarm Settings
This section describes how to navigate and adjust the
temperature alarm settings. The high temperature alarm is
used to alert the user when the temperature in the freezer
space has risen above the set threshold. The low temperature
alarm can be used as a calibration error or redundant overfill
indicator.
To be used as a calibration error indicator, the low
temperature alarm would be set to a temperature slightly
colder than the LN
2
saturation temperature. Since the
temperature in the freezer storage space can never be colder
than LN
2
, if this alarm is triggered, it is an indication that the
sensor requires recalibration.
To be used as a redundant overfill or high level alarm, the low
temperature alarm would be set to a temperature slightly
warmer than the LN
2
saturation temperature and the sensor
placed higher than the desired liquid level in the freezer. If the
low temperature alarm is triggered, then it is an indication that
sensor is submerged in LN
2
and the liquid level is higher than
desired.
1.
Press “SETUP”
Controller will prompt for a
password. A flashing cursor on the
entry screen will make it clear
which digit is being changed. Use
the “
” keys to scroll to the
appropriate number. Press “ENTER” to advance the cursor to
the next position.
2.
Press “ENTER”
The display will read “Temperature
Menus”.
3.
Press “ENTER”
The display will read “Temp A
Menu”.
Note:
To access Temp B Menu,
press “SETUP” instead of
“ENTER”.
4.
Press “ENTER”
The display will read “Temp A
Enabled”.
5.
Press “SETUP”
Until the display reads “Temp A
High Alarm”.
Use the “
” keys to adjust
setting and press “ENTER” to
save the change.
6.
Press “SETUP”
The display will read “Temp A
Low Alarm”. Use the “
”
keys to adjust setting and press
“ENTER” to save the change.
Alarm masks added for Low and
High Temperature alarms for both
sensors A and B. This allows
these alarms to be enabled or disabled by the user. Note
these are called alarm masks because the alarms are not
actually disabled. They are simply no longer indicated via
audio / visual means. The text in the menu screens uses
enable and disable since that is the more conventionally
understood terminology. Feature is available with Firmware
Version 2.03.
7.
Press “SETUP”
The display will read “Temp A
High Alarm”. Use the “
”
keys to adjust setting and press
“ENTER” to save the change.
Press ENTER for
Temp A Menu or press
SETUP for next menu
Temp A ENABLED
Use to
adjust
Press ENTER to save
Initiate High Temp A
Alarm Test
NO TEMP A -196.2°C
Initiate High Temp A
Alarm Test TESTING
TEMP A -115.8°C
Higher User Level
Required use
to
ENTER Password 0000
Press ENTER for
Temperature Menus or
press SETUP for next
menu
Press ENTER for Temp
A Menu or press SETUP
for next menu
Temp A ENABLED
Use
to adjust
Press ENTER to save
Temp A High Alarm -
110.0
°
C
Use
to adjust
Press ENTER to save
Temp A Low Alarm -
200.0°C
Use
to adjust
Press ENTER to save
Temp A High Alarm
ENABLED
Use to
adjust
Press ENTER to save


